In summary:
- Your makeup looks ‘off’ not because of the color, but because of its saturation (chroma) clashing with your skin’s.
- Lighting is not neutral; the color temperature of your lights dramatically alters how your makeup appears to you and others.
- Product layering follows a strict rule: creams and liquids must be applied before powders to avoid a patchy, cakey finish.
- Effective color correction is about using a complementary color with the right intensity to neutralize discoloration without creating a new color problem.
You’ve followed every tutorial. You bought the viral lipstick that looked stunning on your favorite influencer. You even invested in a high-end foundation. Yet, when you look in the mirror, something is fundamentally wrong. The lipstick looks dull and grey, the foundation appears ashy, and the concealer has done little to hide your dark circles. This frustration is a universal experience for makeup users who want a polished, natural enhancement rather than a painted mask.
The common advice is to “find your undertone,” a valid but incomplete piece of the puzzle. The internet is filled with tips on warm, cool, and neutral palettes. But this surface-level guidance fails to address the more complex, technical principles that makeup artists use intuitively. It overlooks the physics of light, the chemistry of product formulas, and the subtle dimensions of color that go far beyond a simple wheel.
The real key to mastering makeup is to think like an artist. It’s not about following rigid rules, but about understanding the interplay of saturation, light, and texture. The reason a shade can look vibrant on one person and muddy on another is due to its chroma. The reason your bronzer looks perfect in the bathroom but streaky in the car is due to color temperature. This is the “why” behind the “how.”
This guide will deconstruct these advanced concepts. We will explore why color matching is about more than just undertone, how to use correctors with technical precision, the role of formula and lighting in your application, and the correct order of operations to achieve a seamless, professional finish. By the end, you will have a framework to diagnose your makeup issues and select products with the discerning eye of an artist.
To navigate this technical guide, the following sections will break down each critical element of color theory, providing you with the knowledge to build a truly personalized and effective makeup routine.
Contents: A Guide to Advanced Color Theory in Makeup
- Why That Viral Lipstick Shade Looks Grey on You?
- How to Use Green and Peach Correctors to Neutralize Redness and Dark Circles?
- Cream or Powder: Which Blush Formula Looks More Natural on Mature Skin?
- The Bathroom Light Trap That Makes You Over-Apply Bronzer
- In What Order Should You Apply Cream and Powder Products to Prevent Patchiness?
- How to Build a Versatile Capsule Wardrobe That Fits Your Body Shape?
- How to Integrate Neon Accents Into a Neutral Wardrobe for a Modern Look?
- How to Design an LED Lighting Plan That Enhances Mood and Saves Energy?
Why That Viral Lipstick Shade Looks Grey on You?
The most common frustration in makeup is color relativity: a product that looks one way in the tube appears completely different on the skin. This is especially true for viral lipstick shades. The reason a vibrant coral turns into a dull, ashy tone on your lips is rarely about undertone alone; it’s about chroma, or saturation. Chroma is the intensity or purity of a color. A fire engine red is high-chroma, while a dusty rose is low-chroma.
Your skin also has a level of chroma. Some people have “clear” or “bright” coloring, where their natural features have high contrast and purity. Others have “muted” or “soft” coloring, where their features are more blended and less intense. When you put a high-chroma lipstick on a person with muted coloring, it can look jarring and artificial. Conversely, when you put a low-chroma, muted lipstick on someone with clear coloring, it can look flat, grey, or “muddy.” This is because the eye perceives the color in relation to its surroundings—your skin.
The “grey effect” happens when the chroma levels are mismatched. A color’s appearance is always relative; colors with low chroma or saturation can appear grey or lifeless when placed against skin with a different saturation level. The viral shade was likely formulated for a different level of skin chroma than yours, causing the color to lose its intended vibrancy and appear washed out.
Case Study: The TikTok Viral Shade Phenomenon
Teak Beauty’s viral TikTok videos offer a perfect demonstration of this principle. They show the same red lipstick on various skin tones, proving how dramatically the final color changes. A red applied over pink-toned lips appears entirely different than the same red applied over purple-brown lips. This visual evidence confirms that the base color of your lips and the chroma of your skin are active participants in the final color equation, explaining why a single lipstick shade can never be universally flattering without adjustment.
To truly understand your unique color profile, it’s essential to analyze the interaction between product and skin. This is the foundational step before choosing any color product.
How to Use Green and Peach Correctors to Neutralize Redness and Dark Circles?
Color correcting is a direct application of complementary color theory: placing two opposite colors on the color wheel next to each other to neutralize them. For makeup, this means using a green-toned corrector to cancel out redness (acne, rosacea) and a peach- or orange-toned corrector to cancel out blue or purple hues (dark circles, hyperpigmentation). However, the secret to effective correction isn’t just picking the right color; it’s selecting the right intensity and saturation for the specific discoloration.
Using a highly saturated mint green corrector on faint, pinkish redness will result in a visible green patch under your foundation. The corrector’s intensity must match the intensity of the redness. For faint redness, a low-saturation, light mint green is sufficient. For an angry, deep red blemish, a more saturated sage green is required to properly neutralize the color without leaving an ashy cast. The same principle applies to under-eye circles. Fair skin with faint, bluish circles needs a light, low-saturation peach. Deeper skin tones with more pronounced, purplish-brown circles require a more vibrant, high-saturation orange to counteract the darkness effectively.
The application technique is just as crucial. Color corrector should be applied in thin, targeted layers and gently patted into the skin, not rubbed. The goal is to create a neutral canvas only on the area of discoloration, allowing you to use less concealer and foundation on top. This prevents the heavy, cakey look that results from piling on product to hide both the original discoloration and the poorly chosen corrector.
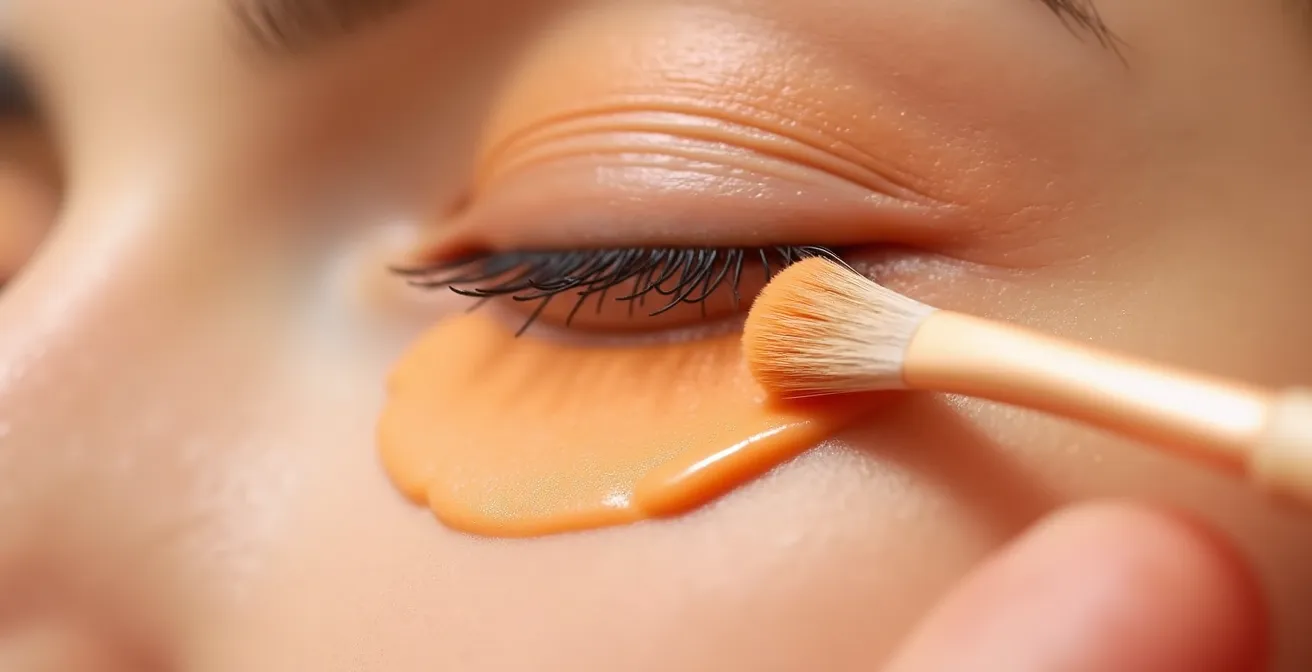
This macro view highlights the precise technique required. The corrector should melt into the skin, becoming one with it before any foundation is applied. The following table provides a guide to choosing the correct intensity for your specific needs.
| Skin Concern | Corrector Color | Intensity Level | Application Tip |
|---|---|---|---|
| Faint Redness | Light Mint Green | Low saturation | Apply in thin targeted layers |
| Angry Acne | Deep Sage Green | High saturation | Pat gently without rubbing |
| Blue Dark Circles (Fair Skin) | Light Peach | Low-medium saturation | Layer under concealer |
| Deep Hyperpigmentation (Dark Skin) | Vibrant Orange | High saturation | Use sparingly on targeted areas |
Cream or Powder: Which Blush Formula Looks More Natural on Mature Skin?
As skin matures, it tends to lose volume and elasticity, and fine lines become more prominent. The goal of blush on mature skin is not just to add color, but to create an illusion of health and lift without emphasizing texture. The choice between cream and powder formulas is critical in achieving this effect. While powders have their place, cream blushes are almost always superior for a natural, youthful look on mature skin.
Cream formulas have a natural translucency that mimics the skin’s own flush. They meld with the skin rather than sitting on top of it, creating a “lit-from-within” glow that powder can rarely replicate. Powder blushes, especially those with high shimmer or a matte, opaque finish, can settle into fine lines and accentuate skin texture, making the skin appear dry and older. A cream or liquid blush with a soft satin finish provides color and luminosity simultaneously.
The saturation of the color is also a key factor. As a Jane Iredale Beauty Expert explains in their guide on color theory:
Highly saturated colors work well for dramatic looks while low saturation colors look softer. For natural looking, daytime pink blush, we want a blush that’s not too saturated.
– Jane Iredale Beauty Expert, Jane Iredale Color Theory Guide
For mature skin, low to medium-saturation colors like soft peach, rosy mauve, and warm apricot are ideal. These shades provide a healthy flush without being high-contrast. The placement is also different; instead of applying blush to the apples of the cheeks, which can drag the face down, it should be applied higher on the cheekbones and blended upwards toward the temples. This creates an optical illusion of lift, drawing the eye upward and sculpting the face.
- Choose cream formulas for a transparent, skin-like finish.
- Select soft, satin-finish colors with low-to-medium saturation.
- Apply blush on the high point of the cheekbone, not the apple.
- Blend upwards and outwards towards the temple to create a lifting effect.
- Avoid high-shimmer or dark, matte shades that can emphasize texture.
The Bathroom Light Trap That Makes You Over-Apply Bronzer
You apply your makeup in your brightly lit bathroom, and it looks flawless. But when you check your reflection in the car mirror, you’re greeted with harsh bronzer lines and an unblended foundation. This is the “bathroom light trap,” a common pitfall caused by poor quality lighting that misrepresents color. Most standard bathroom vanities use warm, yellow-toned bulbs (below 3000K) positioned directly overhead, which creates harsh shadows and distorts color perception.
This warm, unflattering light can make your skin look more sallow than it is, leading you to over-apply bronzer to add warmth. It also hides blending mistakes, making you think your application is seamless when it isn’t. The gold standard for makeup application is diffused, neutral daylight. For artificial lighting, professional makeup artists recommend using daylight bulbs rated between 5000K and 6500K with a high Color Rendering Index (CRI) of 90 or more. This type of light mimics natural daylight and shows colors accurately, revealing exactly how your makeup will look to the outside world.
Without accurate lighting, you are essentially painting in the dark. The color temperature of your light source is as important as the color of the product itself. A foundation that matches perfectly under a 6500K bulb can look orange under a 2700K bulb. The “car mirror test” is a famous trick among makeup artists precisely because the indirect, natural daylight in a car provides one of the most honest assessments of your makeup application.

As the comparison shows, the environment in which you apply your makeup dictates the final result. Investing in proper lighting for your vanity is one of the most impactful changes you can make to your routine, saving you from the surprise of seeing unblended makeup in public. It ensures that what you see in the mirror is what everyone else sees, too.
Your Action Plan: Audit Your Makeup Application Environment
- Points of Contact: List every mirror you use to apply or check your makeup (e.g., bathroom vanity, bedroom window, car mirror).
- Lighting Inventory: For each location, identify the light source. Is it a warm yellow bulb, a cool fluorescent tube, or natural daylight? Note the direction of the light (overhead, front-facing, side).
- Color Consistency Check: Apply your foundation and bronzer in your primary location. Then, check your reflection in all other listed locations. Note any differences in color, blendability, or intensity.
- Identify the Truth-Teller: Determine which light source provides the most honest, accurate representation of your makeup (it’s usually indirect natural light). This is now your benchmark for color accuracy.
- Integration Plan: If your primary application light is inaccurate (e.g., warm/yellow), plan to replace the bulbs with daylight-rated (5000K+) high-CRI LEDs. Until then, use your “truth-teller” mirror for a final blend check before leaving the house.
In What Order Should You Apply Cream and Powder Products to Prevent Patchiness?
One of the most critical technical skills in makeup application is layering. The incorrect layering of cream and powder products is the primary cause of patchiness, pilling, and a cakey finish. The fundamental rule is simple and non-negotiable: liquids and creams must be applied before powders. Attempting to blend a cream product (like a cream blush or contour) over a powder (like a setting powder or powder foundation) will cause the cream to “grab” onto the powder, resulting in a splotchy, unblendable mess.
Think of it like painting. The cream and liquid products are your “underpainting”—they form the base, meld with the skin, and provide a hydrated canvas. The powder products are the “glazing”—they set the creams, add dimension, and refine the finish. Applying a wet medium over a dry one disrupts the surface and creates a muddy texture.
This layering principle is also connected to the concept of translucency. As makeup artist Laura Loukola notes, most makeup products have a degree of translucency. Layering a black or white base, for instance, can dramatically alter the appearance of an eyeshadow applied on top. This is the same principle at work with creams and powders.
Since most makeup products have translucency to them, layering a white or black base underneath an eyeshadow can emphasize the color/shimmer.
– Laura Loukola, Color Theory for Makeup Lovers
The “Makeup Sandwich” technique is a foolproof method for achieving a seamless, long-lasting finish. It ensures each layer adheres properly without disrupting the one beneath it, resulting in a cohesive look that appears to be part of the skin itself.
Action Plan: The Makeup Sandwich Technique
- Cream Base First: Start with all liquid or cream base products, such as foundation and concealer.
- Apply Cream Colors: Apply your cream blush, bronzer, or contour products next, blending them into the still-moist base.
- Set with Translucent Powder: Lightly dust a micro-fine layer of translucent setting powder over the cream layers to lock them in place.
- Glaze with Powder Colors: If desired, lightly sweep matching powder products (powder blush, bronzer) on top of the set cream layers to enhance intensity and longevity.
- Meld with Setting Spray: Finish with a fine mist of setting spray to melt all the layers together, removing any powdery look and creating a skin-like finish.
How to Build a Versatile Capsule Wardrobe That Fits Your Body Shape?
The concept of a “capsule wardrobe”—a curated collection of essential, interchangeable clothing items—is a powerful strategy for simplifying style. This same principle can be applied to makeup to create a “capsule makeup kit” that is versatile, efficient, and perfectly tailored to your unique coloring. Instead of being guided by fleeting trends, a capsule makeup kit is built on the foundation of your personal color theory: your undertone, chroma, and depth.
Building this kit starts with accurately identifying your skin’s characteristics. This is the approach championed by makeup artist Terri Tomlinson, who developed The Flesh Tone Color Wheel™. Her method focuses on using color theory specifically for neutral, flesh-toned shades, allowing artists to precisely identify a client’s color profile and build a versatile kit around it. This moves beyond the simple “warm, cool, neutral” categories and into a more nuanced understanding of skin color.
Once you understand your precise color profile, you can build a kit where every item harmonizes with the others. A well-constructed capsule makeup kit ensures you always have the right shades to create a polished look for any occasion, from natural daytime to evening glamour, without owning an overwhelming number of products. The key is harmony.
The following table illustrates how a basic capsule kit can be built around the three main undertone categories. This serves as a starting point for building your own, more nuanced collection.
| Undertone | Base Products | Harmonizing Colors | Accent Shades |
|---|---|---|---|
| Warm | Golden foundation, Warm beige concealer | Peach/coral blush, Warm bronzer, Earthy eyeshadows | Warm nude lip, Orange-red lip, Golden berry lip |
| Cool | Pink-based foundation, Cool beige concealer | Pink/rose blush, Cool-toned contour, Taupe eyeshadows | Mauve nude lip, Blue-red lip, Cool berry lip |
| Neutral | Balanced foundation, Neutral concealer | Dusty rose blush, Neutral bronzer, Mixed tone shadows | True nude lip, Classic red lip, Neutral plum lip |
How to Integrate Neon Accents Into a Neutral Wardrobe for a Modern Look?
Just as a flash of neon can electrify a neutral outfit, a strategic pop of bold color can elevate a simple makeup look from everyday to editorial. The principles of balance and harmony are the same. Integrating a bold accent is not about randomly adding a bright color; it’s a calculated artistic choice based on color theory. The goal is to create a focal point that enhances your features, not one that competes with them.
The most effective way to choose an accent color is to use the color wheel to select a shade that is complementary to your eye color. This creates the highest level of contrast and makes your eye color appear more vibrant. For example, orange and copper tones make blue eyes look icier, while purples and plums make green eyes appear brighter. This is a classic artist’s trick to create a dynamic and visually appealing contrast.
The “Rule of Balance” is paramount when working with bold colors. If you opt for a strong, colorful eye look, the rest of the face should remain neutral and understated. A bright eyeliner or a sweep of vivid shadow should be paired with a nude lip and a soft, neutral blush. This ensures the bold element is the star of the show and the overall look remains chic and modern, not chaotic. As the Morphe Beauty Team highlights in their guide on using color theory:
Blue eyes: Choose soft, neutral tones like champagne, taupe, and silver to bring out your icy blue hue, or deeper shades such as copper, bronze, and brown to bring out more contrast. Green eyes: Pick earthy tones like warm golds, deep oranges, and olive green to bring out the mossy green of your eyes… For a pop of contrast, go for purples and plums so [they] appear brighter.
– Morphe Beauty Team, How to Incorporate Color Theory Into Your Makeup Routine
If you’re new to bold color, start small. A colored liner in the waterline, a bright inner corner highlight, or a colorful mascara on the lower lashes are excellent ways to experiment without committing to a full-on bright eyeshadow look. This allows you to build confidence while adding a modern, artistic flair to your makeup.
Key takeaways
- Saturation Over Undertone: The reason a lipstick looks “grey” or “muddy” is often a mismatch in chroma (saturation) between the product and your skin, a factor more critical than just undertone.
- Light is an Ingredient: Your makeup will look completely different under warm bathroom light (under 3000K) versus neutral daylight (5000K+). Accurate lighting is essential for accurate application.
- Creams Before Powders: This is a non-negotiable rule. To prevent a patchy, cakey finish, always apply liquid and cream products first, then set and enhance with powders.
How to Design an LED Lighting Plan That Enhances Mood and Saves Energy?
Designing an LED lighting plan for your home is often discussed in terms of ambiance and energy efficiency. However, from a makeup artist’s perspective, your home’s lighting plan is a critical factor that determines the success or failure of your makeup application. The colors you meticulously apply are not absolute; they are rendered by the light that illuminates them. Understanding this is key to ensuring your makeup looks as good outside your home as it does in your mirror.
Every light source has a color temperature, measured in Kelvin (K). Warm, cozy lighting, typically around 2700K, casts a yellow-orange glow. While this is great for a relaxing living room, it’s detrimental for makeup application, as it can make foundation look sallow and hide redness. Conversely, cool office lighting, often 4000K or higher, casts a bluish-white light that can wash out warm tones like bronzer and make you look pale. According to color science research, this variance in lighting is why makeup can seem to change color throughout the day.
Professional makeup artists don’t just apply makeup; they apply it for the environment where it will be seen. This is known as compensatory makeup application. If you are getting ready for a dinner in a restaurant with warm, dim lighting, an artist might use a slightly cooler-toned blush than normal to counteract the yellowing effect of the ambient light. If you are heading to an office with cool fluorescent lighting, you might need a touch more bronzer to avoid looking washed out.
Your home’s LED plan should ideally include a designated space for makeup application with front-facing, dimmable lights that have a neutral color temperature (5000-6500K) and a high CRI (90+). This creates a “truth zone” for application. For the rest of your home, being aware of the color temperature in different rooms allows you to anticipate how your makeup will be perceived and make minor adjustments before you leave, ensuring you always look polished and natural, no matter the setting.
To put these artistic and technical principles into practice, the next logical step is to consciously observe these effects. Begin by auditing your products and your environment, not with the intent to buy more, but with the goal of understanding what you already own more deeply. True mastery comes from this deliberate practice.