In summary:
- Lasting solar light performance is not about a single product, but designing a balanced energy ecosystem (panel, battery, controller).
- Cheap lights fail due to undersized components; focus on the right-sized panel-to-battery ratio and efficient charge controllers.
- Strategic placement, including remote panels for shady areas and proper waterproofing (IP rating), is crucial for longevity.
- Choose brightness (lumens) based on an “energy budget” and use advanced sensors to avoid waste and false alarms.
- For ultimate reliability, build a system with local controls (Zigbee/Z-Wave) that operates independently of your Wi-Fi network.
The promise of solar landscape lighting is compelling: beautiful, secure, and sustainable illumination without the hassle and cost of electrical wiring. Yet, for many homeowners, the reality is a frustrating cycle of lights that shine brightly for a few hours before fading into a useless glimmer. This common experience leads to the conclusion that solar lights are simply unreliable, a cheap gimmick rather than a serious lighting solution. You’ve likely tried the standard advice—placing them in the sunniest spots and keeping the panels clean—only to see them die before midnight.
The core issue, however, isn’t a fundamental flaw in solar technology. It’s a misunderstanding of what makes a system work. The secret to all-night performance doesn’t lie in finding one “magic” light. Instead, it requires a shift in perspective: from buying a product to designing a balanced energy ecosystem. In this system, every component—the photovoltaic panel, the battery, the charge controller, and the LED fixture itself—must be correctly sized and synergistic. A failure in one part compromises the entire system, leading to the premature dimming you’ve observed.
This guide moves beyond the generic tips. We will deconstruct the systemic failure points of common solar lights and provide a technical, component-based framework for designing a scheme that is not only bright but also resilient and cost-effective. By understanding the principles of energy budgeting, component synergy, and environmental hardening, you can build an outdoor lighting system that reliably meets your needs for both security and ambiance, night after night.
To help you navigate this technical landscape, this article breaks down the essential components and strategies. The following summary outlines the key areas we will cover, from diagnosing common failures to building a truly robust and intelligent lighting network.
Summary: A Technical Guide to All-Night Solar Lighting
- Why Cheap Solar Lights Die After 2 Hours and How to Fix Them?
- How to Position Solar Panels in Shady Gardens for Optimal Charging?
- 300 Lumens or 800 Lumens: Which Brightness Do You Need for Pathway Security?
- The Waterproofing Flaw That Kills Solar Lights During Heavy Rain
- How to Adjust Motion Sensor Sensitivity to Avoid False Alarms from Pets?
- How to Build a Stable IoT Ecosystem That Doesn’t Crash When Wi-Fi Drops?
- How to Maintain a Lush Landscape All Year With Minimal Weekly Effort?
- How to Prioritize Energy Efficiency Renovations for Maximum Bill Reduction?
Why Cheap Solar Lights Die After 2 Hours and How to Fix Them?
The most common complaint about solar lights stems from a fundamental imbalance in their design: an undersized “energy income” for their “energy expenditure.” Cheap lights are typically built with the smallest possible photovoltaic (PV) panel and the lowest-capacity battery to keep costs down. This creates an immediate energy deficit. The panel can’t collect enough solar energy during the day to fully charge a battery that is, itself, too small to power the light for the required 8-10 hours. The result is a light that works perfectly for a couple of hours and then fades.
The second, less visible failure point is the charge controller, or often, the lack thereof. A charge controller is the “brain” of the solar ecosystem, managing the flow of energy from the panel to the battery to prevent overcharging and deep discharging, which destroy battery life. Basic lights use a simple diode, while slightly better ones use a Pulse Width Modulation (PWM) controller. However, high-performance systems utilize a Maximum Power Point Tracking (MPPT) controller. Field testing data confirms a stark difference, with MPPT models achieving 94-96% efficiency compared to 74-81% for PWM controllers. This 20% efficiency gain means more of the sun’s energy is stored in your battery, directly translating to longer run times.
To fix an underperforming system, you must rebalance its energy ecosystem. This involves upgrading key components. Start by replacing low-capacity NiMH batteries with higher-density LiFePO4 (Lithium Iron Phosphate) batteries, which offer a significantly longer lifespan. Next, ensure your system has a proper panel-to-battery ratio; a good rule of thumb is a minimum of 10Ah of battery capacity for every 10W of LED lighting. Finally, upgrading to a unit with an MPPT controller ensures you’re maximizing every bit of available sunlight, providing the power needed to last through the night.
How to Position Solar Panels in Shady Gardens for Optimal Charging?
The standard advice to “place solar panels in direct sunlight” is unhelpful for homeowners with mature trees or north-facing gardens. Achieving optimal charging in shaded environments requires moving beyond the integrated-panel light and embracing a more strategic, component-based approach. The key is to decouple the light fixture from its power source. Many high-quality solar systems now offer remote solar panels connected by a discreet, weather-proof cord, typically 3 to 10 feet long.
This design allows you to place the aesthetic light fixture in the desired shaded area—under a tree canopy, along a dark pathway, or illuminating a garden feature—while positioning the photovoltaic panel in the nearest sun-drenched location. This could be on a nearby roof, atop a fence post, or in a sunny patch of a cutting garden. This strategy ensures the panel receives the 4-6 hours of direct sunlight needed for a full charge without compromising your landscape design. When burying the connecting wire, use a shallow trench and cover it with mulch for a seamless, invisible installation.
This is a well-established technique in professional landscape design. A case study on modern lighting documented a designer who successfully used remote photocell systems. They placed collectors in sunny spots while positioning the fixtures in shaded formal landscaping, achieving full charging capacity while maintaining the desired aesthetic. Another tactic is to leverage reflective surfaces. Positioning the panel near a light-colored wall, white gravel path, or stone paver can increase the total light hitting the panel, boosting its energy generation, especially during morning and late afternoon hours when the sun is at a low angle.
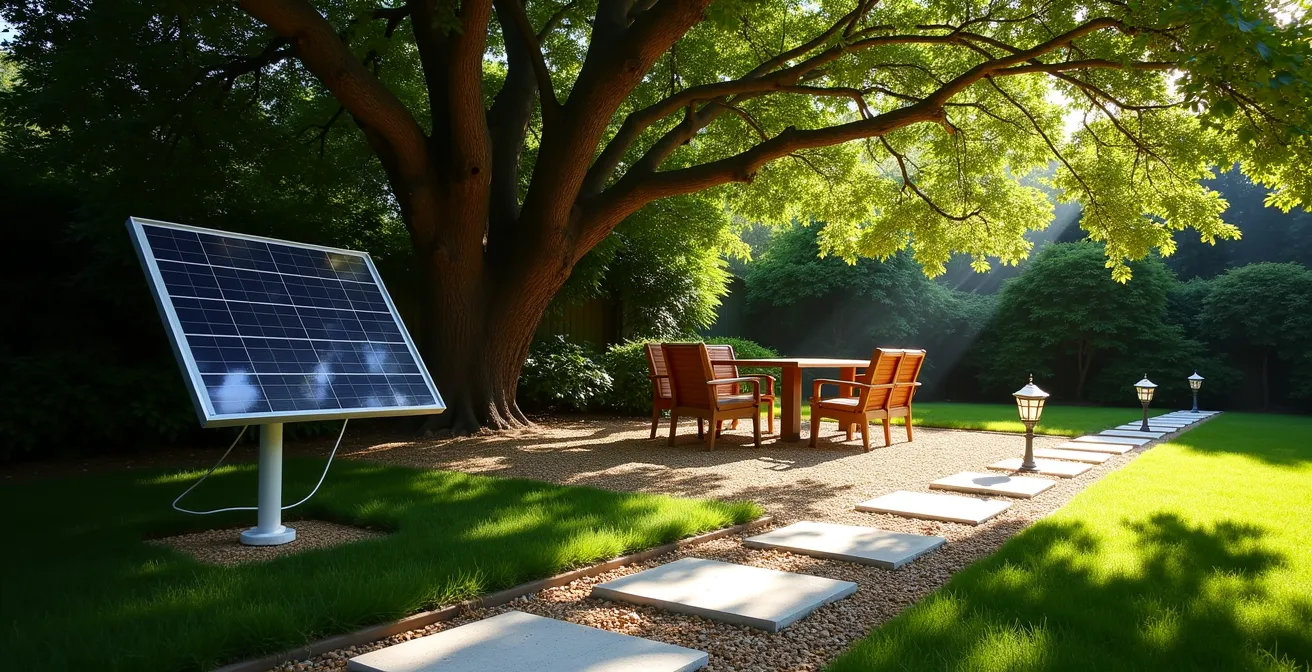
As this image illustrates, the goal is to find a “sun pocket” for the panel, even if the light itself lives in the shade. By thinking of the panel and the light as two separate parts of a system, you can overcome the limitations of even the shadiest gardens and ensure your lights have the power they need to perform all night.
300 Lumens or 800 Lumens: Which Brightness Do You Need for Pathway Security?
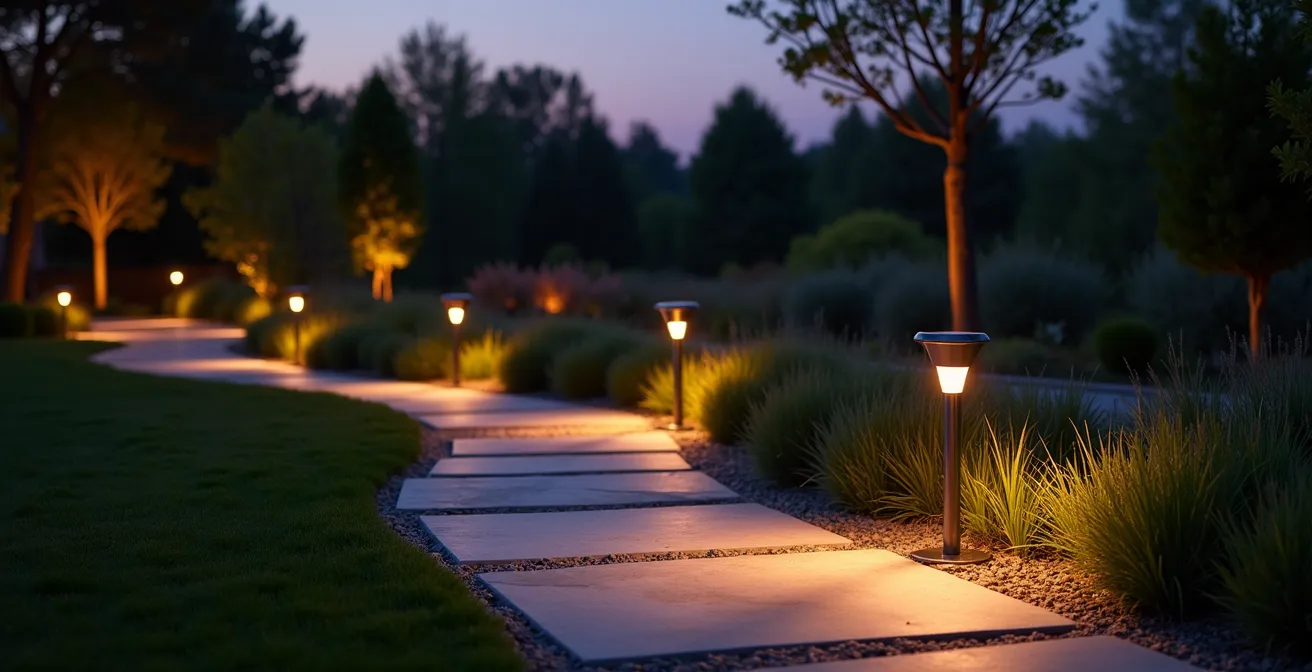
Choosing the right brightness, measured in lumens, is a critical part of designing your solar lighting’s “energy budget.” It’s a trade-off: higher lumens provide better visibility and security but consume more power, requiring a more robust energy ecosystem (larger panel and battery). There is no single “correct” lumen value; the choice depends entirely on the application. For general ambiance and pathway marking, where the goal is to define edges and create a soft glow, 50-300 lumens is typically sufficient. This level of brightness is low-draw, allowing smaller, more discreet fixtures to run all night reliably.
However, for security purposes—such as illuminating doorways, driveways, or dark corners of the property—a much higher output is necessary. A range of 700-1300 lumens is standard for motion-activated security lights. This powerful burst of light is effective at deterring intruders and providing clear visibility. The key to making high-lumen lights viable in a solar setup is that they are not on continuously. They operate in a low-power mode (or are off completely) and only switch to full brightness for short durations (e.g., 30-60 seconds) when motion is detected. This preserves the battery charge for when it’s needed most.
Ultimately, the decision comes down to balancing your security needs with your system’s energy-generating capacity. A system designed for 800-lumen security lighting requires a significantly larger solar panel and battery than one designed for 100-lumen accent lighting. Furthermore, the effectiveness of your panel placement directly impacts your energy budget. International Energy Agency research shows that optimal placement can lead to a 30% increase in energy efficiency. This boost can be the difference between a battery that dies at 3 a.m. and one that powers your security light until dawn. Therefore, before selecting a lumen level, first assess your panel placement possibilities to understand the maximum energy income you can realistically generate.
The Waterproofing Flaw That Kills Solar Lights During Heavy Rain
When a solar light fails after a heavy downpour, the cause is almost always water ingress. While manufacturers often market their products as “weatherproof,” the reality lies in a specific technical rating: the IP (Ingress Protection) code. An IP rating consists of two numbers. The first digit (0-6) rates protection against solid particles (like dust), and the second digit (0-9) rates protection against liquids. For outdoor lighting expected to endure rain, a minimum rating of IP65 is essential. An ‘IP65’ rated device is dust-tight and can withstand water jets from any direction. Anything less, like IP44 (splash-proof), is inadequate for prolonged outdoor exposure and will likely fail.
However, the hidden flaw isn’t just a poor seal; it’s a phenomenon called thermal cycling. During the day, the light heats up in the sun, causing the air inside to expand. As it cools rapidly during a rainstorm, the internal air contracts, creating negative pressure that can suck moisture past even seemingly good seals. High-quality fixtures mitigate this by including a microscopic, GORE-TEX-like pressure-stabilizing vent that allows air to pass but blocks water molecules. Cheaper lights lack this feature, making them highly susceptible to this “breathing” effect and eventual internal corrosion.
A notable case study involved homeowner Casey Finn, who documented solar fence lights installed in 2019. After five years of exposure, the lights, which had a proper waterproof rating and were installed with outdoor mounting tape that didn’t compromise the housing, still functioned perfectly. This demonstrates that longevity is achievable with the right components. You can enhance the durability of your lights by inspecting rubber gaskets for UV degradation, applying silicone grease to seals before installation to keep them supple, and even adding a bead of marine-grade sealant to housing seams for extra protection.
Your Waterproofing Audit Checklist: 5 Steps to Weatherproof Your Lights
- Check IP Rating: Before purchasing, verify the fixture has a minimum IP65 rating. If your existing lights are failing, check their specs; an IP44 rating is a common culprit.
- Inspect Seals and Gaskets: Examine all rubber gaskets and O-rings for signs of cracking or brittleness due to sun exposure. Replace any that appear degraded.
- Apply Protective Sealant: For new installations, apply a thin layer of silicone grease to all gaskets. For existing lights, consider adding a clear, marine-grade silicone sealant bead along the main housing seams and wire entry points.
- Ensure Proper Drainage: Mount fixtures so that water naturally runs off them. Avoid placing them in depressions where water can pool. Check that any built-in weep holes are clear of debris.
- Consider Physical Shielding: In areas with extreme rain, creating a small, discreet rain shield or hood above the fixture can provide an extra layer of defense, reducing the direct impact of water on the seals.
How to Adjust Motion Sensor Sensitivity to Avoid False Alarms from Pets?
A motion-activated solar light is a fantastic security tool, but frequent false alarms triggered by pets or swaying branches can be a nuisance and an unnecessary drain on the battery. Fine-tuning the sensor is key to creating a system that is both responsive and discriminating. The majority of solar lights use Passive Infrared (PIR) sensors, which detect the heat signature of moving objects. The solution to pet-related false alarms lies in understanding and manipulating the sensor’s detection zones.
Most PIR sensors have a downward and outward-facing detection pattern. To create a “pet-immune” zone, the goal is to aim the sensor so its detection field is just above the height of your pet. By tilting the sensor head horizontally or slightly upwards, you create a coverage area that will detect a person walking by but will miss a dog or cat moving below it. Some advanced sensors also allow you to apply small pieces of opaque electrical tape to specific parts of the sensor lens, effectively “masking” or blocking out problematic zones, such as a neighbor’s driveway or a rustling bush.
The type of sensor technology also plays a significant role in false alarm rates. While PIR is common, some lights use microwave sensors, which detect any motion by bouncing waves off objects. These are highly sensitive and notoriously difficult to make pet-immune. For high-security applications where reliability is paramount, dual-technology sensors, which require both a PIR (heat) and a microwave (motion) signal to trigger, offer the lowest false alarm rate.

As this homeowner demonstrates, careful, precise adjustment is the key. The table below, based on data from home service experts, compares the technologies to help you choose the right sensor for your needs and environment. Understanding these differences is crucial for building a smart and efficient security lighting plan.
| Feature | PIR Sensors | Microwave Sensors | Dual-Tech Sensors |
|---|---|---|---|
| Detection Method | Heat signature changes | Any motion | Both heat + motion |
| Pet Immunity | Adjustable with masking | Difficult to filter | Excellent with dual verification |
| Range | 30-40 feet typical | 50-60 feet | 40-50 feet |
| False Alarm Rate | Medium | High | Very Low |
| Best Use Case | Standard residential | Open areas | High-security zones |
How to Build a Stable IoT Ecosystem That Doesn’t Crash When Wi-Fi Drops?
Integrating your solar lights into a smart home (IoT) ecosystem adds incredible convenience, allowing for automated schedules, remote control, and integration with other devices. However, many consumer-grade smart lights are Wi-Fi dependent. When your internet connection or Wi-Fi router goes down, these lights lose their “smarts,” reverting to a basic state or becoming completely unresponsive. Building a truly stable system means designing for resilience and prioritizing local control over cloud dependency.
The most robust solution is to build your lighting network using protocols designed for local automation, such as Zigbee or Z-Wave. Unlike Wi-Fi, which uses a star topology where every device connects directly to the router, Zigbee and Z-Wave create a mesh network. Each device can talk to its neighbors, relaying signals across your property. This extends range and builds redundancy. If one light goes offline, the signal simply finds another path. These devices are controlled by a local hub (like Hubitat or a Raspberry Pi running Home Assistant), which stores all the schedules and automation rules. If the internet goes out, the hub continues to run the entire system flawlessly.
A DIY programmer demonstrated this principle by building an off-grid landscape system. Initially, centralized control failed, but after upgrading to a smart solar controller with programmable load output and local scheduling, the system became fully autonomous. It now operates independently of any network, proving the power of local-first design. When selecting smart solar lights, look for models with onboard memory that can remember their last state or a fallback schedule if they lose connection with the hub. Always program your schedules on the local hub itself, not through a cloud-based app, and periodically test the system’s resilience by disconnecting your home from the internet to verify that everything continues to function as expected.
How to Maintain a Lush Landscape All Year With Minimal Weekly Effort?
The philosophy behind a high-performance solar lighting system—investing in a well-designed, autonomous ecosystem—can be extended to overall landscape maintenance. A truly low-effort garden is not one that is neglected, but one where automated systems handle the repetitive, daily tasks. Solar power is the perfect engine for this automation, creating an off-grid, self-sufficient landscape that requires minimal human intervention.
One enthusiast built a dual-purpose solar system powering both landscape lighting and a drip irrigation network. Using a 50W panel, a 12V battery, and a programmable charge controller, the system waters plants and lights up paths automatically. This integrated approach solves two major landscape chores with a single, resilient energy source. The key to this system’s longevity and minimal effort is the quality of its core components. By using an efficient MPPT charge controller, the system maximizes energy harvest and protects the battery, which is the most common failure point. Proper charge management is shown to result in a 30-50% longer lead-acid battery lifespan, drastically reducing the “effort” of replacing components.
Minimal weekly effort, therefore, comes from excellent initial design. This includes selecting native, drought-tolerant plants that thrive in your climate, applying thick layers of mulch to retain soil moisture and suppress weeds, and installing a solar-powered drip irrigation system on a timer. The lighting component should be equally “set-it-and-forget-it,” with high-quality, IP65+ rated fixtures and self-cleaning coated solar panels that shed dirt and dust with rain. By creating these synergistic, automated systems, your weekly “effort” is reduced to simple observation and occasional adjustments, rather than constant, manual labor.
Key Takeaways
- Lasting solar performance comes from a balanced energy ecosystem, not a single expensive light.
- Prioritize components: an efficient MPPT controller, a high-capacity LiFePO4 battery, and a correctly sized panel are non-negotiable.
- Design for your environment with remote panels for shade, a minimum IP65 waterproof rating for rain, and pet-immune sensor adjustments.
How to Prioritize Energy Efficiency Renovations for Maximum Bill Reduction?
When considering home energy efficiency, homeowners often focus on large-scale projects like insulation or new windows. However, one of the most immediate and cost-effective renovations you can make is to your exterior lighting. Traditional 12V wired landscape lighting, while effective, contributes a steady, year-round cost to your electricity bill. Switching to a 100% solar-powered system eliminates this operational cost entirely, offering a clear and rapid return on investment.
The financial argument for solar is compelling. While a professionally installed wired system can have a high initial cost, a high-quality solar system is significantly more affordable upfront and has a near-zero operating cost. The only long-term expense is the eventual replacement of batteries, typically every 3-7 years depending on the technology and quality. A cost analysis from home and garden experts highlights this stark difference, showing that a solar system’s 5-year total cost is a fraction of a traditional wired system.
The table below breaks down the typical costs, illustrating how quickly the savings from a solar installation accumulate. For those not ready to commit fully, a hybrid system offers a middle ground, reducing energy consumption while maintaining a grid-connected backup.
| System Type | Initial Cost | Annual Operating Cost | 5-Year Total | Energy Savings |
|---|---|---|---|---|
| 12V Wired System (10 lights) | $800-1200 | $120-180 | $1400-2100 | Baseline |
| Solar LED System (10 lights) | $300-600 | $0 | $300-600 | 100% reduction |
| Hybrid Solar-Wired | $500-800 | $40-60 | $700-1100 | 67% reduction |
Furthermore, the efficiency gains from using superior components like an MPPT controller don’t just provide longer nightly run times; they generate a real energy surplus over the system’s life. For example, analysis shows a modest 400W system with an MPPT controller can generate an additional 146 kWh of energy over 5 years compared to a PWM equivalent. In the context of home renovations, prioritizing a switch to solar landscape lighting is a high-impact, low-cost first step that delivers immediate and measurable reductions to your energy bill.
Now that you are equipped with the technical knowledge to design a resilient system, the next logical step is to apply it. Start by auditing your own outdoor space to define your specific lighting needs and identify the optimal locations for solar energy collection.