In summary:
- Prioritize circadian health by using warm-toned LEDs (under 2700K) in the evening to protect sleep quality.
- Build a resilient smart home by choosing a Zigbee mesh network over Wi-Fi for local, reliable lighting control.
- Select high-fidelity bulbs (CRI 95+ with an R9 value over 50) to ensure colors in your home appear vibrant and true.
- Go beyond simple bulb replacement; a systemic plan involves strategic placement, dimmer compatibility, and network stability.
For the tech-savvy homeowner, upgrading to LED lighting feels like a solved problem. The promises are clear: lower energy bills and long-lasting bulbs. Yet, many who make the switch find themselves in a home filled with harsh, unflattering light, experiencing mysterious Wi-Fi dropouts, or dealing with an annoying flicker that old incandescents never had. The common advice—layer your lighting, choose smart bulbs—often overlooks the critical technical systems that underpin a truly effective lighting plan. It treats lighting as a collection of individual products rather than a cohesive, integrated ecosystem.
The truth is that a successful transition to modern lighting goes far beyond just screwing in a new bulb. It requires a designer’s mindset, focused on the interplay between light, human biology, network engineering, and architectural aesthetics. The real key isn’t just swapping to LED, but mastering the technical nuances that prevent these common failures. What if the solution wasn’t just buying a “smart” bulb, but building a resilient lighting *system*? A system that not only saves energy but also actively supports your sleep cycle, makes your decor look its best, and remains stable even when your internet doesn’t.
This guide moves past the generic advice to give you a strategic blueprint. We will deconstruct the core technical pillars of a professional-grade lighting plan, from managing the biological impact of light and ensuring dimmer compatibility, to building a rock-solid smart home network and using light to architecturally enhance your space. You will learn to think like a lighting designer, creating an environment that is efficient, beautiful, and fundamentally in sync with your lifestyle.
For those who prefer a hands-on approach, the following video offers a practical demonstration of retrofitting a dimmer switch, a common task in upgrading a home lighting system.
To navigate this comprehensive design process, we’ve structured this article to address the most critical questions you’ll face. The following summary outlines the key areas we will explore, from the science of sleep to the art of creating a family-friendly, aesthetically pleasing living space.
Summary: Your Guide to a Systemic LED Lighting Plan
- Why Cool White LEDs in the Bedroom Can Ruin Your Sleep Quality?
- How to Retrofit Dimmers for LED Bulbs Without Causing Flickering?
- Wi-Fi or Zigbee Bulbs: Which Is More Reliable for Whole-Home Lighting?
- The Recessed Lighting Error That Creates “Swiss Cheese” Ceiling Effects
- How to Choose High CRI Bulbs to Make Your Furniture Colors Pop?
- How to Build a Stable IoT Ecosystem That Doesn’t Crash When Wi-Fi Drops?
- How to Prioritize Energy Efficiency Renovations for Maximum Bill Reduction?
- How to Design a Living Space That Is Both Instagram-Worthy and Family-Friendly?
Why Cool White LEDs in the Bedroom Can Ruin Your Sleep Quality?
The conventional wisdom to use “warm light” in the bedroom is an oversimplification of a critical biological process. The real issue isn’t just the perceived color, but the specific wavelengths of light that reach your eyes. Human physiology is tuned to a natural light cycle, and our bodies use the blue-spectrum light of midday sun to regulate our internal clock, or circadian rhythm. When we expose ourselves to this same type of light in the evening from cool white LEDs (4000K and above), we send a confusing signal to our brain: “It’s still daytime.”
This exposure directly inhibits the production of melatonin, the hormone responsible for signaling sleep. The effect is not trivial; scientific research shows that light at a 460-480nm wavelength can suppress melatonin production by up to 60% after just two hours of exposure. This disruption can make it harder to fall asleep, reduce sleep quality, and leave you feeling groggy the next day. The problem extends beyond primary light fixtures to include device screens, TV sets, and even the tiny standby LEDs on electronics. A successful lighting plan must therefore be a circadian-aligned plan, actively managing light exposure to support, not sabotage, your natural sleep cycle.
Action Plan: Evening Light Hygiene for Better Sleep
- 90 minutes pre-bed: Transition all primary lights to a warm color temperature below 2700K and dim them to approximately 30% intensity. This begins the hormonal signaling for sleep.
- 60 minutes pre-bed: Switch to using only indirect, low-level accent lighting. Think table lamps or floor lamps with warm bulbs, avoiding any direct overhead light.
- 30 minutes pre-bed: Begin your screen-free wind-down period. If you must read, use a dedicated book light with a very warm temperature, ideally under 2200K.
- Audit for light leaks: Check your bedroom for hidden sources of cool light. Cover or dim the small LED standby lights on chargers, TVs, and other electronics with specialized dimming stickers.
- Block external light: Install draft stoppers at the bottom of doors to block light bleeding in from hallways or other rooms, ensuring a completely dark environment.
How to Retrofit Dimmers for LED Bulbs Without Causing Flickering?
One of the most common frustrations when upgrading to LEDs is the dreaded flicker, buzz, or hum that occurs when they are paired with a dimmer switch. This issue arises from a fundamental incompatibility between old and new technology. Traditional incandescent bulbs were simple resistive loads, and legacy dimmers (leading-edge) worked by simply cutting off part of the AC power wave. LEDs, however, are complex electronic devices with internal drivers that require a stable power supply. Mismatching a modern LED with an old dimmer often leads to strobing, flickering (even if it’s invisible to the naked eye but caught on a phone camera), or a failure to dim smoothly.
The solution requires a systemic approach to compatibility. The first step is ensuring your LED bulb is explicitly marked as “dimmable”. Non-dimmable bulbs will fail immediately. The second, and most critical, step is to replace your old dimmer switch with a modern LED-compatible model, typically a trailing-edge (ELV) or CL-type dimmer. These are specifically designed to work with the sensitive electronics inside LED drivers. Furthermore, every dimmer has a minimum load requirement. If the total wattage of the connected LEDs is too low (a common issue since LEDs are so efficient), the dimmer may not function correctly. A proper retrofit isn’t just about the bulb; it’s about ensuring every component in the electrical circuit is designed to work together seamlessly.

As this macro view of a modern dimmer’s circuitry shows, these devices are sophisticated electronics designed to manage power for complex loads. To ensure compatibility, it’s essential to follow a verification process. Check the dimmer manufacturer’s website for a compatibility list of tested bulb models, and if flicker persists, use the dimmer’s small adjustment dial (low-end trim) to set the minimum brightness level and stabilize the power flow.
Wi-Fi or Zigbee Bulbs: Which Is More Reliable for Whole-Home Lighting?
For a tech-savvy homeowner, creating a smart lighting system that is both powerful and reliable is paramount. The choice between Wi-Fi and Zigbee (or Z-Wave) is not merely a feature preference; it’s a fundamental architectural decision that determines your system’s stability and scalability. Wi-Fi bulbs, while simple to set up individually, create significant long-term problems. Each bulb connects directly to your router, acting as a separate device on your network. This quickly overloads a typical consumer router, leading to dropped connections, slow response times, and system-wide instability as you add more devices.
Zigbee, in contrast, operates on a mesh network protocol. Bulbs and devices communicate with each other, passing signals along to create a robust and self-healing web. Only a single hub connects to your router, drastically reducing network load. This architecture provides two game-changing benefits: local control and superior scalability. Because automations and commands are processed by the hub within your home, your lights continue to function perfectly even if your internet connection goes down. Wi-Fi bulbs, being cloud-dependent, often become unresponsive without internet. For a reliable, whole-home system, a hub-based protocol like Zigbee is the only professional choice.
The differences in architecture have a direct impact on performance and reliability, as highlighted in this comparative analysis.
| Feature | Wi-Fi Bulbs | Zigbee Bulbs |
|---|---|---|
| Network Scalability | Limited (10-30 devices max) | Excellent (100+ devices) |
| Internet Dependency | Cloud-dependent for most functions | Local control via hub |
| Power Outage Recovery | Requires internet reconnection | Automatic local mesh restoration |
| Response Latency | 0.5-2 seconds (cloud relay) | Near instant (local processing) |
| Router Load | High (each bulb = one device) | Minimal (hub = single connection) |
Case Study: Home Assistant Zigbee Implementation for Reliability
A smart home enthusiast implemented a Zigbee-based system with Home Assistant, connecting 45 LED bulbs throughout their home. During a 3-day internet outage, all local automations, motion sensors, and wall switches continued functioning flawlessly. The Zigbee hub, powered by a small UPS, maintained the mesh network even through brief power interruptions, demonstrating superior reliability compared to cloud-dependent Wi-Fi alternatives. This real-world example, referenced in smart home community discussions, proves the resilience of a local-first approach.
The Recessed Lighting Error That Creates “Swiss Cheese” Ceiling Effects
Recessed lighting is a powerful tool for creating clean, modern ambient light, but it’s also the easiest to get wrong. The most common amateur mistake is a grid-like placement of too many narrow-beam fixtures, resulting in a ceiling that looks like a slice of Swiss cheese and a floor covered in harsh, isolated pools of light. This “runway” or “grid” layout fails to light the space evenly and, more importantly, fails to illuminate the vertical surfaces—the walls—which is what makes a room feel bright and spacious.
Professional lighting design focuses on lighting surfaces, not just the floor. This is achieved through two key principles: strategic placement and proper beam angle selection. Instead of a center-room grid, fixtures should be placed closer to the walls to create a “wall washing” effect, which provides smooth, even illumination on vertical planes. A crucial guideline is the Half-Wall Rule: the distance of a light from the wall should be roughly half the distance between each light fixture. For general ambient light, always select bulbs or fixtures with a wide beam angle (90-120°). Narrow beams (under 40°) are specialized tools meant only for accenting specific objects like artwork or architectural details, not for general illumination.
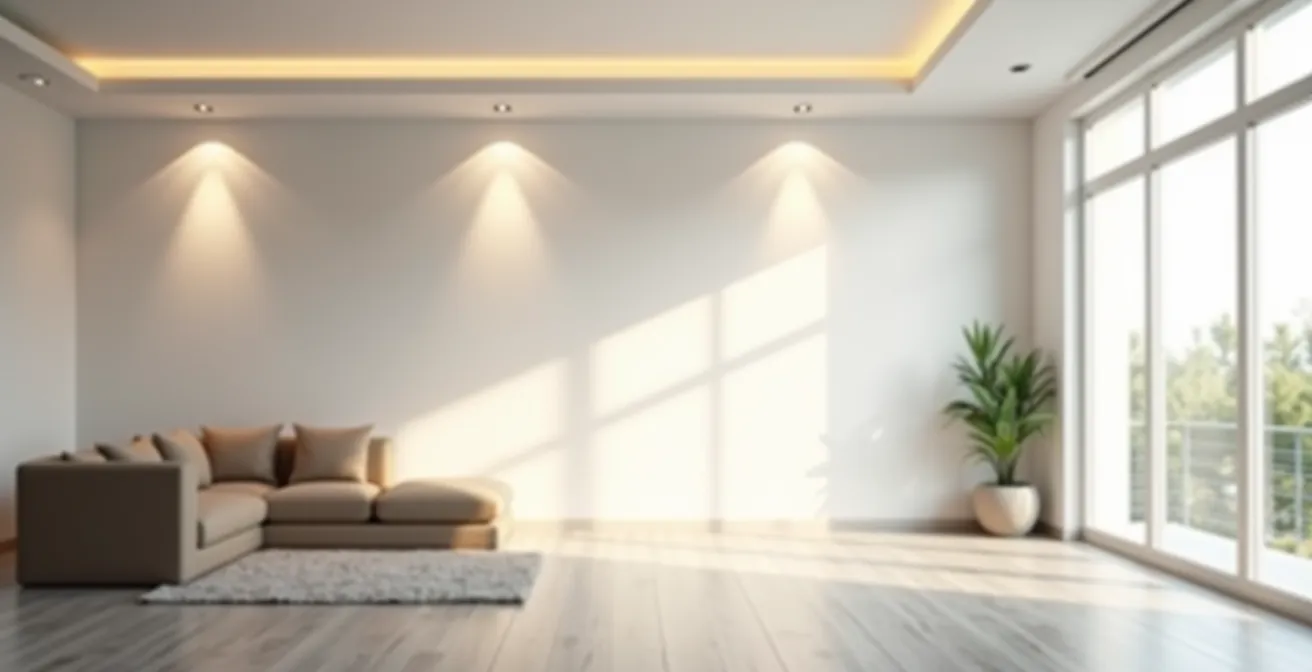
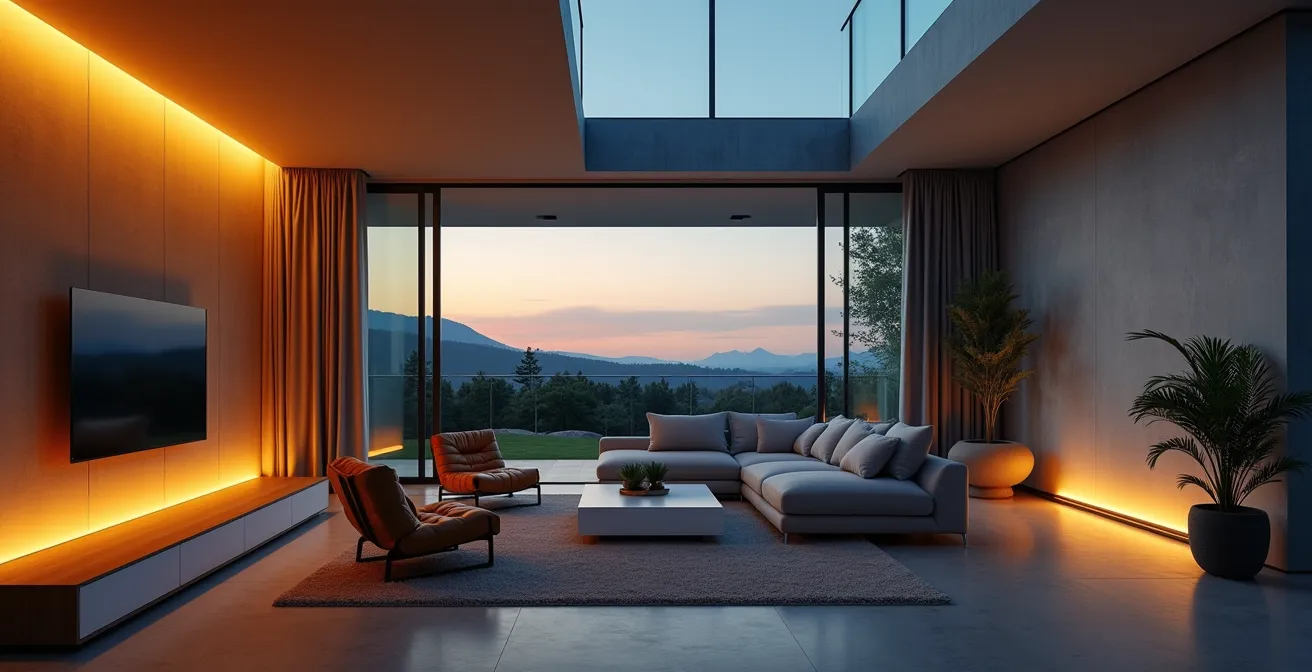
This minimalist living space demonstrates correct execution. The recessed fixtures are placed to wash the walls in a uniform layer of light, eliminating harsh shadows and making the room feel larger and more inviting. To achieve this, use dedicated wall-wash fixtures or place standard downlights strategically. For highlighting specific pieces, use adjustable gimbal fixtures that can be precisely aimed, preventing light spill and glare.
How to Choose High CRI Bulbs to Make Your Furniture Colors Pop?
After you’ve perfected your lighting placement and control system, the final step is selecting a bulb that renders color accurately. The Color Rendering Index (CRI) is the standard metric, measuring how faithfully a light source reveals colors compared to a natural light source. For residential use, a CRI of 90 or above is considered the minimum for good color quality. However, a high CRI score alone doesn’t tell the whole story and can be misleading. Many high-CRI LEDs still make skin tones look pale or wood furniture appear dull.
This is because the standard CRI calculation averages several color samples, but often masks a poor performance in rendering deep reds. The secret to vibrant, rich colors lies in a specific sub-metric: the R9 value. This value measures how well a light source renders strong red. Red is a critical color component in skin tones, wooden grains, and many foods. A bulb can have a 90+ CRI but an R9 value near zero, resulting in a washed-out appearance. For truly excellent color fidelity, you must look for bulbs with not only a CRI of 95+ but also an R9 value above 50. According to color rendering research, LEDs with high R9 values show significantly better red saturation. Some manufacturers are now also reporting TM-30 data (Rf for fidelity, Rg for gamut), which provides an even more comprehensive view of color performance.
To ensure your design choices are seen as intended, pair the right color quality with the right color temperature for each space:
- Kitchens with wood cabinets: Use 3000K with a high R9 value (R9>80) to bring out the warmth and richness of the wood grain.
- Art displays: For maximum accuracy, choose a neutral 4000K with high TM-30 Rf and Rg values to represent the artist’s original palette.
- Bedrooms and living rooms: Select a warm 2700K with a CRI>95 to create a cozy atmosphere and ensure textiles and skin tones look natural and healthy.
- Home office: A slightly cooler 3500K with high fidelity (TM-30 Rf>90) provides a balanced light for productivity without being overly sterile.
How to Build a Stable IoT Ecosystem That Doesn’t Crash When Wi-Fi Drops?
A truly smart home is a resilient one. Your ability to control your lights should never depend on a distant server or a fickle internet connection. The cornerstone of a stable IoT ecosystem, particularly for essential functions like lighting, is the principle of local-first control. This architectural philosophy dictates that all critical operations should be processed within your home, on a dedicated hub, without requiring a connection to the cloud. This ensures that your light switches, motion sensors, and scheduled automations continue to work flawlessly, instantly, and reliably, regardless of whether your ISP is having an outage.
Building this resilience starts with choosing the right network technology—Zigbee or Z-Wave—and a powerful local hub like Hubitat or Home Assistant. From there, you must establish a clear control hierarchy. Physical smart switches should form the base layer, as they provide manual control that works even if the entire network fails. The second layer is your local hub, running automations (e.g., “turn on porch light at sunset”) that are processed internally. The final, and least critical, layer is cloud-based convenience, such as voice control via Alexa or Google Assistant. By designing your system this way, voice control becomes a “nice-to-have” feature, not a single point of failure. This local-first approach is the difference between a frustrating gadget and a dependable utility.
To establish this stable foundation, several network best practices are essential. Create a dedicated 2.4 GHz Wi-Fi network solely for your IoT devices to reduce interference with your primary devices. Assign static IP addresses to your critical components like the smart hub to prevent connection issues after a reboot. Most importantly, power your hub and main router with an uninterruptible power supply (UPS) to ride out brief power flickers and maintain network integrity.
How to Prioritize Energy Efficiency Renovations for Maximum Bill Reduction?
When planning home renovations, many homeowners gravitate towards big-ticket items like new windows or insulation to improve energy efficiency. While these are valuable long-term investments, they come with high upfront costs and long payback periods. A strategic lighting upgrade, however, offers the single fastest and most cost-effective return on investment. Replacing outdated incandescent or halogen bulbs with modern LEDs is a high-impact, low-cost first step that immediately reduces your home’s energy consumption.
The financial case is compelling. LEDs consume up to 85% less energy than their incandescent counterparts for the same light output (lumens). This direct energy saving translates into a rapid payback period. In fact, energy efficiency studies demonstrate that a simple LED bulb replacement typically pays for itself in 12-24 months, compared to the 10-20 years it can take to recoup the cost of new windows. Furthermore, LEDs produce very little heat, which creates a secondary saving. In warmer months, reducing the heat load from lighting can lead to a 5-10% reduction in air conditioning costs. For maximum bill reduction, a systemic LED overhaul should be the number one priority in any energy efficiency renovation plan.
To maximize savings without a huge initial outlay, adopt a phased renovation strategy:
- Phase 1 (High-Impact Swap): Start by replacing the bulbs in your five most frequently used fixtures, typically in the kitchen and living room, for immediate and noticeable savings.
- Phase 2 (Automated Savings): Install occupancy or vacancy sensors in transient spaces like bathrooms, laundry rooms, and closets to ensure lights are never left on accidentally.
- Phase 3 (Optimized Dimming): Install compatible dimmers on major light sources. Running LEDs at 70-80% brightness is often unnoticeable but can provide an additional 20% in energy savings for that fixture.
- Phase 4 (Attrition-Based Replacement): For less-used fixtures, simply replace the remaining old bulbs with LEDs as they burn out, minimizing upfront cost.
Key Takeaways
- Biology First: Your lighting plan must support your circadian rhythm by using warm, dim light in the evenings to protect sleep quality.
- Local Control is King: For a reliable smart home, choose a hub-based system (Zigbee/Z-Wave) that processes commands locally, independent of your internet connection.
- Color Fidelity Matters: Look beyond CRI and demand high R9 values (50+) to ensure that reds, wood tones, and skin tones are rendered beautifully and accurately.
How to Design a Living Space That Is Both Instagram-Worthy and Family-Friendly?
The ultimate goal of a lighting plan is to create a space that is not only functional but also beautiful and adaptable. The modern living room must serve as a bright space for homework, a cozy den for movie nights, and an elegant backdrop for entertaining. Achieving this balance between aesthetics (“Instagram-worthy”) and practicality (“family-friendly”) is possible through a combination of layered lighting and dynamic control. The key is to move beyond static, single-purpose lighting and embrace a flexible system that can transform the mood of the room at the touch of a button.
This is where tunable white LEDs and smart scene control become invaluable. Tunable white technology allows you to adjust the color temperature of your lights, from a crisp, energizing daylight (4000K-5000K) to a warm, relaxing candlelight glow (2200K). By pairing these with a smart hub, you can create pre-set “scenes” for different activities. For example, a “Focus Mode” might set lights to a bright, neutral 4000K, while “Movie Night” could dim all lights to a warm 2200K at 20% intensity. This adaptability satisfies both the practical needs of a busy family and the aesthetic desire for a perfectly curated atmosphere.
Case Study: Tunable White LED Implementation for Dynamic Living
A family transformed their living room using tunable white LED strips and smart controls, creating preset scenes for different activities. ‘Homework Mode’ delivers crisp 4000K at 100% brightness for focus, while ‘Movie Night’ dims to warm 2200K at 20% intensity. The system automatically transitions from bright daylight tones in the morning to candlelight warmth in the evening, satisfying both aesthetic Instagram moments and practical family needs while supporting natural circadian rhythms.
To achieve that polished, layered look, combine different lighting techniques. Use cove lighting to provide soft, indirect ambient light. Add tight-beam accent spots to highlight artwork or plants, creating focal points. Install wall-grazing fixtures to emphasize textured surfaces like brick or stone, and consider uplighting behind sofas or media centers for dramatic silhouettes. This multi-layered approach adds depth and visual interest, making the space feel professionally designed and ready for any occasion.
A thoughtfully designed LED lighting plan is more than an energy-saving measure; it’s a fundamental upgrade to your home’s environment. By moving beyond simple bulb replacement and adopting a systemic approach that considers biology, network reliability, color fidelity, and architectural placement, you can create a space that truly enhances your quality of life. Start today by auditing one room in your home and identifying the first small change you can make toward building a more intelligent and responsive lighting system.