Most homeowners feel trapped in a cycle of endless landscape chores because they treat their yard as a collection of individual tasks. The key to a beautiful, low-effort property is to stop thinking in tasks and start building an automated maintenance system. By making a few strategic, one-time decisions about soil, water, and plants, you can eliminate the root cause of 90% of your weekly work and create a landscape that largely takes care of itself.
For many busy homeowners, the dream of a lush, beautiful landscape quickly turns into a reality of relentless weekend work. You mow, you weed, you water, you prune—and the cycle repeats, week after week. The common advice is to choose “low-maintenance” plants or to mulch your garden beds, but these are just isolated tactics, not a comprehensive strategy. This approach often fails because it doesn’t address the underlying inefficiencies in your yard’s ecosystem.
What if the secret wasn’t about working harder or finding more time, but about working smarter? The difference between a high-maintenance yard and a low-effort one is a plan. A landscape contractor doesn’t just show up and start pulling weeds; they design a system where each component works together to minimize future labor. This is the mindset shift from being a garden laborer to becoming a landscape manager.
This guide is your blueprint for building that system. We will move beyond generic tips and focus on strategic leverage points—the critical, often-overlooked decisions that deliver the biggest return on your time. You’ll learn to diagnose your landscape’s needs, automate its care, and make upfront investments that pay you back with years of reduced maintenance. It’s time to trade your to-do list for a schedule of strategic, high-impact actions.
Summary: Your Year-Round Low-Effort Landscape Plan
- Why Fertilizing Without a Soil Test Is Often a Waste of Money?
- How to Program Your Sprinkler System to Save 30% on Water Bills?
- Bark or Gravel: Which Mulch Prevents Weeds Better in Windy Areas?
- The Pruning Mistake That Kills Hydrangea blooms for the Entire Season
- When to Aerate Your Lawn: The Critical Window for Root Health
- How to Create a Biodiverse Garden That Is Both Beautiful and Ecologically Functional?
- How to Design a Solar Landscape Lighting Scheme That Stays Bright All Night?
- How to Strategically Increase Property Value With Low-Cost Cosmetic Updates?
Why Fertilizing Without a Soil Test Is Often a Waste of Money?
Applying fertilizer without a soil test is the definition of working inefficiently. It’s like taking medicine without a diagnosis—you’re guessing at the problem, wasting money on products you may not need, and potentially harming your lawn by creating nutrient imbalances. A soil test is the single most important upfront investment in your landscape maintenance system. It provides a precise blueprint of what your soil lacks and, more importantly, what it already has in abundance.
The financial return on this diagnostic step is significant. For agricultural operations, research shows a return on investment ranging from 3:1 to 8:1. For homeowners, the savings are just as tangible. Instead of buying “all-purpose” fertilizer year after year, you can target specific deficiencies with the right amendments, often for a fraction of the cost. In a striking example, one farmer’s $270 investment in soil sampling led to a reported saving of $20,000 he would have otherwise spent on unnecessary fertilizer.
This is strategic leverage in action. A small, one-time effort provides the data needed to make your fertilization program dramatically more effective and cost-efficient for years to come. It eliminates guesswork and ensures every dollar spent on soil amendments is directly contributing to the health of your landscape.
Action Plan: Your 3-Step Soil Testing Process
- Collect Samples Correctly: Using a stainless steel trowel, collect several random samples from different zones of your yard (e.g., lawn, vegetable garden, flower beds). Dig to a depth of about 6 inches for an accurate reading.
- Consolidate and Prepare: Mix the samples from a single zone together in a clean bucket to create a composite sample. Remove any rocks, roots, or debris. Let the soil air dry before packaging it according to your local extension office’s instructions.
- Submit and Schedule: Submit your samples several weeks before you plan to plant or fertilize. This allows ample time to receive the results and apply any recommended amendments, like lime or specific nutrients, so they can integrate into the soil.
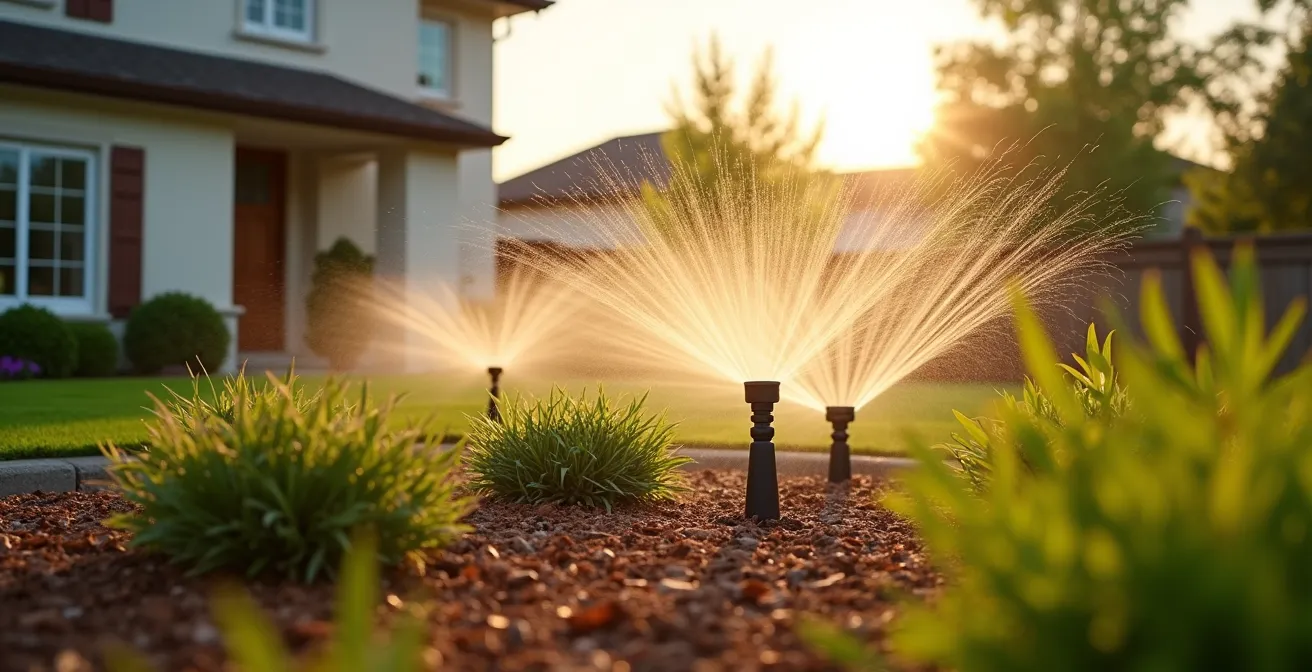
How to Program Your Sprinkler System to Save 30% on Water Bills?
An irrigation system on a fixed timer is not an automated system; it’s a dumb machine. It waters the same amount whether it’s 95 degrees and sunny or 65 degrees and has just rained. This inefficiency is costly for both your wallet and the environment. The key to true automation is upgrading to a smart controller that uses real-time data to make decisions for you. This is the next phase in building your self-sustaining landscape system.
Smart irrigation controllers, particularly those with the WaterSense label, connect to local weather stations via Wi-Fi. They automatically adjust your watering schedule based on rainfall, temperature, and humidity. This simple upgrade moves you from a reactive chore (manually turning off sprinklers when it rains) to a proactive, automated process. According to the EPA, a WaterSense labeled irrigation controller can save an average home nearly 15,000 gallons of water annually.
The difference between a traditional timer and a smart controller represents a fundamental shift in landscape management. Instead of applying a blanket solution, you’re delivering precisely what your landscape needs, when it needs it. This not only saves a significant amount of water but also promotes deeper root growth and healthier, more resilient plants that require less intervention overall.
The following table from the EPA breaks down the systemic advantages of upgrading your irrigation brain.
| Feature | Traditional Timer | WaterSense Smart Controller |
|---|---|---|
| Water Savings | 0% (Baseline) | 7,600 gallons/year (average) |
| Weather Adjustment | Manual only | Automatic using local weather data |
| Cost Savings | Baseline | Can contribute to $2.5 billion in national savings if all homes upgraded |
Bark or Gravel: Which Mulch Prevents Weeds Better in Windy Areas?
Mulch is a cornerstone of any low-maintenance landscape system, serving to suppress weeds, retain soil moisture, and regulate temperature. However, choosing the wrong type of mulch for your environment can create more work, not less. In windy areas, lightweight organic mulches like bark nuggets or pine straw often blow away, leaving soil exposed and requiring constant replacement. The strategic choice is to select a material that stays put.
For windy, open areas, inorganic mulches like pea gravel or river rocks are the superior long-term solution. Their weight prevents them from being displaced by wind, creating a permanent, one-and-done weed barrier. While the upfront material and installation cost is higher, this investment eliminates the annual chore of replenishing organic mulch. For a more budget-conscious or naturalistic look, finely shredded hardwood mulch is the best organic option. Unlike larger nuggets, its fine texture allows the pieces to interlock and mat together, forming a more wind-resistant blanket.
Your mulch strategy should be zoned, just like your irrigation. Use heavier, inorganic materials in high-wind channels and exposed fronts. In more protected areas or around acid-loving plants, you can use shredded hardwood to gain the benefit of organic matter breaking down into the soil over time. This systematic approach ensures your mulch layer is a durable, effective part of your landscape, not a recurring maintenance headache.

As this image shows, the texture difference is key. The interlocking nature of shredded hardwood on the left contrasts with the solid, immovable quality of gravel on the right. Your choice depends on balancing aesthetics with the specific environmental pressures of your property.
The Pruning Mistake That Kills Hydrangea Blooms for the Entire Season
Pruning is an area where one small mistake, made in just a few minutes, can erase an entire season of beauty. Many homeowners, in an effort to be tidy, prune all their shrubs at the same time in late winter or early spring. This is a critical error for certain plants, like many popular hydrangea varieties. Understanding the “when” of pruning is a perfect example of how a little knowledge provides massive strategic leverage in your maintenance system.
The mistake lies in not knowing whether your shrub blooms on “old wood” or “new wood.” Plants that bloom on old wood, like Bigleaf (mophead) and Oakleaf hydrangeas, form their flower buds for the next year during the late summer and early fall of the current year. If you prune these shrubs back in the fall or following spring, you are cutting off all of the buds that would have become flowers. The correct time to prune these types is right after they finish blooming in mid-summer, before the new buds are set.
Conversely, shrubs that bloom on new wood, like Panicle and Smooth hydrangeas, produce their flower buds on the growth of the current season. These are resilient and can be pruned back in late winter or early spring to encourage vigorous new growth and abundant flowers. Knowing this distinction turns pruning from a risky guess into a scheduled, predictable task in your annual maintenance plan.
| Old Wood Bloomers (Prune After Flowering) | New Wood Bloomers (Prune in Early Spring) | Reblooming Types (Minimal Pruning) |
|---|---|---|
| Bigleaf hydrangeas (mophead) | Panicle hydrangeas (‘Limelight’) | Newer bigleaf varieties (‘Endless Summer’) |
| Oakleaf hydrangeas | Smooth hydrangeas (‘Annabelle’) | Mountain hydrangea cultivars |
| Climbing hydrangeas | — | — |
When to Aerate Your Lawn: The Critical Window for Root Health
For many homeowners, the lawn is the single largest and most demanding part of the landscape. A common frustration is a lawn that looks thin, patchy, or stressed despite regular watering and fertilizing. The culprit is often a problem you can’t see: soil compaction. Over time, foot traffic and mowing compact the soil, squeezing out air pockets and preventing water and nutrients from reaching the grass roots. Aeration is the solution, but timing is everything.
Aerating at the wrong time of year can stress your lawn and invite weeds. The critical window for aeration is during your grass type’s peak growing season. For cool-season grasses (like Fescue, Ryegrass, and Bluegrass), this is in the early fall. For warm-season grasses (like Bermuda, Zoysia, and St. Augustine), this is in the late spring or early summer. Performing core aeration during these windows allows the grass to recover quickly and take full advantage of the increased access to air, water, and nutrients.
Not sure if your lawn needs it? Use the “Screwdriver Test”: simply try to push a screwdriver into moist lawn soil. If you can’t easily push it 4-6 inches deep, your soil is compacted and your lawn will benefit from aeration. Furthermore, you can maximize your effort by “task stacking.” Research shows that when you aerate, overseed, and fertilize in the correct sequence, you can achieve up to 30% better results than by doing these tasks separately. This is the essence of an efficient system: timing actions for a synergistic effect that produces a healthier lawn with less overall work.
How to Create a Biodiverse Garden That Is Both Beautiful and Ecologically Functional?
A truly low-maintenance garden is one that starts to manage itself. This concept, known as ecological automation, is achieved by fostering biodiversity. Instead of a sterile monoculture of a few plant types, a biodiverse garden is a bustling ecosystem of native plants, beneficial insects, pollinators, and healthy soil microbes. This system creates its own pest control, reduces the need for fertilizer, and builds resilience against disease and drought.
The foundation of this system is choosing native plants. These are plants that have evolved for millennia in your specific climate and soil conditions. Because they are perfectly adapted, they are inherently low-maintenance. They often don’t need extra fertilizing or watering once established, and they provide the exact food and habitat required by local pollinators and beneficial insects like ladybugs and lacewings, which in turn prey on pests like aphids.

This approach transforms your garden from a passive space that requires constant input into an active, living system. By planting a layered mix of native grasses, flowers like yarrow and dill, and shrubs, you create a self-regulating community. This is the ultimate form of strategic leverage: designing a garden that works *for* you, reducing your workload while increasing its ecological and aesthetic value.
How to Design a Solar Landscape Lighting Scheme That Stays Bright All Night?
Solar lighting is a fantastic low-effort way to add beauty and security to your landscape, but many homeowners are disappointed by lights that are dim or die before midnight. This failure is rarely due to the quality of the light itself, but rather a lack of strategic planning in its placement. A successful solar lighting scheme that lasts all night depends on one thing: maximizing the charging efficiency of the solar panel.
The key is to perform a simple sun exposure audit before you install a single light. Don’t just place lights where you think they look good; place their panels where the sun works the hardest. Most solar panels need at least 6-8 hours of direct, unfiltered sunlight to achieve a full charge. This means you need to observe your yard throughout the day to map out the “full sun” zones, paying close attention to shadows cast by your house, trees, and fences, which will change with the seasons.
Once your lights are installed, the system requires one small, scheduled maintenance task that yields a huge return: cleaning the panels. A simple wipe-down once a month to remove dust, pollen, and water spots can dramatically improve performance. According to some garden experts, a clean panel can result in a 30% increase in output, which directly translates to brighter, longer-lasting light. This small, scheduled task ensures your lighting system performs reliably all year round.
Action Plan: Solar Light Placement Audit
- Map Sun Exposure: On a sunny day, sketch your yard and mark the areas that receive full, direct sun at 9 AM, 12 PM, and 3 PM.
- Identify Prime Zones: Locate the zones that are in direct sun for all three observations. These are your 6+ hour zones, ideal for panel placement.
- Consider Winter Angles: Remember that in winter, the sun is lower in the sky and shadows are longer. A spot that’s sunny in summer might be shaded in winter. Plan for the worst-case scenario.
- Test Before Installing: Place the lights in your chosen spots for a few days to test their performance before committing to a permanent installation.
- Schedule Monthly Cleaning: Add a recurring reminder to your calendar to wipe the solar panels clean to maintain peak charging efficiency.
Key Takeaways
- Adopt a “system mindset” by focusing on strategic, one-time decisions that eliminate recurring chores.
- Always diagnose before you treat. Use tools like soil tests and sun audits to apply resources efficiently.
- Leverage automation, both technological (smart sprinklers) and ecological (biodiversity), to create a landscape that manages itself.
How to Strategically Increase Property Value With Low-Cost Cosmetic Updates?
A well-maintained landscape is not just a source of personal pride; it’s a financial asset that directly impacts your home’s curb appeal and market value. However, you don’t need to spend a fortune to see a return. The key is to apply the 80/20 rule: focus 80% of your effort on the 20% of your landscape that creates the most visual impact. This is the final layer of your maintenance system—ensuring your efforts translate into tangible value.
The most critical zone is the “curb-to-door” path. This is the first impression for visitors and potential buyers. Instead of spreading your budget across the entire property, concentrate on creating a clean, crisp, and welcoming entryway. One of the highest-impact, lowest-effort investments is installing permanent edging made of steel, stone, or brick. While it’s an upfront cost, it creates a sharp, permanent line between your lawn and garden beds, eliminating the endless weekly chore of re-edging and instantly making the entire landscape look more professional and cared-for.
Other high-impact, low-cost updates include applying a fresh coat of paint to shutters, fences, and the front door, and performing strategic pruning to open up views and showcase your home’s architecture. It’s about focusing on cosmetic finishes that signal to the world that this is a well-managed property. Considering that studies show the average American spends more than $600 a year on landscaping, directing that budget toward permanent, high-visibility improvements provides a far greater return than simply paying for recurring maintenance.
By implementing these scheduled, systematic strategies, you transform your relationship with your yard. You move from being a reactive laborer to a proactive manager, creating a beautiful, valuable landscape that serves your lifestyle instead of consuming it. The next logical step is to draft your own annual maintenance schedule based on these principles.