
In summary:
- Kitesurfing success relies on understanding technique and finesse, not brute physical strength.
- Your safety is paramount. Always verify an instructor’s IKO Level 2 (or higher) certification for water lessons.
- The vast majority of accidents happen during the launch; mastering a clear, step-by-step safety protocol is non-negotiable.
- Learning to read wind and water signs proactively is a core skill that separates safe riders from reckless ones.
The image is iconic: a rider, suspended between the power of the wind and the pull of the ocean, carving across the water. For any adrenaline seeker, the call of kitesurfing is powerful. You see the freedom, the speed, the thrill, and you think, “I can do that.” If you have a background in fitness, you might even feel overconfident. But the truth is, kitesurfing doesn’t reward the assumptions you bring from the gym or other sports. It’s a sport of intelligence and respect for invisible forces, not one of brute strength.
Many beginners believe that strong arms and a six-pack are the keys to controlling the kite. They focus on the board and the waves, underestimating the real engine of the sport: the wind. This fundamental misunderstanding is where the danger lies. The most common and severe accidents aren’t caused by big waves, but by a simple lack of understanding of how to manage the kite’s power, especially during the critical first few seconds of launching. True mastery isn’t about fighting the kite; it’s about learning to dance with it.
This guide is built from an instructor’s perspective to re-frame your approach. We’ll dismantle the myth that gym fitness is enough, show you exactly how to vet the person you’re trusting with your safety, and pinpoint the specific moments and decisions that truly matter. We will move beyond generic advice and give you a clear, actionable framework for learning to manage the invisible forces of wind and water, ensuring your journey into this incredible sport is as safe as it is exhilarating.
For those who prefer a visual format, the following video provides a great overview of a beginner’s progression in kitesurfing, perfectly complementing the safety principles we will detail below.
To give you a clear path through this essential knowledge, this article is structured to build your understanding from the ground up. We’ll cover your physical preparation, choosing your guide, your equipment, and the critical skills you need on the beach and on the water, before looking at how to maintain your athletic readiness for this and other adventures.
Summary: How to Start Kitesurfing Safely Without Prior Experience
- Why Your Gym Abs Won’t Save You From Back Pain on the Water?
- How to Verify an Instructor’s Certification Before Booking Lessons?
- Rent or Buy: When Does It Make Sense to Purchase Your Own Wetsuit?
- The Launching Mistake That Causes 80% of Kitesurfing Accidents
- How to Read Water Surface Signs to Predict Gusts Before They Hit?
- How to Prepare for High-Altitude Trekking to Prevent Acute Mountain Sickness?
- How to Implement Zone 2 Training to Improve Heart Health Without Burnout?
- How to Engineer a Home Office Setup That Prevents Physical Pain and Video Fatigue?
Why Your Gym Abs Won’t Save You From Back Pain on the Water?
The most common misconception beginners have is that kitesurfing requires immense upper body and arm strength. They see riders holding onto a powerful kite and assume it’s a battle of muscle. In reality, your arms should be relaxed; they are simply there to steer. The real work is done by your harness, which transfers the kite’s power directly to your core. But we’re not talking about the superficial “six-pack” muscles you build with crunches. We’re talking about core intelligence: the deep stabilizing muscles like the transverse abdominis and obliques.
These are the muscles that create a rigid, stable frame, allowing you to channel the kite’s pull through your body, down into your legs, and into the board’s edge. Without this specific type of strength, your body will compensate by arching your back, leading to immediate strain, back pain, and a complete loss of control. It’s a game of leverage and posture, not a tug-of-war. Your goal is to become a solid conduit for power, not a source of resistance.
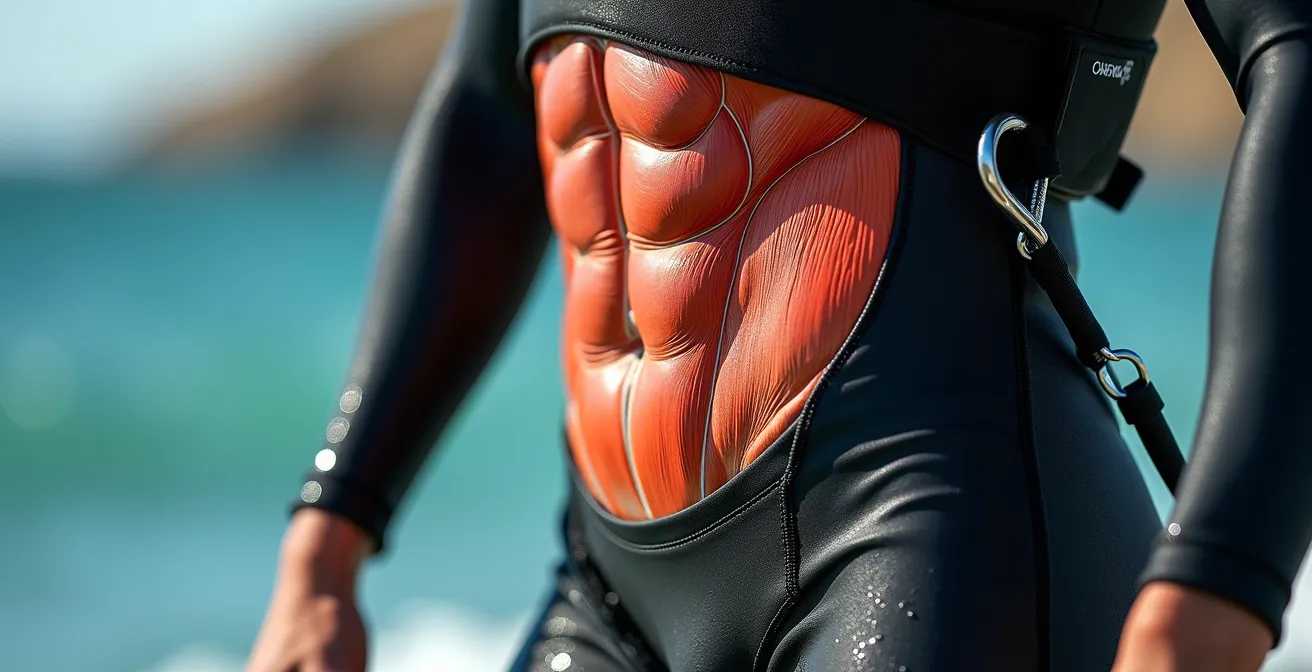
As this image highlights, the tension is focused deep within the midsection, creating a powerful connection between the harness and the lower body. Think of your core less like armor and more like a sophisticated suspension system. Exercises like planks, bird-dog, and dead bugs are far more valuable for kitesurfing than hundreds of sit-ups because they train this deep, stabilizing postural endurance. Building this core intelligence is your first step to preventing injury and learning efficiently.
How to Verify an Instructor’s Certification Before Booking Lessons?
Choosing your instructor is the single most important safety decision you will make. A great instructor doesn’t just teach you the moves; they build your safety instincts and your understanding of the “invisible forces” at play. A bad one can put you in a dangerous situation on day one. Therefore, verifying their credentials is not optional, it’s essential. The global benchmark for certification is the International Kiteboarding Organization (IKO), which provides a structured training system and certifies instructors in over 60+ countries around the world.
Do not be shy about asking for proof of certification. A professional instructor will be proud to show you. When checking, you need to look for two key things: their level and its validity. A “Level 1” instructor is only certified for land-based discovery lessons. For any lessons that involve entering the water and attempting a water start, you must insist on an instructor with a minimum IKO Level 2 certification. Their certification must also be current, as it requires annual renewal to ensure they are up-to-date with safety standards.
To be absolutely sure, follow these steps before you pay for a single lesson:
- Go to the official IKO website and use their “Find an Instructor” search tool.
- Verify their name and certification level. Look for “Level 2,” “Level 3,” or “Coach.”
- Check the expiration date on their public profile to ensure it is current.
- Ask for their IKO number and cross-reference it with the online database.
- When you meet them, ask to see their physical certification card and confirm the photo matches.
The differences between certification levels are significant and directly impact the quality and safety of your lesson. This table breaks down what each level is authorized to teach.
| Level | Teaching Authorization | Suitable for Beginners? |
|---|---|---|
| Assistant | Beach assistance only | No |
| Level 1 | Discovery lessons (land-based) | Limited |
| Level 2 | Full water lessons | Yes – Recommended |
| Level 3 | Advanced techniques | Yes – Excellent |
Rent or Buy: When Does It Make Sense to Purchase Your Own Wetsuit?
As you start your lessons, one of the first gear questions you’ll face is whether to use the school’s rental wetsuit or buy your own. For your first one or two lessons, renting is perfectly fine. It allows you to experience the sport without a major financial commitment. However, if you are serious about progressing, investing in your own well-fitting wetsuit early on provides a significant, often underestimated, advantage. The reason is simple: fit equals warmth and energy efficiency.
Rental wetsuits are often stretched out and ill-fitting. A loose suit constantly flushes with cold water, forcing your body to burn precious energy just to stay warm. This leads to fatigue, shorter sessions, and a loss of focus—all of which hinder your learning. A wetsuit that fits like a second skin minimizes water entry, keeping you warmer and more comfortable for much longer. This extended water time is crucial during the learning phase when repetition is key.
Case Study: The Impact of Wetsuit Ownership on Learner Progression
A 2024 analysis of kitesurfing students revealed a dramatic difference between those who rented and those who owned their wetsuits. The study showed that learners who purchased their own suit after just three lessons averaged 2.5 hours more water time per session. This was attributed to a properly fitting suit that, according to the analysis from a report on kitesurfing safety and progression, reduced the body’s energy expenditure on thermoregulation by up to 30%. Consequently, these students were able to practice more, stay focused longer, and completed their progression to independent riding 40% faster on average than their renting counterparts.
So, when does it make sense to buy? The tipping point is usually after your second or third lesson. By then, you’ll know if the sport is for you. At that stage, purchasing your own wetsuit is not a luxury; it’s an investment in faster, more efficient, and more enjoyable progression. You’ll spend less time shivering and more time riding.
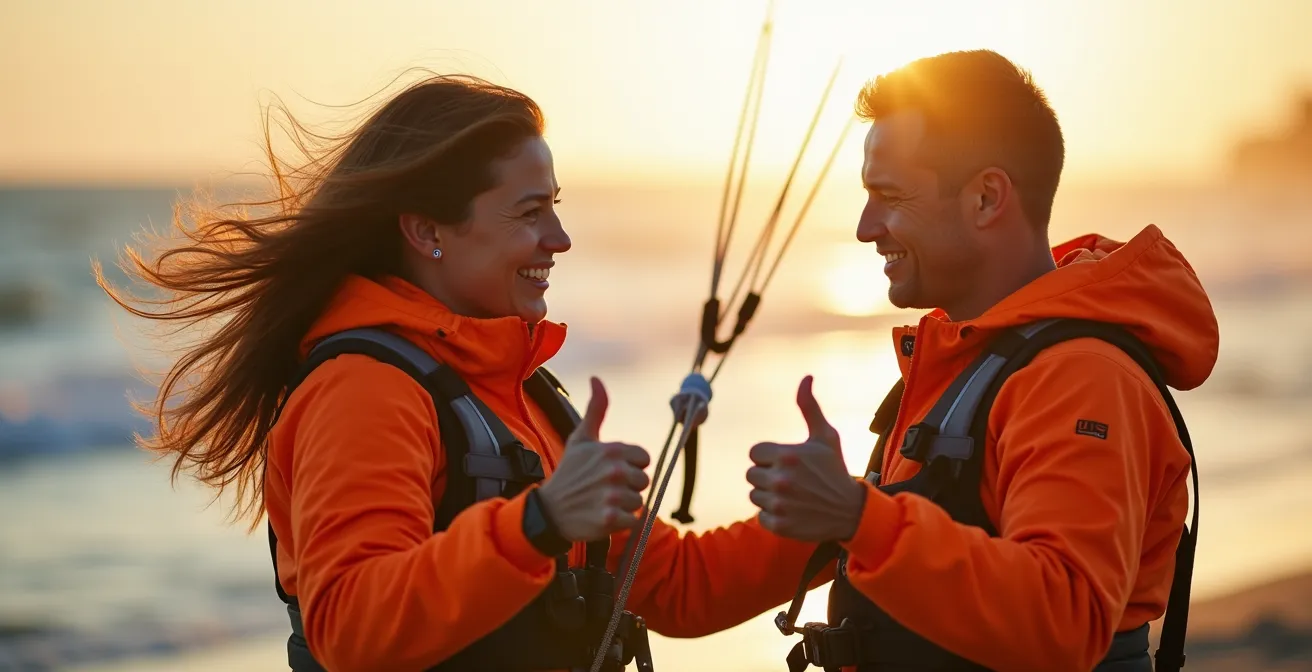
The Launching Mistake That Causes 80% of Kitesurfing Accidents
While kitesurfing can look extreme, its safety record has improved dramatically thanks to better gear and training. However, the vast majority of incidents still occur in one specific phase: launching the kite on the beach. In fact, comprehensive research indicates that over 82% of kitesurfing accidents can be attributed to operator error, with a huge portion of those errors happening during launch. The single most dangerous mistake is a failure in communication and positioning between the rider and their assistant.
A common scenario involves the assistant letting go of the kite before the rider is ready or when the kite is in the “power zone”—the area of the sky where it generates maximum pull. This can happen due to a misunderstood signal, a sudden gust of wind, or simply a lack of a clear, agreed-upon procedure. The result can be the rider being dragged uncontrollably across the beach towards obstacles. Proper launching is a precise, two-person drill that demands absolute clarity and discipline from both parties.
The correct procedure, as shown above, involves clear, unambiguous visual signals and precise positioning. The kite should always be at the edge of the wind window (9 or 3 o’clock), where it has minimal power. The rider must give a clear “thumbs up” signal only when their lines are clear, their safety systems are engaged, and the downwind path is completely free of people or hazards. The assistant should only release the kite after receiving this explicit signal and confirming they have eye contact. This disciplined sequence is the core of your “system integrity.”
Your Pre-Launch Safety Protocol
- Lines Clear: Visually trace all lines from your bar to the kite, ensuring there are no twists, knots, or tangles that could affect control.
- Leash Engaged: Physically confirm your safety leash is securely attached to your harness and that the quick-release mechanism is accessible and unobstructed.
- Path Clear: Perform a full 180-degree scan of the 100-meter downwind “hot zone.” Identify all people, obstacles, and hard surfaces. If it’s not clear, don’t launch.
- Wind Check: Feel the wind on your face and neck to confirm its direction. Verify your kite is positioned at the very edge of the wind window, not drifting into the power zone.
- Communication Confirmed: Establish clear, simple visual signals (like “thumbs up” for launch) with your assistant. Do not proceed until you have made eye contact and received a confirming nod.
How to Read Water Surface Signs to Predict Gusts Before They Hit?
Once you are safely on the water, your next challenge is learning to manage the invisible force of the wind. The wind is rarely perfectly consistent; it comes with lulls and, more importantly, gusts. A sudden, powerful gust can overpower an unprepared rider, leading to a loss of control or being lifted unexpectedly. The key to managing this is to move from a reactive to a proactive mindset. You must learn to “see” the wind on the water’s surface before it hits you.
Experienced riders are constantly scanning upwind, looking for tell-tale signs. The most obvious indicator of an approaching gust is a patch of dark, textured water moving towards you. These are often called “cat’s paws”—dark ripples that look like a disturbance on an otherwise glassy surface. This darkness indicates that the wind is pressing down harder on the water, revealing its strength and direction. Seeing these dark patches is your 5-to-10-second warning to prepare.
Study on Wind Pattern Recognition
The ability to read these signs is a proven, life-saving skill. A recent study published in a disaster and emergency medicine journal analyzed professional kitesurfers’ response to wind changes. It found they demonstrated 85% accuracy in predicting gust intensity by observing water surface changes several seconds before impact. When they spotted dark “cat’s paws” moving quickly, they knew a gust 30-50% stronger than the ambient wind was imminent. By automatically sheeting out (pushing the bar away) upon this visual cue, they successfully neutralized 90% of potentially overpowering incidents.
Your response to seeing a gust should become an automatic reflex. Don’t wait until you feel the pull. The moment you see the dark water approaching, execute this drill:
- Sheet Out: Immediately push the control bar all the way out, away from your body. This is your primary depower mechanism.
- Edge Hard: Dig the heel-side edge of your board firmly into the water, pointing the board further upwind. This acts as your brake.
- Body Low: Lean back and get your center of gravity as low as possible, keeping your arms extended.
This sequence allows you to absorb the gust’s energy with control rather than being pulled by it. It’s a critical skill that turns a potentially dangerous situation into a manageable moment.
How to Prepare for High-Altitude Trekking to Prevent Acute Mountain Sickness?
As an adrenaline seeker, your adventures may not stop at the coastline. Kitesurfing often takes you to incredible, remote locations, some of which are at high altitudes, like Lake Titicaca in Peru or mountain lakes in the Alps. In these environments, your biggest physical challenge isn’t just the wind and water; it’s the lack of oxygen. Failing to prepare for this can lead to Acute Mountain Sickness (AMS), a condition with symptoms ranging from headaches and nausea to life-threatening complications. Preparing for altitude is just as critical as preparing for the water.
The golden rule of high-altitude preparation is acclimatization. Your body needs time to adapt to the lower oxygen levels. This means you cannot fly into a high-altitude location and expect to perform at your peak the next day. A common and safe strategy is to ascend gradually, allowing for rest days. The general guideline is “climb high, sleep low.” Plan your itinerary so that you spend at least one or two nights at an intermediate altitude (e.g., 2,500 meters or 8,000 feet) before proceeding higher.
During acclimatization, two other factors are crucial: hydration and exertion. The dry air at altitude dehydrates you much faster, and dehydration can mimic and worsen the symptoms of AMS. You must consciously drink significantly more water than you would at sea level. Secondly, keep your initial activity light. Don’t plan a strenuous trek or an intense kitesurfing session on your first day. A gentle walk is far more beneficial. Some travelers also consult their doctor about preventative medication like Acetazolamide (Diamox), which can help speed up the acclimatization process. Approaching altitude with the same respect and patience you give the ocean is key to a successful and healthy adventure.
How to Implement Zone 2 Training to Improve Heart Health Without Burnout?
To excel in kitesurfing—or any demanding sport—you need a powerful engine. Many athletes focus on high-intensity interval training (HIIT), but this often leads to burnout and neglects a critical component of endurance: the aerobic base. This is where Zone 2 training comes in. It’s a low-intensity training method that is arguably the most effective way to improve your heart health, endurance, and metabolic efficiency without stressing your body.
Zone 2 corresponds to a heart rate that is roughly 60-70% of your maximum. It’s a level of exertion where you can comfortably hold a conversation. It might feel “too easy,” but at this intensity, magical things are happening inside your cells. You are training your body to become more efficient at using fat for fuel instead of relying solely on carbohydrates. This develops your mitochondria—the powerhouses of your cells—making them more numerous and efficient. For a kitesurfer, this translates directly into the ability to stay on the water for hours without “bonking” or feeling completely drained.
Implementing Zone 2 is simple. First, estimate your Zone 2 heart rate range. A common formula is `(180 – your age)`. This gives you a rough upper limit. For example, a 30-year-old would aim for a heart rate around 150 bpm or slightly below. The key is consistency. Aim for at least two to three Zone 2 sessions per week, each lasting 45 to 60 minutes. The type of activity doesn’t matter as much as the heart rate—it could be a light jog, a bike ride, or even a brisk walk on an incline. By building this deep aerobic base, your high-intensity performance will improve naturally, and your ability to recover between sessions will skyrocket. It’s the foundation upon which all other fitness is built.
Key Takeaways for Aspiring Kitesurfers
- True kite control comes from “core intelligence” and proper posture, not brute arm strength.
- Your safety hinges on your instructor. Verifying their IKO Level 2 (or higher) certification is a non-negotiable step before any water lesson.
- The kite launch is the most dangerous moment. Mastering a clear, step-by-step communication and safety protocol prevents the vast majority of accidents.
How to Engineer a Home Office Setup That Prevents Physical Pain and Video Fatigue?
An athlete’s performance is determined as much by their recovery as by their training. For the modern adrenaline seeker, who often balances work with play, the biggest threat to recovery isn’t on the water—it’s at their desk. A poorly designed home office setup can lead to chronic neck pain, back strain, and eye fatigue, all of which will sabotage your physical readiness for a demanding sport like kitesurfing. Engineering an ergonomic workspace is a crucial part of your overall athletic strategy.
The core principle of office ergonomics is achieving a neutral posture. Your screen should be positioned so that the top of it is at or slightly below eye level, preventing you from hunching your neck. Use a monitor stand or a stack of books to achieve this. Your keyboard and mouse should be placed so that your forearms are parallel to the floor, with your elbows at roughly a 90-degree angle. This prevents wrist and shoulder strain. Most importantly, your chair must support the natural curve of your lower back. If it doesn’t, a simple lumbar support pillow can make a world of difference.
To combat video fatigue, apply the 20-20-20 rule: every 20 minutes, look at something 20 feet away for 20 seconds. This simple habit relaxes your eye muscles and prevents digital eye strain. Also, ensure your lighting is adequate and doesn’t create glare on your screen. Your performance on the kite is a direct reflection of your body’s condition. Arriving at the beach already sore and fatigued from a week of poor posture is a recipe for injury. Treating your workspace with the same attention to detail as you treat your sports gear is an investment in your longevity as an athlete.
By embracing a mindset of respect for the elements, prioritizing certified instruction, and building a foundation of specific physical preparedness, you can safely unlock the incredible freedom of kitesurfing. The next logical step is to find a certified school in your area and book your first lesson. Begin your journey the right way, and you’ll be riding safely for years to come.