In summary:
- Successful EV ownership in an apartment requires building a personal charging ecosystem, not relying on a single plug.
- Prioritizing your battery’s health by limiting daily fast charging is crucial for long-term range and value.
- Mastering public charging etiquette and using digital tools turns a potential frustration into a manageable routine.
- A Plug-in Hybrid (PHEV) can be a strategic bridge to full EV ownership if charging access is highly uncertain.
- Anticipating real-world challenges like winter range loss and having a redundant digital toolkit are non-negotiable.
The dream of gliding silently past gas stations in a new electric vehicle often hits a hard wall: the apartment building parking lot. For the growing number of city residents eager to make the switch, the lack of a private garage feels like a dealbreaker. The common advice you hear— »just use public chargers » or « ask your landlord to install one »—oversimplifies a complex reality of high costs, logistical hurdles, and daily frustrations.
But what if the solution isn’t about finding one perfect plug? What if, instead, it’s about developing a strategic mindset? Transitioning to an EV as an apartment dweller is less about your parking spot and more about creating a personal, resilient charging ecosystem. This approach means understanding the trade-offs of different charging methods, mastering the digital tools at your disposal, and implementing smart habits that protect your most valuable asset: the battery.
This guide moves beyond the obvious to give you the operational playbook you need. We will dismantle the myths around fast charging, provide concrete tactics for navigating the world of public stations, and explore how to make intelligent choices—from the type of vehicle you buy to the apps you use—that make EV ownership not just possible, but practical and empowering, even without a dedicated home charger.
This article provides a comprehensive roadmap for prospective EV owners living in apartments. Below, you will find a detailed breakdown of the key strategies and considerations, from battery science to navigating public infrastructure, designed to equip you for a successful transition.
Summary: Your Strategic Guide to Apartment EV Ownership
- Why Fast Charging Every Day Degrades Your Battery Life by 10%?
- How to Use Public Chargers Without Getting Fined for Loitering?
- Plug-in Hybrid or Full EV: Which Is More Practical for Apartment Dwellers?
- The Winter Range Surprise That Strands New EV Drivers
- How to Charge Only to 80% to Save Time and Money on Road Trips?
- How to Prioritize Energy Efficiency Renovations for Maximum Bill Reduction?
- How to Design a Solar Landscape Lighting Scheme That Stays Bright All Night?
- How to Build a Stable IoT Ecosystem That Doesn’t Crash When Wi-Fi Drops?
Why Fast Charging Every Day Degrades Your Battery Life by 10%?
The allure of a DC fast charger (DCFC) is undeniable: adding hundreds of miles of range in under an hour seems like the perfect solution for an apartment dweller. However, relying on this method for daily charging is a recipe for accelerated battery degradation. The core issue is heat. Fast charging forces a massive amount of energy into the battery, generating significant thermal stress on its chemical components. Over time, this repeated stress reduces the battery’s ability to hold a full charge, a phenomenon known as capacity loss.
Think of it as the difference between sipping water throughout the day versus chugging a gallon in one minute. The latter is more stressful on your system. For an EV battery, this stress is quantifiable. The 80% threshold is a critical pivot point. To protect the battery, its management system dramatically slows down the charging rate once it reaches this level. In fact, comprehensive research from Recurrent Auto demonstrates that charging speed can drop by 70% or more when going from 80% to 100%. This means the last 20% of a fast-charging session is not only the most time-consuming but also the most damaging.
Achieving battery sovereignty is about treating your battery like the valuable asset it is. The most effective strategy is the 80/20 rule: aim to use slower Level 2 charging (like at work or a grocery store) for 80% of your needs, and reserve DC fast charging for the 20% of situations where it’s truly necessary, like long road trips. This simple shift in mindset preserves your vehicle’s range and resale value, giving you more freedom and control within your charging ecosystem.
How to Use Public Chargers Without Getting Fined for Loitering?
For apartment dwellers, public chargers are an essential part of the EV ecosystem, but they come with their own set of rules and etiquette. The biggest risk is incurring « idle fees, » which are penalties charged by networks when your car remains plugged in after its charging session is complete. These fees are designed to prevent drivers from monopolizing stations, but they can be a source of major anxiety if you can’t get back to your car the second it’s done.
The solution is to reframe charging time from a waiting game into a productive activity. This is the concept of « Charge Tasking »: strategically pairing your charging sessions with other necessary errands. Choose charging stations located at grocery stores, gyms, or cafes where you already plan to spend an hour or two. This turns a chore into a seamless part of your weekly routine and eliminates the stress of watching the clock.

Beyond personal productivity, using community-focused tools is key. As demonstrated in one study, apps like PlugShare, which enable drivers to check in and communicate their charging status, have reduced wait times by up to 40% in dense urban areas. To avoid fees, create a multi-layer notification system: set the alert in the charging app, create a personal phone timer for 5 minutes before the session ends, and consider leaving a dashboard note with your phone number as a courtesy to other drivers. This proactive communication and planning transforms you from a potential rule-breaker into a responsible member of the EV community.
Plug-in Hybrid or Full EV: Which Is More Practical for Apartment Dwellers?
The decision between a full Battery Electric Vehicle (BEV) and a Plug-in Hybrid (PHEV) is one of the most critical for an apartment dweller. While the allure of a zero-emissions BEV is strong, a PHEV offers a pragmatic compromise that can significantly reduce charging anxiety. This is especially relevant when you consider that nearly one-third of Americans live in multifamily dwellings, where reliable charging remains a significant challenge.
A PHEV provides an electric range of typically 25-50 miles, which is often enough to cover a daily commute. This allows you to reap the benefits of electric driving for most of your routine trips, using a standard 120V wall outlet if available or occasional public charging. Crucially, the gasoline engine backup eliminates range anxiety for long trips or on days when you can’t find an available charger. This flexibility makes it an ideal bridge technology for those not yet ready to commit to a fully electric lifestyle due to infrastructure gaps.
In contrast, a BEV demands a more robust charging strategy. It’s the right choice if you have reliable charging at your workplace, a guaranteed public charger nearby that you can incorporate into your routine, or if your landlord is open to installation. While the operating and maintenance costs of a BEV are lower over time, the higher upfront purchase price and complete dependence on charging infrastructure are significant factors. The following table breaks down the key considerations:
| Factor | PHEV | BEV |
|---|---|---|
| Average Purchase Price | $41,995 | $58,940 |
| Operating Cost per Mile | ~8¢ (mixed use) | ~4¢ (home charging) |
| Annual Maintenance | $600-$1,000 | $300-$550 |
| Charging Infrastructure Dependence | Low – gas backup available | High – fully dependent |
| Typical Electric Range | 25-50 miles | 250-350 miles |
| Ideal for Apartment Dwellers If: | Limited charging access, frequent long trips | Reliable workplace or nearby public charging |
Ultimately, the choice depends on an honest assessment of your driving habits and the charging infrastructure available to you. A PHEV provides a safety net, while a BEV offers the full electric experience for those who can build a reliable charging ecosystem.
The Winter Range Surprise That Strands New EV Drivers
One of the harshest realities for new EV owners, especially those in colder climates, is the « winter range surprise. » It’s common for an EV to lose 30-40% of its advertised range when temperatures drop below freezing. This isn’t a defect; it’s physics. Cold temperatures slow down the chemical reactions inside the battery, reducing its efficiency. Furthermore, a significant portion of the battery’s energy must be diverted to heating the cabin and the battery pack itself, energy that would otherwise be used for propulsion.
For an apartment dweller who can’t plug in overnight to precondition, this can be a serious problem. You might leave your parking spot with what you thought was 150 miles of range, only to find it’s closer to 90. This discrepancy can easily turn a routine commute into a stressful search for an emergency charger. Understanding and anticipating this is a cornerstone of a resilient charging strategy.

The key to mitigating winter range loss is proactive energy management. If you have access to any charger (even a standard outlet at work or a public Level 2), use it to precondition the cabin and battery 10-15 minutes before you depart. This draws power from the grid, not your battery, to get the systems to their optimal operating temperature. Additionally, relying on heated seats and a heated steering wheel is far more energy-efficient than blasting the cabin heater. Small habits, like clearing all snow and ice to improve aerodynamics, can collectively save precious range.
Your Action Plan: Winter EV Efficiency Checklist for Apartment Dwellers
- Precondition cabin 10-15 minutes before departure while still connected to any available charger.
- Slightly overinflate tires within manufacturer specs to compensate for the pressure drop from the cold.
- Utilize Eco or Range driving modes to limit aggressive acceleration and moderate cabin heating.
- Clear all snow and ice from the vehicle to improve aerodynamics, which can save 5-10% of your range.
- When possible, park in covered or underground garages to protect the battery from extreme cold and reduce « vampire drain. »
- Prioritize using heated seats and steering wheel over the main cabin heater to conserve the most energy.
How to Charge Only to 80% to Save Time and Money on Road Trips?
While the 80% charging rule is vital for daily battery health, it becomes a powerful time-saving strategy on road trips. The instinct to charge to 100% at every stop is counterproductive. As we’ve established, charging an EV battery slows dramatically as it gets full. The time spent going from 80% to 100% at a DC fast charger can often be as long as the time it took to get from 20% to 80%. This final, slow trickle of energy is what creates long, frustrating charging stops.
The smarter approach is a strategy known as « Charger Leapfrogging. » Instead of one long stop to charge to 90% or more, you make two or more shorter stops, charging only to the 70-80% range needed to comfortably reach the next charger. You operate within the battery’s fastest charging window (typically 10-80%), minimizing your stationary time.
Case Study: The « Charger Leapfrogging » Strategy
A real-world test illustrates this perfectly. An analysis cited by GreenCars found that making two 25-minute charging stops to go from 20% to 70% each time was 20 minutes faster on a long trip than a single 70-minute stop to go from 10% to 90%. Drivers employing this leapfrogging method not only saved significant travel time but also reduced thermal stress on their batteries and often avoided higher per-minute pricing that some networks implement during peak demand.
To execute this strategy effectively, you need the right digital tools. Apps like A Better Route Planner (ABRP) are essential. You input your vehicle model, starting charge, and destination, and it automatically calculates the optimal charging stops, durations, and target charge levels to minimize total travel time. It understands your car’s specific charging curve and plans stops to keep you in that fast-charging sweet spot. This data-driven approach removes guesswork and turns road-tripping from a source of range anxiety into a simple, efficient process.
How to Prioritize Energy Efficiency Renovations for Maximum Bill Reduction?
For an apartment dweller, the most impactful « renovation » you can undertake isn’t to your unit, but to your building’s infrastructure—and your landlord’s mindset. While you can’t install insulation or new windows, you can spearhead the installation of EV charging stations, an upgrade that dramatically increases property value and tenant appeal. The key is to approach your landlord not with a request, but with a business case.
A successful pitch requires preparation. Don’t simply ask for a charger; present a solution. Start by researching all available federal, state, and local utility incentives for installing EV charging infrastructure. Many programs cover a significant portion of the hardware and installation costs, drastically reducing the financial burden on the property owner. Tools from charging network providers like ChargePoint often have incentive finders to simplify this research.
Next, demonstrate demand. The most powerful tool you have is social proof. Organize with other interested neighbors—even 3 or 4 tenants presenting a united front is far more compelling than a single request. Frame the installation as a competitive advantage in the rental market, a way to attract and retain high-quality tenants in an increasingly green-conscious world. You can even prepare a simple Return on Investment (ROI) calculation, showing how the cost (after incentives) can be recouped through a modest monthly charging fee or increased property value, often within a 2-4 year payback period. Bundling the request with other efficiency upgrades, like a switch to LED lighting in the garage, can make it even more attractive.
How to Design a Solar Landscape Lighting Scheme That Stays Bright All Night?
While installing a personal solar array on your apartment balcony isn’t feasible, the desire to power your EV with clean energy is still within reach. The modern solution lies in shifting your thinking from a personal « lighting scheme » to a collective energy strategy: community solar programs. This model is a game-changer for renters and apartment dwellers who want to tap into the benefits of solar without owning a roof.
Here’s how it works: you subscribe to a portion of a large, off-site solar farm located in your utility’s service area. You don’t own the panels, but you receive credits on your monthly electricity bill corresponding to the energy your share of the farm produces. This directly lowers your overall energy costs, including the portion used for charging your EV at public stations or, if you have one, a shared building charger. It’s a way to ensure the kilowatts you put into your car are offset by clean, renewable generation elsewhere.
Case Study: Community Solar for Apartment EV Owners
This model has proven highly effective. In states with robust programs like California, participants in community solar initiatives save an average of 10-15% on their electricity bills. This provides a direct, tangible reduction in EV charging expenses. For apartment dwellers, it’s the most practical way to link their clean transportation choices with a commitment to renewable energy, completing the sustainability loop that often feels broken by a lack of personal solar access.
You can also advocate for smaller-scale solar solutions within your complex. Proposing solar-powered pathway or security lighting for parking areas and near future charging stations can be framed as a safety and modernization enhancement. Suggesting solar canopies over parking spaces not only provides shade but also future-proofs the property for direct solar-to-EV charging. These ideas position you as a forward-thinking resident focused on improving the entire community, making them far more likely to be adopted.
Key takeaways
- EV ownership in an apartment is a system of strategies, not a search for a single plug.
- Your top priority is battery health: use the 80/20 rule, limiting daily fast charging to preserve range and value.
- Building digital redundancy with multiple apps and an offline RFID card is non-negotiable for reliable public charging.
- Anticipating real-world factors like winter range loss and planning accordingly separates successful owners from frustrated ones.
How to Build a Stable IoT Ecosystem That Doesn’t Crash When Wi-Fi Drops?
Your electric vehicle is the most sophisticated device in your personal Internet of Things (IoT) ecosystem. But unlike a smart speaker that loses its connection, a charging failure due to a dropped Wi-Fi or cellular signal can leave you stranded. For an apartment dweller totally dependent on public infrastructure, building a stable and redundant digital toolkit is not just a convenience; it’s a critical part of your charging strategy.
The first layer of this ecosystem is a multi-app approach. Do not rely on a single charging network’s app. Best practice involves using a combination: PlugShare for its invaluable community-sourced reviews and real-time station status, A Better Route Planner (ABRP) for optimizing long-distance travel, and the native apps of major networks like ChargePoint or Electrify America for initiating sessions. One study of urban EV drivers found that those using this multi-app strategy reported 35% fewer charging-related delays, as they could always find a backup if one network’s station was down or its app was failing.
However, the most crucial element for when all digital systems fail is the analog backup: the RFID card. Most major charging networks provide a physical, credit-card-sized card that can activate a charger by simply tapping it on the station’s reader. This works even when your phone has no service or the station’s own network connection is spotty. Keeping these cards in your glovebox is the ultimate failsafe, the equivalent of a spare tire for your digital charging life. Finally, practice good digital hygiene. Use virtual credit card numbers or services like Apple/Google Pay to protect your financial data and enable two-factor authentication on all your charging accounts.
Stop waiting for the perfect charging spot to appear. Start building your personal charging ecosystem today. Evaluate your daily commute, explore the apps and strategies we’ve discussed, and take the first step toward a confident and empowered electric future, right from your apartment.
Frequently Asked Questions about How to Transition to an Electric Vehicle When You Live in an Apartment?
What charging apps work offline at public stations?
Most major networks like ChargePoint and Electrify America offer RFID cards that work without a cellular connection. Keep these cards in your glovebox as a reliable backup for when apps or mobile connectivity fail at a charging station.
How can I protect my payment data at public chargers?
Use virtual credit card numbers, Apple/Google Pay, or other payment services that offer robust fraud protection. It’s also critical to enable two-factor authentication on all your charging network apps and use a secure password manager to protect your account credentials.
What IoT tools help apartment EV drivers manage charging?
A smart IoT strategy for an apartment EV driver includes: setting up IFTTT automations for charging alerts and reminders; using multiple charger-locator apps (like PlugShare and ChargeHub) for redundancy; leveraging your car’s built-in LTE for remote status checks; and maintaining offline maps of charging networks on your phone for emergencies in areas with no service.
Relying on your cloud provider’s security alone is a critical mistake that leaves your most precious files vulnerable to total loss from ransomware.
- True resilience comes from implementing client-side encryption *before* you upload any sensitive files.
- The core of this strategy is creating an isolated « Cold Cloud Vault » that is immune to the sync-based attacks that destroy typical backups.
Recommendation: Start immediately by classifying your data into ‘Hot’ for daily use and ‘Cold’ for irreplaceable archives, then set up your first encrypted, non-synced vault.
As a freelancer or a family historian, the thought of losing years of work, client records, or irreplaceable family photos is a constant, underlying fear. You have diligently moved your files to the cloud, believing they are safe. You’ve been told to use strong passwords and enable multi-factor authentication, and you have. Yet, a deep sense of vulnerability remains. This is because the conventional advice is dangerously incomplete.
The common understanding of cloud storage misses a fundamental threat: the very synchronization feature that makes it convenient is also its greatest weakness in the face of a ransomware attack. An infection on your computer can encrypt your local files, and your cloud service will dutifully sync these now-useless, encrypted versions, overwriting your clean copies. In an instant, your « backup » is gone.
The true path to securing your digital life is not about choosing a supposedly « unbreakable » provider. It is about fundamentally shifting your mindset. You must stop being a passive user of a service and become the active architect of your own data fortress. This requires building a deliberate, multi-layered system where you, not the provider, hold the ultimate keys. This strategy is built on the principles of controlled encryption, strategic separation of data, and intentional friction to stop automated threats in their tracks.
This guide will provide you with the exact framework to build this personal security system. We will dismantle common myths, provide concrete tools and methods for encryption, and lay out a step-by-step plan to structure your digital life for maximum resilience. Follow this blueprint, and you will move from a state of fear to one of control and confidence in your data’s safety.
Summary: A Practical Blueprint for Your Personal Cloud Security Fortress
- Why Having Files in the Cloud Is Not Enough to Guarantee Their Safety?
- How to Encrypt Your Tax Documents Before Uploading Them to the Cloud?
- Google Drive or Proton Drive: Which Respects Your Privacy More?
- The Syncing Mistake That Can Delete Files Across All Your Devices Instantly
- How to Structure Your Folder Hierarchy to Find Any Document in 30 Seconds?
- How to Automate Your Personal Admin to Spend Less Than 1 Hour a Month on Paperwork?
- How to Successfully Transition to a Digital Nomad Lifestyle Without Career Instability?
- How to Use Technology to Simplify Your Daily Routine Instead of Complicating It?
Why Having Files in the Cloud Is Not Enough to Guarantee Their Safety?
The primary misunderstanding about cloud storage is the belief that « in the cloud » means « safe. » While providers like Google, Dropbox, and Microsoft invest heavily in securing their infrastructure, their responsibility ends at their servers. Your responsibility begins with how you use the service and control access to your data. The threat landscape is relentless; research shows a ransomware attack occurs every 19 seconds, and cloud accounts are a prime target. This is not a failure of the cloud itself, but a failure to understand the Shared Responsibility Model.
Think of your cloud provider as the landlord of a high-security apartment building. They are responsible for the main gates, the building’s structural integrity, and the security guards in the lobby. However, they are not responsible for who you give a key to, whether you lock your front door, or what you keep inside your apartment safe. In the digital world, this translates to specific duties. The provider secures their servers and ensures platform uptime. Your responsibility is to manage access controls, maintain offline backups, and secure your data *before* it even reaches their servers.
Relying solely on the provider’s default security is a passive stance that exposes you to significant risk. If your account credentials are stolen or a synced device is compromised, the provider’s infrastructure security is irrelevant. The attacker is effectively walking through the front door with your key. Achieving true data sovereignty—the principle that you maintain ultimate control over your information—means accepting that you are the first and most important line of defense. The rest of this guide is dedicated to building that defense.
This shared model is not a weakness but an empowering reality. It clarifies that your active participation is not optional, but essential for robust data protection.
How to Encrypt Your Tax Documents Before Uploading Them to the Cloud?
The most powerful step you can take to enforce your data sovereignty is implementing client-side encryption. This means you encrypt your files on your own device *before* they are uploaded to any cloud service. Even if a provider’s servers are breached or an employee accesses your account, the files they find will be unreadable gibberish without your unique encryption key. This single practice neutralizes a vast array of threats, a lesson reinforced by attacks like the ‘Codefinger’ ransomware, which specifically targeted cloud storage buckets and made recovery impossible for those who had not encrypted their data beforehand.
To implement this, you do not need to be a cryptography expert. User-friendly tools like Cryptomator or Boxcryptor are designed for this exact purpose. They create a digital « vault » inside your existing cloud storage folder (like Dropbox or Google Drive). Any file you place into this vault is automatically encrypted on your computer before it is synced to the cloud. When you need to access the file, the software decrypts it on your device after you enter your password. The cloud provider only ever stores the encrypted version.
This strategy allows you to create secure, isolated containers for your most sensitive information, such as tax documents, legal contracts, or personal identification. You can even create decoy vaults to mislead an attacker, further protecting your critical archives.

As this visualization suggests, the goal is to treat your cloud storage not as an open drawer but as a secure deposit box for which only you hold the key. By encrypting data at the source, you transform a public-facing service into a private, secure extension of your personal hard drive. This proactive measure is the cornerstone of a truly resilient data protection strategy.
This method ensures that even if your cloud account is compromised, your most critical files remain shielded by a layer of security that you, and only you, control.
Google Drive or Proton Drive: Which Respects Your Privacy More?
Once you embrace client-side encryption, any cloud provider can be made secure. However, for maximum privacy and to minimize your data footprint, the choice of provider still matters. The key difference lies in their fundamental business models and privacy architecture, particularly the concept of zero-knowledge encryption. As a primary concern for individuals and businesses alike, it’s no surprise that 40% of organizations were targeted by cloud ransomware in a recent survey, making the provider’s native security posture critical.
A service like Google Drive is built for collaboration and convenience. It encrypts your data « at rest » on its servers and « in transit » between you and them, but Google holds the encryption keys. This is necessary for features like file content search, real-time collaboration, and account recovery. It also means that, under certain circumstances (like a legal warrant or a rogue employee), Google has the technical ability to access and decrypt your files. Conversely, a service like Proton Drive is built on a zero-knowledge or end-to-end encryption model. This means your files are encrypted on your device with a key that Proton itself does not possess. They cannot decrypt your data, even if they wanted to. This offers superior privacy but comes with trade-offs, such as more limited collaboration features and the fact that losing your password means permanent loss of access to your data.
The following table breaks down the essential differences to help you make an informed decision based on your specific needs for different types of data.
| Feature | Google Drive | Proton Drive |
|---|---|---|
| Zero-Knowledge Encryption | No – Google can access files for features | Yes – Even Proton cannot decrypt your files |
| Default Encryption | AES 128-bit in transit, AES 256-bit at rest | AES 256-bit end-to-end |
| Password Recovery | Yes – Through account recovery | No – Lost password means permanent data loss |
| Collaboration Features | Extensive – Real-time editing, comments | Limited – Secure sharing only |
| Best For | Hot data, daily collaboration | Cold data, sensitive documents |
A robust strategy often involves using both: a convenient service like Google Drive for active, less sensitive work, and a zero-knowledge service like Proton Drive for the long-term archival of critical documents.
The Syncing Mistake That Can Delete Files Across All Your Devices Instantly
The most insidious threat to your cloud-stored data is not an external hacker but the service’s own core functionality: synchronization. We call this « The Sync Trap. » When ransomware strikes your computer, it doesn’t steal your files; it encrypts them, making them unusable. Your cloud client, performing its designated function, sees these changed (encrypted) files and immediately syncs them to the cloud, overwriting your previous clean versions. In minutes, your entire cloud backup can be rendered worthless, a perfect mirror of the disaster on your local machine.
Most cloud services offer a « version history » feature that allows you to restore previous file versions, but this is a fragile safety net. A study found that while 56% of companies successfully restored files from backups after an attack, this often relies on rapid detection. Many standard version history policies only last for 30 days, which may not be enough if an infection goes unnoticed. The only foolproof way to escape the Sync Trap is to create a backup that is physically and logically isolated from the sync process.
This is the principle behind the « Cold Cloud Vault. » It is a separate cloud storage account, preferably with a different provider, that you *never* sync. You only interact with it manually through a web browser to upload critical archives. By introducing this intentional friction—the manual upload process—you create an « air gap » that a ransomware infection cannot cross automatically. An attack on your primary machine and its synced cloud accounts will have no effect on this isolated vault. This is not just a backup; it is a resilient, long-term archive for your most irreplaceable data.
Action Plan: Setting Up Your Cold Cloud Vault
- Secure a Foundation: Create a new account on a separate cloud provider from your primary one (e.g., if you use Google Drive, use pCloud or a zero-knowledge service for your vault).
- Break the Sync Chain: Never install any desktop sync client or mobile app for this vault account. Access it exclusively through a web browser, ideally in a private/incognito window to minimize tracking.
- Manual Archiving: Once a month or quarter, manually upload a compressed and encrypted archive (.zip or .7z) of your most critical files (the ‘Cold’ data from the next section). If available, enable immutable storage (WORM) features.
- Isolate Access: Secure this account with a unique, strong password and a separate Two-Factor Authentication (2FA) method from your main accounts. Do not use the same authenticator app or phone number.
- Validate Your Escape Route: On a quarterly basis, test your recovery plan. Download a single file or a small archive from the vault, decrypt it, and verify its integrity. A backup that is not tested is not a backup.
Implementing a Cold Cloud Vault is the single most effective action you can take to move from being a potential victim of ransomware to a survivor.
How to Structure Your Folder Hierarchy to Find Any Document in 30 Seconds?
Creating a Cold Cloud Vault is a powerful defense, but it is only effective if you have a clear system for deciding what goes into it. A well-designed folder structure is not just about tidiness; it is a critical component of your security strategy. By classifying your data, you can apply the right level of protection and accessibility to every file you own. The most effective method for this is the Hot-Warm-Cold data classification system.
This system categorizes your files based on how frequently you access them and how critical they are, allowing you to align your storage strategy with your security needs. This discipline also helps in rapidly identifying a ransomware infection; files with scrambled names or unusual extensions (like `.locked`) in your « Hot » data folders are an immediate red flag.
- HOT Data (Active/Synced): These are your daily-use files. This includes current project documents, drafts, and files you are actively collaborating on. These files should be stored in your primary, synced cloud service (like Google Drive) for maximum convenience and accessibility. They are your most vulnerable but also your most frequently backed-up via version history.
- WARM Data (Reference): This category includes completed projects, reference materials, and older files you may need to access occasionally but are not actively editing. These can be stored in a separate folder within your primary cloud account with sync turned off for that specific folder, or in a secondary, less-frequently accessed cloud account.
- COLD Data (Archive/Critical): This is for your digital crown jewels: tax returns, legal documents, birth certificates, business records, and irreplaceable family photos. This data should be encrypted and stored in your isolated Cold Cloud Vault. It is not meant for daily access but for long-term preservation and disaster recovery.
To support this structure, a consistent naming convention is vital. A format like YYYY-MM-DD_Category_Description_v##.ext (e.g., 2024-04-10_Taxes_Form1040_v01.pdf) makes files instantly searchable and sortable. Combined with a simple folder structure like `/Year/Category/Project/`, you can navigate to any file with precision and speed.

By adopting this tiered approach, you move from a chaotic digital pile to an organized, strategic library. Your security actions become targeted and efficient, focusing the highest levels of protection on the assets that matter most.
This clarity not only streamlines your workflow but also fortifies your defenses, making your data both accessible to you and resilient against attack.
How to Automate Your Personal Admin to Spend Less Than 1 Hour a Month on Paperwork?
While manual processes like updating a Cold Cloud Vault add crucial security, other areas of your digital life can be safely automated to save time. The goal is to automate mundane tasks, not security decisions. However, every automation creates a potential new entry point for attack, a risk that cannot be ignored when U.S. ransomware attacks showed a 149% year-over-year increase in a recent analysis. Secure automation requires a deliberate and cautious approach.
A key principle is the granting of minimum permissions. When you connect an automation tool (like a receipt scanner or a document organizer) to your cloud storage, it should only have access to the specific folder it needs to function, and nothing more. For example, a receipt-scanning app should only have permission to write to a `/Finances/Receipts-Inbox` folder, not your entire drive. Many services now support app-specific passwords or limited-scope API keys, which are critical for containing the damage if that automation service is compromised.
Furthermore, it is vital to regularly audit these connections. Once a quarter, review all third-party apps and services that have access to your cloud accounts. Remove any that are no longer necessary. This digital housekeeping prevents « permission creep, » where a collection of forgotten connections becomes a web of potential backdoors for an attacker. The lessons from enterprise security, such as using time-delayed key deletion and regular audits, are directly applicable. A compromised automation tool can be a vector for ransomware, turning a convenience into a catastrophe. Treat every connection as a potential vulnerability that must be managed and monitored.
By combining thoughtful automation for low-risk tasks with robust manual controls for high-risk data, you can build a system that is both efficient and highly secure.
How to Successfully Transition to a Digital Nomad Lifestyle Without Career Instability?
For a digital nomad, your data security strategy is as essential as your passport. Working from unfamiliar networks, crossing borders, and relying on a travel laptop dramatically increases your risk profile. The Hot-Warm-Cold strategy becomes paramount, with an extreme emphasis on minimizing the data stored on your physical devices. The goal is to operate in what can be called « Travel Mode, » where your travel laptop is treated as a disposable, low-trust terminal, not a vault of sensitive information.
In this mode, your travel device should only contain « Hot » data—the immediate files required for your current project. All « Warm » and « Cold » data should reside exclusively in the cloud, completely inaccessible from the travel device. The Cold Cloud Vault, in particular, should never be logged into from your travel laptop. This approach contains the potential damage from device theft or a malware infection on a local café’s Wi-Fi. If your device is compromised, you can confidently wipe it clean and restore your essential « Hot » files from your primary cloud account without fear of losing your life’s work.
Border crossings present a unique risk. Some jurisdictions may require you to unlock your devices. To prepare for this, your security checklist must include specific measures for transit:
- Dedicated Travel Device: Use a laptop with minimal local storage and a clean OS install. It should not contain personal photos, financial records, or client archives.
- 90% Cloud-Based: Store the vast majority of your data in your Warm and Cold cloud vaults, which are not synced to or accessible from your travel device.
- Password Manager Travel Mode: Use a password manager that offers a « travel mode. » This feature temporarily hides your most sensitive vaults (e.g., for banking or the Cold Cloud Vault password) from the device, making them invisible even if you are compelled to unlock the app.
- Factory Reset Plan: Maintain the ability to remotely wipe your travel device and restore its minimal working configuration from your primary cloud account within hours.
By treating your physical devices as temporary access points rather than permanent storage, you can achieve the freedom of a nomadic lifestyle without sacrificing the security of your career and personal data.
Key Takeaways
- Standard cloud sync is a liability, not a backup, during a ransomware attack because it replicates encrypted files, overwriting your clean data.
- True security is achieved through client-side encryption and an isolated, non-synced « Cold Cloud Vault » for your most critical files.
- Classifying your data into Hot (active), Warm (reference), and Cold (archive) tiers is the foundational discipline for a resilient and manageable security strategy.
How to Use Technology to Simplify Your Daily Routine Instead of Complicating It?
The purpose of a robust data security strategy is not to bury you in complicated procedures but to give you peace of mind. By making deliberate choices upfront, you can create a system that runs quietly in the background, protecting you without demanding constant attention. The strategies outlined—client-side encryption, data classification, and the Cold Cloud Vault—can be implemented in stages. You do not need to achieve perfect security overnight. The key is to start, and to build momentum. The modern approach to ransomware, reflected in enterprise playbooks, is focused on resilience and recovery, not just prevention.
This tiered implementation allows you to match your effort to your current risk tolerance and available time, ensuring that you are consistently improving your security posture. It is a journey from basic digital hygiene to a state of high resilience, following a path similar to the classic 3-2-1 backup rule (3 copies of your data, on 2 different media, with 1 copy off-site). The Cold Cloud Vault is the ultimate evolution of that off-site copy.
This table, based on an analysis from a report on ransomware trends by Veeam, provides a clear roadmap for this journey. You can start at the « Good » level today and progressively work your way to « Best » as you become more comfortable with the tools and processes.
| Level | Security Measures | Time Investment | Protection Level |
|---|---|---|---|
| Good | Enable MFA + Password Manager | 1 hour setup | 60% reduction in breach risk |
| Better | Add Cryptomator encryption to existing cloud | 2 hours setup + 5 min/week | 80% protection against ransomware |
| Best | Full hybrid strategy with Cold Cloud Vault + quarterly recovery drills | 4 hours setup + 1 hour/month | 95% resilience with rapid recovery |
The security of your digital legacy is not a matter of chance; it is a matter of design. By taking these deliberate, structured steps, you build a fortress around your most valuable data. Begin implementing these protective layers today to ensure your work, your history, and your peace of mind remain yours, and yours alone.
]]>In summary:
- Contrary to popular belief, turning your heat completely off when you leave costs more than using a smart setback temperature due to your home’s thermal inertia.
- Your smart thermostat is a powerful diagnostic tool; use its data on runtime and humidity to pinpoint hidden energy leaks like poor insulation or air gaps.
- Maximum savings come from a systemic approach: combining smart thermostat automation with physical upgrades like better insulation, thermal curtains, and a reliable offline Wi-Fi strategy.
If you’ve invested in a smart thermostat, you were likely sold on the promise of effortless energy savings. Yet, many homeowners see their energy bills spike in winter and summer, leaving them wondering what went wrong. The common advice is to « set a schedule, » but if your bills are still high, it’s clear that a simple schedule isn’t the whole story. You’re using the features, but you’re not leveraging the real intelligence of the device.
The problem is that most people treat their smart thermostat like a fancy timer. They’re missing the bigger picture. True efficiency doesn’t come from just turning the heat down; it comes from understanding your home’s unique energy signature—how it gains, loses, and retains heat. The real power of your thermostat is its ability to act as a diagnostic tool that helps you work *with* your home’s physics, not against it.
Forget the basic « set it and forget it » approach. This guide will show you how to move beyond simple schedules and use your thermostat’s advanced features to make intelligent decisions. We’ll explore why turning your system off is a costly mistake, how to use data to find your home’s weak points, and how to build a resilient smart home ecosystem that saves you money without ever sacrificing comfort. This is how you make your smart investment finally pay off.
For those who prefer a visual guide, the following video offers a practical walkthrough of installing and setting up a typical smart thermostat, which is the first step toward implementing the advanced strategies we discuss.
To help you navigate these advanced techniques, this article is structured to build your expertise from the ground up. You will learn the core principles of smart climate control before moving on to integrating your thermostat with your home’s broader infrastructure for maximum efficiency.
Summary: Mastering Your Home’s Climate for Real Savings
- Why Turning Your Heat Off Completely During the Day Actually Costs More?
- How to Set Up Geofencing so Your House Heats Up Before You Arrive?
- Room Sensors or Single Thermostat: Which Is Necessary for Multi-Story Homes?
- The Humidity Oversight That Makes Your Smart AC Work Twice as Hard
- How to Use Smart Alerts to Change HVAC Filters at the Exact Right Time?
- How to Prioritize Energy Efficiency Renovations for Maximum Bill Reduction?
- How to Build a Stable IoT Ecosystem That Doesn’t Crash When Wi-Fi Drops?
- How to Select Sustainable Home Textiles That Are Durable and Toxin-Free?
Why Turning Your Heat Off Completely During the Day Actually Costs More?
It seems logical: if you’re not home, the heating system should be off. Zero usage equals zero cost, right? This is one of the most common and costly mistakes I see homeowners make. The reason it backfires is a concept called thermal inertia. Your house, with its walls, furniture, and structure, acts like a thermal battery. It takes a significant amount of energy to bring it up to a comfortable temperature from a cold start.
When you turn the system off completely, you allow the entire structure to get cold. Upon your return, the HVAC system has to run at full blast for an extended period, not just to heat the air, but to reheat the walls, floors, and everything in the house. This massive energy spike to recover from a deep cold state often uses more fuel than simply maintaining a lower, stable temperature throughout the day.
The smart approach is to use a « setback » temperature—typically 7-10°F (or 4-6°C) lower than your comfort setting. This keeps the home’s thermal mass from getting completely cold, requiring a much shorter and less intense recovery cycle. According to the U.S. Department of Energy, you can achieve up to 10% in annual savings just by using a proper setback strategy for 8 hours a day. The key is to find the perfect balance for your specific home.
Your Action Plan: Find Your Home’s Break-Even Temperature
- Test Day 1 (Setback): Set your thermostat to an « Away » mode or a manual setback of 7-10°F lower than your usual setting for an 8-hour period while you are out.
- Test Day 2 (Off): On a day with similar outside temperatures, turn your HVAC system completely off for the same 8-hour period.
- Collect Data: Use your thermostat’s app to compare the detailed energy usage reports from both days. Look specifically at the energy spike during the recovery period.
- Analyze Recovery: Note how long it takes for the house to return to your comfort temperature in both scenarios. A longer, high-power recovery often indicates higher costs.
- Confirm Conditions: Ensure your comparison is fair by checking that the outdoor temperatures on both test days were reasonably close.
How to Set Up Geofencing so Your House Heats Up Before You Arrive?
A fixed schedule is a good start, but it’s rigid. It doesn’t account for days you leave work early or get stuck in traffic. This is where geofencing transforms your smart thermostat from a reactive timer into a proactive comfort system. Geofencing uses your smartphone’s GPS location to create a virtual perimeter, or « fence, » around your home.
Setting it up is usually done directly within your thermostat’s app. You define a radius around your home—say, two or three miles. When your phone crosses this boundary on your way out, the app automatically signals your thermostat to switch to your energy-saving « Away » temperature. More importantly, when you cross that same boundary on your way back, it triggers the system to start heating or cooling, ensuring the house is perfectly comfortable the moment you walk through the door. No more arriving to a cold house and waiting for it to warm up.
The real intelligence lies in the learning algorithm. Over time, your thermostat learns how long it takes to bring your home to your desired temperature under different weather conditions. It might start heating 30 minutes before your arrival on a mild day, but 45 minutes on a freezing one. This dynamic adjustment ensures you never waste energy by starting too early or sacrifice comfort by starting too late. It’s the ultimate expression of « set it and forget it, » because it adapts to your life in real-time.
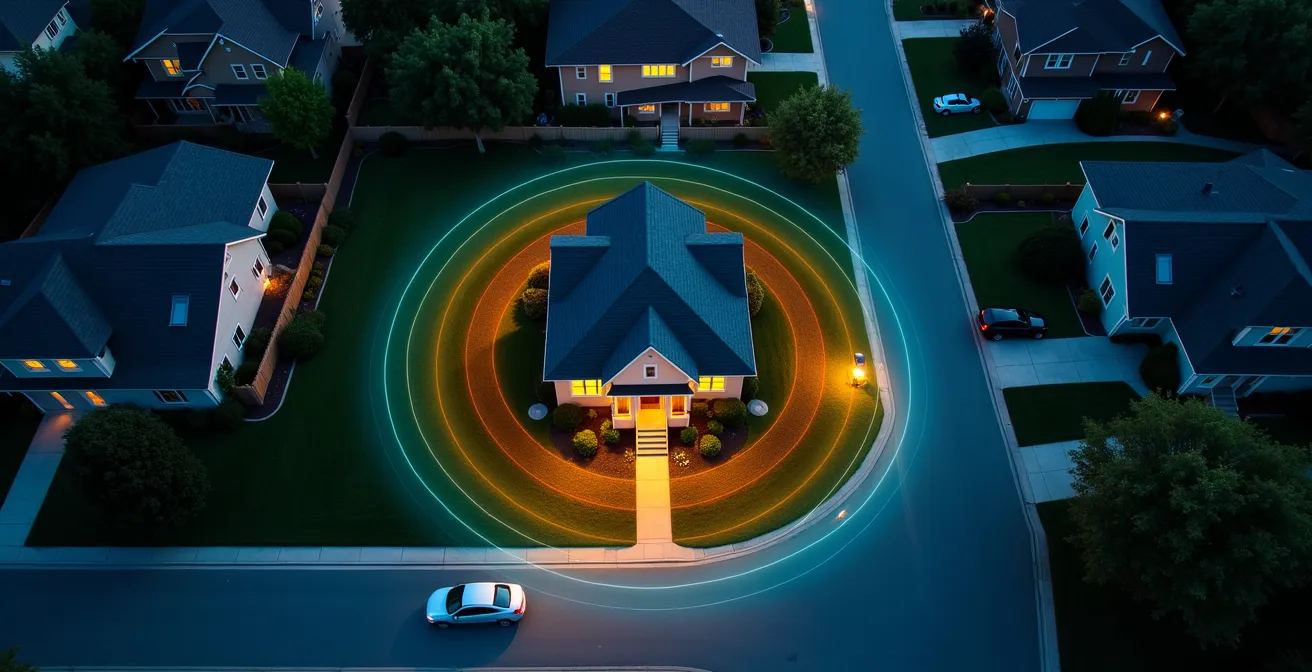
As the visual above suggests, you can think of geofencing as creating invisible zones of comfort around your property. This automated control is a massive step up from manual adjustments, providing both convenience and optimized energy use without you having to think about it. It’s the key to making savings truly effortless.
Room Sensors or Single Thermostat: Which Is Necessary for Multi-Story Homes?
If you live in a multi-story home, you’ve experienced it: the thermostat is on the main floor, which feels fine, but the upstairs bedrooms are freezing in winter or sweltering in summer. This is due to the stack effect, where warm air naturally rises and cool air sinks. A single thermostat located in a central hallway can’t possibly account for these drastic temperature differences, leading to massive inefficiency and discomfort.
A single thermostat only measures the temperature in one spot. To make the upstairs comfortable, you have to « over-cool » or « over-heat » the main floor, wasting huge amounts of energy. This is where smart room sensors become essential, not just a luxury. By placing wireless sensors in key rooms (like the master bedroom, a home office, or a nursery), you give your thermostat the data it needs to make smarter decisions.
With a multi-sensor system, you can tell your thermostat to prioritize different rooms at different times. For example, you can program it to maintain a perfect 70°F in the home office during the day, and then switch its focus to ensuring the bedrooms are at a comfortable sleeping temperature at night. The system averages the temperatures or prioritizes specific sensors, running the HVAC system just enough to keep the *occupied* spaces comfortable. For anyone with a multi-story or sprawling ranch-style home, a multi-sensor setup is the only way to truly solve comfort imbalances and stop paying to heat or cool empty rooms.
This table from a comparative analysis by Consumer Reports clearly breaks down the advantages of a system with multiple sensors.
| Feature | Single Thermostat | Multi-Sensor System |
|---|---|---|
| Temperature Accuracy | One location only | Room-by-room monitoring |
| Stack Effect Compensation | Limited | Excellent with strategic placement |
| Occupancy Detection | Central location only | Multiple room detection |
| Cost | $140-250 | $250-400 with sensors |
| Best For | Single-story homes | Multi-story or zoned homes |
The Humidity Oversight That Makes Your Smart AC Work Twice as Hard
Most homeowners focus exclusively on one number: the temperature. But in the summer, there’s another critical factor that dramatically impacts both your comfort and your energy bill: humidity. High humidity makes the air feel much warmer and stickier than it actually is. Your body cools itself by evaporating sweat, but when the air is already saturated with moisture, that process slows down dramatically.
As a result, you might set your AC to a chilly 70°F, but it still feels stuffy and uncomfortable. Your air conditioner is working overtime, not just to cool the air, but also to pull massive amounts of moisture out of it—a process called dehumidification. This is incredibly energy-intensive. A smart thermostat that also monitors humidity can provide a much more efficient solution.
Many modern smart thermostats have a built-in hygrometer to measure relative humidity. By targeting an ideal indoor humidity level (typically between 40% and 50%), you can feel perfectly comfortable at a higher temperature. For instance, 75°F with 45% humidity can feel more comfortable than 72°F with 65% humidity. Some thermostats can control a whole-home dehumidifier or even use your AC in a special « dehumidify » mode. This focuses on removing moisture first, which often allows the AC to run for shorter cycles, saving significant energy while delivering a higher level of perceived comfort.

Ignoring humidity is like trying to cool your home with one hand tied behind your back. By monitoring and controlling it, you can set your thermostat several degrees higher and feel even more comfortable, leading to substantial savings on your summer electricity bills. It’s the single biggest overlooked factor in cooling efficiency.
How to Use Smart Alerts to Change HVAC Filters at the Exact Right Time?
The old advice for HVAC maintenance was to change your air filter every 90 days. This calendar-based approach is simple, but completely inefficient. A filter’s lifespan depends not on time, but on HVAC runtime. In mild months your system might barely run, while during a heatwave it could be running constantly. Changing a filter that’s still clean is a waste of money, while leaving a clogged filter in place is even worse.
A clogged filter is like trying to breathe through a straw. It forces your HVAC system’s fan motor to work much harder to pull air through, drastically increasing energy consumption and putting unnecessary strain on the equipment. This can lead to premature system failure, an expensive repair I see all too often.
This is where your smart thermostat’s data becomes a powerful maintenance tool. Most smart thermostats track and report on your system’s daily and monthly runtime. Instead of relying on a generic 90-day rule, you can set up a reminder based on accumulated hours of operation. Many HVAC professionals recommend changing a standard 1-inch filter after approximately 500 to 600 hours of runtime. Your thermostat app does the math for you.
Example: Using Runtime Data for Predictive Maintenance
Your thermostat’s energy insights app is more than just a historical record; it’s a diagnostic tool. By reviewing humidity, ambient temperature, and runtime, you can spot anomalies. If you notice your air conditioning runtime is steadily increasing in a specific room or for the whole house compared to last year under similar temperatures, it’s a strong indicator that something is impeding airflow. The first and cheapest thing to check is a dirty filter. This runtime-based approach to filter replacement ensures your system always operates at peak efficiency, saving energy and extending its lifespan.
How to Prioritize Energy Efficiency Renovations for Maximum Bill Reduction?
A smart thermostat is the brain of your HVAC system, but it can only do so much if it’s controlling an inefficient « body »—your house. For the average American household, nearly half the annual energy bill, often more than $900 per year, goes to heating and cooling. If you’re planning home renovations, your smart thermostat’s data is the best tool you have for prioritizing projects that will deliver the biggest reduction in that cost.
Stop guessing where your energy is going. Use data to find the real culprits. If you have room sensors, you can conduct a simple DIY energy audit. Let the sensors log temperatures in various rooms overnight. The room that loses heat the fastest is your #1 priority for insulation and air sealing. Is it the room with old, drafty windows? Or the one with an uninsulated attic above it? The data will tell you exactly where your money is leaking out.
You can even quantify the impact of smaller projects. Before and after you install new weather stripping on a door, for example, compare the HVAC runtime data from your thermostat app. A noticeable drop in runtime for that zone is a clear indicator of your return on investment. By using your thermostat as a diagnostic tool, you can move from a vague desire to « be more efficient » to a data-driven plan. You’ll tackle the biggest energy vampires first—like attic insulation or window sealing—ensuring every dollar you spend on renovations delivers the maximum possible reduction on your future energy bills.
How to Build a Stable IoT Ecosystem That Doesn’t Crash When Wi-Fi Drops?
A major concern for any homeowner investing in smart technology is reliability. What happens to your « smart » thermostat if the Wi-Fi goes down? Will you be left in the freezing cold? This is a valid fear, and as a technician, I advise choosing hardware that is designed for resilience. The good news is that reputable smart thermostat manufacturers have already solved this problem.
You are not dependent on a constant internet connection for basic operation. Virtually all major smart thermostats have local schedule storage. This means the schedule you’ve programmed—including your setback temperatures and comfort settings—is stored directly on the device itself. If your Wi-Fi router reboots or your internet service provider has an outage, the thermostat will continue to run its stored schedule flawlessly. You won’t notice a thing.
Where you will see a difference is in the « smart » features that rely on the cloud, such as remote control via your phone, geofencing, or receiving voice commands from a smart assistant. Those will be temporarily unavailable. However, different brands handle this offline state with varying degrees of sophistication. Some, like Ecobee, retain their full complex schedule indefinitely, while others may revert to a more basic program. This is a critical factor to consider when purchasing a device.
This data from a comprehensive guide to smart thermostats shows how different brands behave when they lose their internet connection.
| Brand | Offline Behavior | Local Schedule Storage | Failsafe Mode |
|---|---|---|---|
| Nest | Maintains last schedule | Yes, 10-day schedule | Auto-away after timeout |
| Ecobee | Full schedule retained | Yes, indefinite | Comfort settings maintained |
| Honeywell | Basic schedule only | Limited | Reverts to manual mode |
| Amazon | Maintains schedule | Yes, 7-day | Temperature hold at last setting |
Key Takeaways
- Stop turning your heat completely off. Use a smart setback of 7-10°F to work with your home’s thermal inertia, not against it, to prevent costly recovery cycles.
- Treat your thermostat as a diagnostic tool. Use its data on runtime, humidity, and room-specific temperature drops to identify your home’s biggest energy leaks.
- Maximum savings come from a systemic approach. Combine smart automation with physical improvements like thermal curtains and targeted insulation for the highest return on investment.
How to Select Sustainable Home Textiles That Are Durable and Toxin-Free?
After optimizing your thermostat and sealing your home, the final layer of efficiency comes from an often-overlooked area: your home textiles. The fabrics you choose for your curtains, bedding, and rugs have a direct impact on your home’s thermal performance and can help you feel more comfortable at more energy-efficient thermostat settings.
The most important textile choice for energy savings is installing thermal curtains, especially on large or older windows. These curtains have an insulated backing that can reduce heat loss through windows by up to 25% in the winter and block significant solar heat gain in the summer. This simple, relatively low-cost addition creates a buffer that directly reduces the load on your HVAC system.
Your bedding choices also play a role in personal comfort, allowing you to lower the thermostat at night. In summer, switch to breathable fabrics like linen or lightweight cotton (with a low TOG rating of 4.5 or less) that wick away moisture. In winter, flannel sheets and high-TOG duvets (10.0-13.5) trap body heat effectively, allowing you to comfortably lower the nighttime temperature by a few extra degrees. Furthermore, placing thick area rugs on hardwood or tile floors adds another layer of insulation, reducing heat loss through the floor. By using textiles to manage your « micro-climate, » you can adjust your home’s « macro-climate » for significant savings.
Start today by auditing just one of these areas—whether it’s finding your home’s setback temperature or checking your humidity levels. Taking control of your home’s unique energy signature is the smartest investment you can make for both your wallet and your comfort.
]]>A truly stable smart home isn’t bought, it’s architected. The root of instability isn’t a weak Wi-Fi signal, but a dependency on cloud services that create single points of failure.
- Prioritize local-first processing so that core automations (lights, heating, security) function without an internet connection.
- Isolate IoT devices on a separate network segment (VLAN) to contain security threats and reduce network congestion.
- Use a mix of protocols like Thread and Z-Wave for low-power devices, reserving Wi-Fi for high-bandwidth needs.
Recommendation: Shift your mindset from connecting devices to engineering a system. Start by auditing your network for single points of failure and implementing local control wherever possible.
You have a house full of « smart » devices, yet you live with a constant, low-level frustration. The voice command that fails for no reason. The smart bulb that becomes a « dumb » bulb after a brief internet outage. The security camera feed that buffers endlessly. You’ve been told the solution is a better Wi-Fi router or to stick with a single brand, but the problems persist. These are symptoms, not the disease. The core issue is a fundamental flaw in how most consumer smart homes are designed: they are brittle, cloud-dependent, and lack a robust network architecture.
The conventional approach creates a collection of gadgets that communicate with a distant server, making your internet connection a critical single point of failure (SPOF). When it fails, your home’s IQ plummets. This is not how professional, mission-critical systems are built. The real solution lies in thinking like a network engineer, not a consumer. It requires shifting focus from the devices themselves to the underlying infrastructure that connects them. The goal is to build a resilient, secure, and self-sufficient local network that treats the internet as a useful feature, not a lifeline.
This guide abandons the simplistic advice. Instead, we will explore the engineering principles for building a truly stable IoT ecosystem. We will focus on three pillars: implementing protocols designed for local-first reliability, architecting network segmentation for security and performance, and designing fail-safe configurations for your most critical devices. By embracing this architectural approach, you can transform your collection of fragile gadgets into a cohesive and dependable system that works, every time.
This article provides a technical roadmap to building that resilient system. We will break down the essential protocols, security measures, and device-level strategies required to achieve true smart home stability, guiding you through each critical component of a professionally architected IoT environment.
Summary: How to Engineer a Resilient IoT Ecosystem
- Why the New « Matter » Standard Changes Everything for Smart Home Compatibility?
- How to Set Up a Guest Network specifically for IoT Devices to Protect Privacy?
- Wi-Fi or Z-Wave: Which Protocol Is Better for Large Homes?
- The Default Password Mistake That Opens Your Smart Cameras to Hackers
- How to Chain Commands in Voice Assistants to Perform Complex Morning Routines?
- How to Design an LED Lighting Plan That Enhances Mood and Saves Energy?
- How to Use Smart Thermostats to Cut Heating Bills Without Sacrificing Comfort?
- How to Design a Solar Landscape Lighting Scheme That Stays Bright All Night?
Why the New « Matter » Standard Changes Everything for Smart Home Compatibility?
The promise of a universally compatible smart home has been a persistent challenge, with users trapped in walled gardens of competing ecosystems. The Matter protocol is the first serious attempt to solve this at an industry level, but its true value isn’t just about making a Google lightbulb talk to an Apple hub. From an engineering perspective, its most significant contribution is the mandatory support for local control. Unlike many legacy Wi-Fi devices that rely on cloud servers for every command, Matter-certified devices can communicate directly with controllers on your home network.
This fundamentally alters the reliability equation. By leveraging local network communication—often over a low-power mesh protocol called Thread—Matter eliminates the internet as a single point of failure for basic operations. When your internet goes down, a Matter-based routine to turn on your lights will still execute instantly. This shift from cloud-dependency to a local-first architecture is the cornerstone of a resilient system. The protocol’s adoption has been widespread, with over 256 organizations backing Matter, supporting more than 41 device categories, signaling a definitive move toward this more stable model.
The introduction of Thread as a primary transport layer for Matter is also critical. Thread creates a self-healing mesh network specifically for low-power IoT devices like sensors and lights. Each mains-powered Thread device acts as a router, extending the network’s range and reliability. This is far more robust than a traditional Wi-Fi setup where every device competes for bandwidth and relies on a single central router. For example, the Nanoleaf Essentials A19 bulbs, using Matter over Thread, have demonstrated exceptional stability, with users reporting zero disconnections over months when paired with a Thread border router. This stands in stark contrast to Wi-Fi-only bulbs that often suffer from frequent dropouts.
Ultimately, Matter isn’t just another standard; it’s a philosophical shift. It provides the architectural blueprint for an ecosystem where devices are interoperable, secure, and, most importantly, not crippled by a temporary loss of internet connectivity.
How to Set Up a Guest Network specifically for IoT Devices to Protect Privacy?
Using your router’s guest Wi-Fi for IoT devices is a common recommendation, and it’s a step up from nothing. It provides basic isolation. However, from a network engineering standpoint, it’s a crude tool. A more robust and secure method is network segmentation using Virtual LANs (VLANs). A VLAN allows you to create logically separate networks on the same physical hardware. This means your smart TV, cameras, and smart plugs can live in their own digital « room, » completely unable to see or interact with your trusted devices like laptops and phones, even though they use the same router and wiring.
The need for this level of isolation is not theoretical. According to the 2024 IoT Security Landscape Report, home networks face an average of 10 attacks every 24 hours, with a significant percentage targeting vulnerable smart devices. If a hacker compromises a smart plug on a flat network, they potentially have a foothold to access your personal computer. A VLAN contains that threat completely. The compromised device can only talk to the internet and other devices within its own VLAN, not your primary network.
Implementing a VLAN requires a managed switch and a router that supports VLAN tagging. The setup involves creating a new network (e.g., VLAN 20 for IoT) and then configuring firewall rules. A typical rule set would be:
- Allow the IoT VLAN to access the internet for updates.
- Block all traffic from the IoT VLAN to your main « trusted » VLAN.
- Allow traffic from the trusted VLAN to the IoT VLAN, so you can still control your devices from your phone.
A compelling real-world example is provided by engineer David Mello, who successfully isolated his IoT devices using Ubiquiti hardware. He created a dedicated VLAN with strict firewall rules that prevented any compromised IoT device from accessing his trusted computers, effectively building a digital moat around his sensitive data while maintaining full functionality.
While a guest network is a start, a VLAN is the definitive solution for architecting a secure and segmented smart home, treating your IoT devices as untrusted guests by design.
Wi-Fi or Z-Wave: Which Protocol Is Better for Large Homes?
This question presents a false dichotomy. A resilient smart home, especially a large one, shouldn’t rely on a single protocol. The correct engineering approach is to use each for its intended purpose, creating a multi-protocol system. Wi-Fi is a high-bandwidth, power-hungry protocol designed for data-intensive tasks like streaming video. It is not optimized for the dozens of low-data, low-power devices like sensors, locks, and switches that form the backbone of a smart home. Relying solely on Wi-Fi for these devices leads to network congestion, battery drain, and reliability issues, especially as the number of devices and the size of the home increase.
Low-power mesh protocols like Z-Wave and Thread (used by Matter) are purpose-built for this role. They operate on a different frequency than Wi-Fi, reducing interference. More importantly, they create a mesh network, where each mains-powered device acts as a repeater, extending the network’s range and healing it if one node fails. A Z-Wave door sensor at the far end of the house doesn’t need to reach the central hub; it only needs to reach the nearest Z-Wave light switch, which then relays the signal. This creates a far more robust and scalable network than the hub-and-spoke model of Wi-Fi.
As industry expert Calvin notes in the Particle IoT Guide, the limitations of Wi-Fi become clear with scale:
For any device that’s moving even a few-hundred feet, you can’t use WiFi because it’s not going to have access to the same WiFi network across those different places where it needs to operate.
– Calvin, Particle IoT Guide
The choice becomes clear when comparing their core attributes. A protocol’s ability to operate locally, its power consumption, and its mesh capabilities are the critical factors for a stable system.
| Protocol | Range | Power Usage | Mesh Capability | Offline Operation |
|---|---|---|---|---|
| Wi-Fi 6 | 15-45m indoors | High | Limited | Router-dependent |
| Z-Wave | 30m per hop | Low | Native mesh | 100% local |
| Thread/Matter | 30m per device | Very Low | Self-healing mesh | Fully local |
| Zigbee | 10-20m | Very Low | Large mesh networks | Hub-local |
The optimal architecture for a large home uses a hybrid model: Wi-Fi for computers, phones, and streaming devices; Z-Wave or Thread/Matter for sensors, switches, locks, and thermostats. This segregates traffic and leverages the strengths of each protocol to build a resilient, multi-layered ecosystem.
The Default Password Mistake That Opens Your Smart Cameras to Hackers
Leaving the default password on any network device is a cardinal sin of security engineering. For IoT devices, and especially internet-facing smart cameras, it’s the equivalent of leaving your front door wide open with a « welcome » sign. Hackers constantly run automated scripts that scan for devices using known default credentials like « admin/admin » or « user/password ». The default password isn’t a suggestion; it’s a temporary placeholder that must be changed during setup. Failing to do so is the single most common and dangerous mistake smart home users make.
The threat is distributed across a wide range of seemingly innocuous devices. While cameras are a prime target, the 2024 threat report reveals that vulnerabilities are widespread, with 18% found in smart plugs and 13% in DVRs. Every insecure device on your network is a potential entry point. A compromised smart plug could be used to launch attacks against other devices, or a hacked DVR could be used to spy on your network traffic. Security is only as strong as its weakest link, and a device with a default password is a very weak link.
Securing your IoT ecosystem requires a systematic « hardening » process that goes beyond just passwords. It involves a multi-layered defense strategy. This includes disabling features like Universal Plug and Play (UPnP), which can automatically open ports on your router to the internet without your knowledge, creating backdoors for attackers. It also means enabling two-factor authentication (2FA) wherever possible and creating specific firewall rules on your VLAN to block any unnecessary communication. A smart camera, for instance, has no legitimate reason to communicate with your smart thermostat.
Your Action Plan: IoT Security Hardening Checklist
- Device Inventory: List all IoT devices on your network and their IP addresses. Identify the make, model, and firmware version.
- Credential Audit: Go through each device’s admin interface and change the default password to a unique, 16+ character passphrase. Store it in a password manager.
- Network Configuration: Disable UPnP on your router. Ensure your IoT devices are on a dedicated, isolated VLAN with strict firewall rules blocking access to your trusted network.
- Feature Lockdown: Disable any remote access features or cloud services you do not use. Turn off unnecessary protocols on a per-device basis (e.g., Telnet, FTP).
- Firmware Update Plan: Check for firmware updates for all devices. Schedule a quarterly review to patch any new vulnerabilities discovered.
Adopting this rigorous, systematic approach to security is non-negotiable. It moves you from a reactive posture of fixing things after a breach to a proactive one of architecting a system designed to resist attack from the outset.
How to Chain Commands in Voice Assistants to Perform Complex Morning Routines?
Chaining voice commands into routines like « Good morning » is a popular feature, but its implementation reveals a critical architectural weakness in most smart homes: cloud dependency. When you trigger an Alexa or Google routine, the command travels from your device to a server, is processed, and then commands are sent back to your individual devices. If any part of that chain—your Wi-Fi, your ISP, or the cloud service itself—is down, your « smart » morning routine fails completely. A truly resilient system processes these commands locally.
The solution is to use a local control hub, such as Home Assistant, as the brain of your operation. By integrating local voice processing tools, you can build routines that are faster, more private, and immune to internet outages. This approach brings all processing inside your home network. For example, a local hub can use a project like Whisper for speech-to-text and Piper for text-to-speech, running entirely on a device as small as a Raspberry Pi.
The performance and reliability gains are substantial. A cloud-based command can take 1-3 seconds, with high variability. A local command is consistently executed in under a second. The options for local processing offer a clear trade-off between hardware and speed, but all are superior to cloud dependency for core tasks.
| Method | Processing Time | Hardware Required | Offline Capable |
|---|---|---|---|
| Speech-to-Phrase | Under 1 second | Raspberry Pi 4 | 100% local |
| Whisper (Local) | 8 seconds (RPi4) | Intel NUC recommended | Fully offline |
| Cloud Assistant | 1-3 seconds | Any | Internet required |
In his guide, Michael Sleen demonstrates a highly resilient voice setup using Home Assistant. His system prioritizes local processing for fundamental commands like controlling lights and thermostats. Only if a command cannot be understood locally (e.g., « What’s the weather in Tokyo? ») does it fall back to a cloud-based service. This tiered approach ensures that the essential functions of the home always work, regardless of internet status. Chaining commands for a « Good morning » routine in this system means the local hub executes a script directly, turning on lights, adjusting the thermostat, and opening blinds in an instant, with zero reliance on the outside world.
Therefore, the engineering answer to creating complex routines is not about finding the right cloud app. It’s about migrating the intelligence of your smart home from the cloud to a local hub that you control.
How to Design an LED Lighting Plan That Enhances Mood and Saves Energy?
An effective smart lighting plan is not about filling your home with color-changing smart bulbs. From a reliability and usability standpoint, that approach is flawed. It creates multiple points of failure and removes the intuitive physical control of a light switch. The superior architectural choice is to prioritize smart switches over smart bulbs. A smart switch controls the power to the fixture, allowing you to use any standard (and cheap) « dumb » LED bulb. This design is inherently more resilient.
This « smart switch, dumb bulb » model has several key advantages. First, it provides a fail-safe physical override. If your hub goes offline, your Wi-Fi fails, or an automation misfires, the switch on the wall still functions as a normal light switch. A guest or family member doesn’t need a smartphone app to turn on the lights. Second, it separates the points of failure. If an LED bulb burns out, you replace a $2 bulb, not a $20 smart bulb that needs to be re-paired with your system. The intelligence resides in the switch, which is a more durable and long-lasting component.
Furthermore, this approach is crucial for system stability after a power outage. Many smart bulbs default to « on » at 100% brightness after losing power, which can lead to a rude 3 AM awakening. A quality smart switch can be configured to return to its last known state or remain off, preserving your sanity and sleep schedule. For maximum resilience, all lighting scenes and schedules should be stored and executed on a local hub, not a cloud service. This ensures that your « movie night » scene or circadian lighting schedule runs without any dependency on an internet connection.
By focusing on the control points (switches) rather than the endpoints (bulbs), you create a lighting system that is not only smart and energy-efficient but also intuitive, reliable, and usable for everyone in the household, regardless of their technical skill.
How to Use Smart Thermostats to Cut Heating Bills Without Sacrificing Comfort?
A smart thermostat’s primary value is its ability to automate energy savings, but its intelligence can become a liability if it’s entirely cloud-dependent. The most critical feature of a reliable smart thermostat, from an engineering perspective, is its ability to function as a fully programmable thermostat without an internet connection. The schedule, temperature settings, and safety cutoffs must be stored locally on the device or, even better, on a local control hub. Relying on a cloud service to tell your furnace to turn on is an unacceptable single point of failure in a critical system.
To build a truly resilient heating and cooling system, several hardware and software configurations are essential. First, ensure the thermostat is powered by a C-wire (Common wire). This provides constant 24V power from the HVAC system itself, eliminating the risk of battery failure at a critical moment. Battery-powered Wi-Fi thermostats are a frequent source of failure, as a dead battery renders your entire HVAC system useless. Second, for more accurate and comfortable climate control, deploy multiple Z-Wave or Thread temperature sensors throughout the home. A local hub can average the readings from these sensors to get a true picture of the home’s temperature, rather than relying on a single reading from the hallway where the thermostat is located.
All automation logic should be programmed on a local hub. This includes:
- Occupancy-based setbacks: Using local motion sensors to detect when the house is empty and automatically adjust the temperature.
- Time-based schedules: Storing the entire weekly schedule on the hub, not a vendor’s app.
- Freeze protection: Creating a non-negotiable local automation that turns on the heat if the temperature drops below a critical threshold (e.g., 5°C / 40°F), regardless of any other settings or internet status.
This local-first approach ensures your comfort and safety are never hostage to your internet connection. The system is self-contained and autonomous, using cloud services only for non-essential tasks like remote adjustments when you’re away from home.
By architecting your climate control this way, you achieve both energy efficiency and peace of mind, knowing that your home’s most essential system is built on a foundation of reliability.
Key Takeaways
- Prioritize local-first processing to ensure core functions work without internet.
- Implement network segmentation via VLANs to isolate IoT devices and enhance security.
- Use a hybrid protocol approach: Thread/Z-Wave for low-power mesh and Wi-Fi for high-bandwidth devices.
How to Design a Solar Landscape Lighting Scheme That Stays Bright All Night?
Designing a reliable solar landscape lighting system presents a unique engineering challenge. The common all-in-one solar lights, with their integrated panel, battery, and sensor, are prone to failure and inconsistency. Their built-in dusk-to-dawn sensors are often cheap, poorly calibrated, and can trigger at different times, creating a chaotic and unprofessional look. A robust design decouples the intelligence from the individual lights, centralizing control for synchronized and dependable operation.
The most effective strategy is to treat the solar lights as « dumb » fixtures and use a centralized, reliable trigger. Instead of relying on a dozen individual light sensors, use a single, high-quality Zigbee or Z-Wave outdoor light sensor connected to a local hub. When this one sensor detects dusk, the hub sends a command to all the lights simultaneously. An even more reliable method is to use the astronomical clock built into a local hub like Home Assistant. This triggers the lights based on the precise, calculated sunset time for your exact location, which is immune to weather conditions or sensor obstruction.
To ensure the lights last all night, especially during cloudy periods, you must implement intelligent power management. This is impossible with basic all-in-one units. With a hub-controlled system, you can create automations such as:
- Motion-Triggered Brightness: Keep lights at a low-level glow (e.g., 20% brightness) to save power, and have them ramp up to 100% only when an outdoor motion sensor detects activity.
- Scheduled Dimming: Program the lights to dim to 30% after midnight, extending battery runtime during the late hours when high brightness is less critical.
- Battery Preservation Mode: If the hub detects several cloudy days in a row (via a weather integration), it can automatically switch the lights to a motion-only mode to conserve their remaining battery charge.
This centralized, logic-driven approach transforms a set of unreliable individual lights into a cohesive, intelligent system that is both beautiful and dependable.
By removing the « smarts » from the endpoints and placing them in a central, reliable controller, you engineer a solar lighting scheme that not only stays bright but also operates with precision and resilience.
]]>In summary:
- Stop collecting single-purpose apps and start building an integrated admin ecosystem that runs itself.
- Prioritize tools that drive behavioral change (like YNAB) over those that just track past spending (like Mint).
- Implement « financial firewalls, » such as virtual cards for free trials and a 3-2-1 backup strategy for your data.
- The goal isn’t just saving time; it’s eliminating the decision fatigue that comes with constant, reactive admin chores.
Is your Sunday evening regularly sacrificed to a mountain of bills, stray receipts, and the nagging feeling you’ve forgotten something important? You’re not alone. The constant hum of personal administration—filing, paying, tracking, and saving—is a major source of stress for any household manager. The common advice is to « go paperless » or « download a budgeting app, » but these are just fragmented fixes, not a real solution. They often add another app to your phone without fundamentally changing the workload.
This approach treats the symptoms, not the cause. You end up with a collection of disconnected digital tools that still require your constant attention. The pile of paper just becomes a folder of disorganized PDFs, and the budgeting app becomes another notification to ignore. But what if the true path to freedom wasn’t about finding better tools, but about building a better, self-running system? What if you could design an intelligent, automated workflow that handles 90% of your admin without you even thinking about it?
This guide is your blueprint for exactly that. We’re moving beyond simple tips to construct a cohesive personal admin ecosystem. We’ll explore how to create systems for your finances and data that not only save you time but, more importantly, eliminate the constant decision fatigue that drains your mental energy. Forget spending hours on paperwork. It’s time to build a system that gives you your time—and your peace of mind—back.
This article provides a complete blueprint for designing your automated admin system. Explore the sections below to master each component, from secure digital receipts to building a bank-approved financial plan.
Summary: Reclaim Your Time by Building a Personal Admin Ecosystem
- Why Digital Receipts Are Safer Than Paper Ones for Tax Audits?
- How to Automate Your Savings Transfers to Build Wealth Without Thinking?
- YNAB or Mint: Which App Actually Changes Your Spending Habits?
- The « Free Trial » Trap That Costs You Hundreds of Dollars a Year
- How to Transition to a Password Manager to Eliminate Login Frustration Forever?
- How to Implement a Personal Cloud Strategy to Secure Your Data Against Ransomware?
- How to Use Technology to Simplify Your Daily Routine Instead of Complicating It?
- How to Build a Real Estate Financial Plan That Secures Bank Approval?
Why Digital Receipts Are Safer Than Paper Ones for Tax Audits?
The first step in building your admin ecosystem is taming the paper beast. Faded, lost, or disorganized paper receipts are a massive liability, especially in the event of a tax audit. A digital system isn’t just about tidiness; it’s about creating an immutable, searchable, and secure archive that stands up to scrutiny. Thermal paper receipts fade, ink smudges, and paper gets lost. Digital copies, when managed correctly, are permanent and far more reliable.
The key is to move beyond simply taking photos of receipts and adopt a systematic approach. A proper digital receipt system ensures legibility, authenticity, and easy retrieval. This is crucial because tax authorities like the IRS can demand proof of expenses years after the fact. For instance, in some cases, the IRS can access records going back up to six years, a timeframe in which most paper receipts would be long gone or unreadable. A robust digital system is your best defense.
To be audit-proof, your digital records must be a true and accurate copy of the original. This means ensuring scans are high-quality and that the data is stored securely. Many modern receipt-scanning services use Optical Character Recognition (OCR) to automatically extract key data like vendor, date, and amount, making expense reports and tax preparation effortless. This turns a box of chaotic paper into a structured, valuable dataset. By creating this digital foundation, you’re not just cleaning up; you’re building the first pillar of your automated admin system.
How to Automate Your Savings Transfers to Build Wealth Without Thinking?
Once your financial inputs are digitized, the next step is to put your money to work automatically. « Pay yourself first » is classic advice, but systemic automation turns this platitude into an effortless reality. Instead of relying on willpower to transfer money to savings each month, you design a system where it happens before you can even spend it. This is a surprisingly underutilized strategy; only 17% of Americans rely on automatic transfers to build savings, leaving a huge opportunity for the rest to build wealth on autopilot.

The most effective method is to create a set of rules that automatically diverts your income into different « digital envelopes » on payday. This isn’t just one transfer to a savings account; it’s a multi-pronged strategy that funds all your goals simultaneously. One popular framework is the 50/30/20 rule, which you can fully automate.
Here’s how to structure it systematically:
- 50% for Needs: Set up an automatic transfer from your primary checking account to cover essentials like housing, utilities, and insurance.
- 30% for Wants: Automatically allocate this portion to a separate account for discretionary spending like entertainment, dining, and hobbies.
- 20% for Savings & Investments: This is the crucial part. Direct this 20% straight from your paycheck into dedicated high-yield savings or investment accounts, completely bypassing your main spending account. An automated wealth-building habit ensures your future is prioritized.
This approach removes you from the equation, eliminating the temptation to spend what you should be saving. It’s a foundational shift from reactive saving (i.e., saving what’s left over) to proactive wealth building.
YNAB or Mint: Which App Actually Changes Your Spending Habits?
With your data flowing and your savings on autopilot, the next layer is conscious spending. Many people turn to budgeting apps, but they are not all created equal. The critical difference lies in their philosophy: are they designed for passive tracking or for active behavioral change? Mint, for example, is excellent at showing you where your money *went*. It’s a rearview mirror. YNAB (You Need A Budget), on the other hand, forces you to decide where your money *will go*. It’s a forward-looking GPS.
This philosophical difference is the single most important factor in choosing a tool. If your goal is simply awareness, Mint is a great, free option. But if your goal is to break the paycheck-to-paycheck cycle, get out of debt, or fundamentally change your relationship with money, a proactive system like YNAB is far more powerful. It requires more initial effort but delivers transformative results by forcing you to « give every dollar a job » before you spend it.
This table breaks down the core differences in their approach and impact:
| Feature | YNAB | Mint |
|---|---|---|
| Philosophy | Proactive ‘Give Every Dollar a Job’ | Reactive expense tracking |
| Average First-Year Savings | $6,000 | Not reported |
| Learning Curve | Steep but transformative | Easy, minimal behavior change |
| Cost | $14.99/month or $99/year | Free (ad-supported) |
| Best For | Breaking paycheck-to-paycheck cycle | Financial awareness and tracking |
Case Study: Six-Figure Debt Payoff with a Proactive System
The power of a behavioral-change app is best shown through results. One family, after switching from Mint to YNAB, embraced the proactive budgeting principles fully. As they detail in their story, this shift in mindset and tooling enabled them to pay off six figures of student loan debt in just three years and buy a house a year later. It wasn’t just an app; it was a new operating system for their finances that they still use nearly a decade later.
Choosing the right tool is about aligning it with your ultimate goal. For a true admin ecosystem that reduces mental load, a proactive tool that front-loads decisions is almost always the superior choice.
The « Free Trial » Trap That Costs You Hundreds of Dollars a Year
One of the biggest leaks in a modern budget is the « free trial » trap. Companies bank on you forgetting to cancel, and a few small, recurring charges of $9.99 can add up to hundreds or even thousands of dollars a year. This is a classic example of where a lack of a system leads to financial drain. Manually tracking trial end dates is tedious and prone to failure. The solution is to build a financial firewall using virtual credit cards.
Virtual card services allow you to generate unique, temporary card numbers for specific merchants. You can set strict spending limits or even create single-use cards that automatically decline any further charges. This puts you back in complete control and makes it impossible for companies to charge you after a trial ends without your explicit permission. It’s a proactive defense mechanism that completely neutralizes the « forget to cancel » business model.
Implementing this strategy is simple and incredibly effective. Instead of using your real credit card for a trial, you use a virtual one with a $1 limit. The charge for the trial goes through, but the automatic renewal will fail. This forces you to make a conscious decision about whether the service is valuable enough to pay for. You’re no longer at the mercy of default settings; you are the one who authorizes every dollar spent.
Here is a simple plan to shield yourself:
- Sign up for a virtual card service like Privacy.com or a similar feature offered by some banks.
- Create a single-use virtual card with a very low spending limit (e.g., $1) specifically for free trials.
- Use this card number exclusively when signing up for trial offers.
- Set a calendar reminder two days before the trial expires to evaluate if you want to continue the service.
- If you value the service, update your billing with a real payment method. If not, do nothing. The card will automatically block the renewal charge.
How to Transition to a Password Manager to Eliminate Login Frustration Forever?
Your entire digital admin ecosystem—banking, bills, investments—is protected by passwords. A weak or disorganized password strategy is the single biggest threat to your financial security and a huge source of daily frustration. Resetting forgotten passwords is a massive time sink. A password manager is the non-negotiable cornerstone of a secure and efficient digital life. It allows you to use complex, unique passwords for every single site, all while only having to remember one master password.
The biggest hurdle isn’t understanding the benefit; it’s the perceived hassle of migrating years of accumulated logins. The key is to avoid a « boil the ocean » approach. Instead of trying to move everything at once, you should implement a phased migration plan. This turns a daunting project into a manageable, week-by-week process that integrates smoothly into your daily routine. You start small and build momentum, and before you know it, your entire digital life is secured and streamlined.

This gradual approach removes the friction and ensures you stick with it. Within a couple of months, you’ll have a fortress of a password system that not only protects you from breaches but also eliminates the « Forgot Password » link from your life forever. Many password managers can also store other secure information like credit card numbers and personal details, further automating online checkouts.
Follow this phased plan for a painless transition:
- Week 1: Install a reputable password manager (like 1Password or Bitwarden) on your computer and phone. For now, just use it to save passwords for *new* accounts you create.
- Weeks 2-3: Actively migrate your 10 most critical accounts: primary email, main bank accounts, and key social media.
- Weeks 4-5: Tackle 5-10 medium-priority logins each week as you use them.
- Week 6 and beyond: Let the rest of your logins migrate organically. When you log into a site, take the extra 30 seconds to save it to your password manager and update it with a strong, generated password.
How to Implement a Personal Cloud Strategy to Secure Your Data Against Ransomware?
Your admin ecosystem contains more than just financial data; it holds your most important documents, photos, and personal records. A hard drive failure, theft, or a ransomware attack could wipe it all out in an instant. Protecting this data requires a strategy more robust than just dragging files to an external drive once in a while. The industry gold standard for data protection is the 3-2-1 backup rule, a simple but powerful system for ensuring your data survives any disaster.
The 3-2-1 rule is a clear, actionable blueprint:
- Have 3 copies of your data: The original file on your computer, plus two backups.
- Use 2 different media types: For example, one backup on an external hard drive (local) and another on a cloud backup service (remote). This protects you if one type of media fails.
- Keep 1 copy off-site: This is the most critical step for protecting against disasters like fire, flood, or theft. An automated cloud backup service fulfills this requirement perfectly.
Services like Backblaze or iDrive automate this entire process. They run quietly in the background, continuously backing up your files to a secure, remote server. Crucially, these services offer versioning, which is your ultimate defense against ransomware. If a virus encrypts your files, you can simply restore a clean version from a date *before* the attack occurred. This turns a potentially catastrophic event into a minor inconvenience. This isn’t just a backup; it’s a data recovery system that makes your personal information resilient.
Setting this up once provides permanent peace of mind. It’s the final piece of your ecosystem’s defensive wall, ensuring that both your financial access and your data itself are secure and recoverable.
Key takeaways
- The goal of automation is not just efficiency, but the elimination of decision fatigue from your daily life.
- A proactive system (like YNAB) that forces you to plan is more effective for behavioral change than a reactive one (like Mint) that only tracks.
- Build « financial firewalls » using tools like virtual cards and the 3-2-1 backup rule to proactively defend your money and data.
How to Use Technology to Simplify Your Daily Routine Instead of Complicating It?
The promise of technology is to make life easier, but often it just adds complexity. We download apps to solve problems and end up with a cluttered phone and a dozen new accounts to manage. The core principle of a successful admin ecosystem is that every tool must demonstrably reduce complexity and mental load. If a tool requires constant tinkering, manual input, or creates more notifications than it solves problems, it’s a liability, not an asset.
When evaluating any new app or service, ask a simple question: « Does this automate a recurring decision or task, or does it just give me more data to look at? » A good tool works for you in the background; a bad one creates more work. For instance, workflow automation tools like Bardeen or Zapier can connect different apps to perform multi-step tasks automatically. One user reported saving 1-2 hours every day by automating a repetitive copy-pasting task that used to take ages. This is a prime example of technology simplifying a routine.
The goal is to curate a small, powerful stack of tools that integrate seamlessly. Your password manager should auto-fill logins. Your receipt scanner should sync with your budgeting software. Your backup service should run without you ever thinking about it. Each piece should enhance the others, creating a whole that is far greater than the sum of its parts. Before adding anything new to your system, run it through this filter. Be ruthless about cutting out anything that doesn’t genuinely liberate your time and attention.
How to Build a Real Estate Financial Plan That Secures Bank Approval?
Building a robust admin ecosystem isn’t just an academic exercise; it has powerful, real-world applications. Perhaps the ultimate test of your financial system is its ability to help you achieve a major life goal, like buying a home. Securing bank approval for a mortgage isn’t just about your credit score; it’s about demonstrating consistent, reliable financial behavior. Your automated system is the perfect tool for building and proving this capability.
Lenders want to see that you can comfortably handle a mortgage payment. A brilliant way to prove this—and build your down payment at the same time—is the « Ghost Mortgage » Stress Test. This method involves « paying » your estimated future mortgage payment to yourself for several months before you even apply for a loan. It provides undeniable proof to lenders that the payment is manageable within your budget, and it simultaneously accelerates your savings.
This proactive approach, powered by the automated systems you’ve already built, puts you in a position of incredible strength. You’re not just telling the bank you can afford the house; you’re showing them, with months of concrete financial data. The funds you’ve saved can then be applied directly to your down payment, further strengthening your application. It transforms the stressful, uncertain process of getting a mortgage into a clear, predictable financial plan.
Action Plan: The ‘Ghost Mortgage’ Stress Test
- Calculate your estimated future mortgage payment, including principal, interest, taxes, and insurance (PITI).
- Create a dedicated budget category and a separate high-yield savings account for this exact amount.
- For 3-6 months, use your automated transfer system to « pay » this ghost mortgage into the savings account on the first of every month.
- When applying for a loan, present your bank statements showing these consistent, dedicated savings as proof of payment capability.
- Finally, apply the accumulated funds from this account directly toward your down payment and closing costs.
Now that you have the blueprint for a fully automated admin ecosystem, the next logical step is to start implementing the first component. Begin by choosing your tools and setting up your first automated workflows today to reclaim your time and peace of mind.
]]>The promise of a simpler life through technology is often a lie; true simplification comes from strategic subtraction and invisible automation, not from adding more apps.
- The constant management of productivity apps creates a « maintenance tax » that drains your cognitive resources and lowers your actual output.
- Focus on high-ROI automation for mundane tasks and commit to a single digital ecosystem (Apple or Google) to eliminate friction between devices.
Recommendation: Before downloading any new tool, first identify one existing app or digital process you can eliminate to reduce your overall cognitive load.
For the busy professional, technology was supposed to be the great liberator. It promised to automate the mundane, organize the chaotic, and free up precious time. Yet, for many, the reality is a digital prison of our own making. We are drowning in a sea of productivity apps, each with its own subscription, notification system, and learning curve. This « app fatigue » has created a paradox: the very tools meant to simplify our lives have become a significant source of complication and mental clutter.
The common advice is to find a better app, a smarter gadget, or a more complex automation workflow. We’re told to digitize everything, go paperless, and sync our calendars across a dozen platforms. But this approach only adds more layers to an already overburdened system. It treats the symptom—disorganization—while ignoring the disease: an overwhelming cognitive load. The constant switching between apps, managing updates, and responding to a torrent of pings is not efficiency; it’s a digital maintenance tax we pay with our focus and mental well-being.
What if the solution isn’t about adding more, but about ruthlessly subtracting? This guide rejects the notion that more tech equals more simplicity. Instead, it offers a minimalist’s framework for curating a digital life that serves you, not the other way around. We will explore how to audit your digital tools, leverage « invisible automation » that works without your constant input, and build a tech environment that protects your most valuable asset: your attention. It’s time to move beyond the illusion of productivity and engineer genuine simplicity.
To help you navigate this path from digital clutter to intentional simplicity, this article breaks down the core principles and actionable strategies. The following sections will guide you through diagnosing the problem, implementing high-impact solutions, and creating a sustainable balance between technology and mental wellness.
Contents: How to Reclaim Your Focus from Your Tech
- Why Using Too Many Productivity Apps Actually Lowers Your Output?
- How to Use « If This Then That » Logic to Automate Your Email Filing?
- Apple or Google: Which Ecosystem Offers a Smoother Seamless Experience?
- The Backup Mistake That Could Cost You Years of Digital Memories
- How to Configure « Do Not Disturb » Modes to Reclaim 2 Hours of Focus Daily?
- How to Balance High-Tech Efficiency With Mental Wellness in a Hyper-Connected World?
- How to Automate Your Personal Admin to Spend Less Than 1 Hour a Month on Paperwork?
- How to Engineer a Home Office Setup That Prevents Physical Pain and Video Fatigue?
Why Using Too Many Productivity Apps Actually Lowers Your Output?
The modern productivity landscape is built on a seductive but flawed premise: that for every problem, there is an app. We download task managers, note-takers, calendar aggregators, and habit trackers, believing each new tool will be the one to finally bring order to our lives. In reality, we are building a complex, fragmented system that actively works against our goals. Each app represents a new « digital room » we must enter, maintain, and manage. This creates what digital minimalists call a maintenance tax—the time and mental energy spent learning interfaces, troubleshooting sync issues, managing subscriptions, and simply deciding which app to use for which task.
This fragmentation directly increases your cognitive load. Instead of having a single, reliable system, your brain must constantly juggle different workflows and information silos. A to-do list item might live in Todoist, the notes for that task in Evernote, and the related file in Dropbox. The effort required to connect these disparate pieces is a hidden drag on your productivity. The illusion of efficiency provided by a specialized app is often outweighed by the friction it introduces into your overall system. This is why a simple, unified approach, even if less « powerful » on paper, often leads to greater output. It’s not about the features of the tools, but the seamlessness of the workflow they enable.
The minimalist approach, championed by figures like Carl Pullein, emphasizes radical simplification. His straightforward, no-nonsense style focuses on creating systems that are easy to apply in real life, bringing order to chaos by reducing the number of moving parts. The first step is to stop looking for the « perfect » app and instead audit the tools you already have. Identify overlaps, eliminate redundancies, and commit to a « single source of truth » for each core function of your life: one place for tasks, one for notes, one for your calendar. This act of subtraction is the most powerful productivity move you can make.
How to Use « If This Then That » Logic to Automate Your Email Filing?
Email is the epicenter of digital chaos for most professionals. A constant stream of newsletters, receipts, notifications, and genuine correspondence creates a state of perpetual distraction. The traditional solution—manually filing messages into folders—is a losing battle. The key to reclaiming your inbox is not better discipline, but better systems. This is where invisible automation, based on simple « If This, Then That » (IFTTT) logic, becomes a game-changer. The goal is to create rules that automatically handle the digital noise before it ever demands your attention.
Every modern email client (like Gmail or Outlook) has powerful, built-in filtering capabilities. You can create rules that automatically perform actions based on the sender, subject line, or keywords. For example: « IF a message is from ‘[email protected]’, THEN skip the inbox and apply the label ‘Finances/Receipts’. » Or « IF a message contains the word ‘Unsubscribe’, THEN move it to a ‘Newsletters’ folder to be reviewed weekly. » This approach transforms your inbox from a cluttered to-do list into a curated space containing only messages that require your direct action. The rest is pre-sorted and waiting for you on your own terms.
This workflow visualizes how automation acts as a silent assistant, sorting and filtering information before it ever reaches your main workspace, thereby reducing cognitive load.

As the diagram suggests, each automated rule creates a new pathway that diverts non-essential information away from your primary line of sight. However, not all automation is worth the effort. The trick is to focus on high-return, low-maintenance rules. Setting up a complex, multi-step automation that saves you 30 seconds a week is a poor investment of your time. Before building a rule, consult a mental ROI calculator.
The following table provides a clear framework for deciding which automation tasks are worth your time. The goal is to focus on quick setups that yield significant weekly time savings, ensuring your automation efforts reduce your workload rather than adding to it.
| Task Type | Setup Time | Weekly Time Saved | ROI Status |
|---|---|---|---|
| Email filtering to folders | 10 minutes | 15 minutes | Automate |
| Receipt forwarding to expense tracker | 15 minutes | 20 minutes | Automate |
| Newsletter archiving | 5 minutes | 10 minutes | Automate |
| Complex multi-app chains | 45 minutes | 5 minutes | Skip |
Apple or Google: Which Ecosystem Offers a Smoother Seamless Experience?
The quest for the perfect app is often a distraction from a more fundamental decision: choosing your core digital ecosystem. While it’s tempting to pick and choose the « best in class » app for every function, this hybrid approach inevitably creates friction. Your calendar app doesn’t talk to your to-do list, your notes don’t sync seamlessly with your email, and you spend your life as a digital go-between. Committing to a single ecosystem—primarily Apple or Google—is one of the most significant acts of simplification you can undertake. It replaces a collection of disparate tools with a single, integrated platform where everything is designed to work together.
Apple’s ecosystem is renowned for its frictionless integration and hardware-software synergy. If you own an iPhone, Mac, and Apple Watch, features like Handoff, Universal Clipboard, and iCloud syncing create a seamless experience. A task you start on your phone can be finished on your laptop without a second thought. The « walled garden » approach, while restrictive for some, ensures a high degree of reliability and security. For users who value a « just works » philosophy and are willing to invest in the hardware, Apple offers a powerful antidote to app fatigue by making the underlying technology virtually disappear.
Google offers a more open, cloud-centric alternative. Its strength lies in its web-based services like Gmail, Calendar, Drive, and Photos, which are accessible on any device, regardless of the manufacturer. This flexibility is ideal for users who mix and match hardware (e.g., a Windows PC and an Android phone). While the hardware integration isn’t as tight as Apple’s, Google’s powerful AI and search capabilities create a different kind of seamlessness, where information is intelligently organized and accessible from anywhere. The massive interest in productivity optimization, demonstrated by channels like Ali Abdaal’s which has grown to over 3.35M subscribers, shows that people are desperately seeking systems. Choosing a core ecosystem is the first step to building one that doesn’t crumble under its own weight.
The Backup Mistake That Could Cost You Years of Digital Memories
In a simplified digital life, the things you choose to keep become more valuable. Your curated photo library, essential documents, and personal projects represent years of memories and work. The single biggest mistake you can make is having a fragile or non-existent backup strategy. Many people fall into one of two traps: either they have no backup at all, or they rely on a single method, like an external hard drive thrown in a drawer or a single cloud service. Both approaches leave you one hardware failure, ransomware attack, or accidental deletion away from losing everything.
A robust backup strategy isn’t complicated; it’s redundant. The gold standard in the industry is the 3-2-1 rule: keep at least three copies of your data, on two different types of media, with at least one copy stored off-site. This sounds complex, but it can be easily automated to run invisibly in the background. For example, your primary data lives on your computer (Copy 1). An automatic, weekly backup to an external hard drive in your home office covers the first local backup (Copy 2, Media 1). Finally, a continuous cloud backup service like Backblaze or iDrive provides the crucial off-site copy (Copy 3, Media 2), protecting you from local disasters like fire or theft.
Simplifying your digital life means reducing anxiety, and nothing creates more tech-related anxiety than the fear of data loss. By implementing an automated 3-2-1 system, you remove that fear entirely. You no longer have to think about backing up your files; the system does it for you. This is another form of « invisible automation » that reduces cognitive load and provides profound peace of mind. The small, one-time effort to set it up pays dividends for years to come.
Your Action Plan: The 3-2-1 Backup Implementation Guide
- Establish Primary Copy: Confirm all essential files (photos, documents, projects) are organized on your main computer’s internal drive. This is your first copy.
- Create Local Backup: Connect an external hard drive and use your operating system’s built-in tools (Time Machine on Mac, File History on Windows) to schedule automatic, weekly backups.
- Configure Off-Site Backup: Sign up for a continuous cloud backup service (e.g., Backblaze, iDrive) and install its software. This service will run in the background, backing up new and changed files to the cloud.
- Run « Backup Fire Drills »: Once per quarter, practice restoring 2-3 non-critical files from both your local external drive and your cloud service to ensure the system is working correctly.
- Secure Your Credentials: Document your backup service login, passwords, and any encryption keys, and store this information in a secure physical location separate from your computer.
How to Configure « Do Not Disturb » Modes to Reclaim 2 Hours of Focus Daily?
The most sophisticated productivity system in the world is useless if you are constantly being interrupted. Notifications are the single greatest threat to deep work and mental clarity. Every ping, buzz, and banner is an external claim on your attention, pulling you out of your current task and forcing a context switch that drains cognitive resources. The default state of our devices is one of perpetual availability. To simplify your daily routine, you must flip this default. Instead of being always on, you must be off by default, and only available by exception.
Modern operating systems on both phones and computers have powerful « Do Not Disturb » or « Focus » modes that are chronically underutilized. These are not just simple on/off switches; they are customizable environments that let you define who and what is allowed to reach you, and when. For example, you can create a « Deep Work » focus mode that blocks all notifications except for calls from your immediate family. You can schedule this mode to activate automatically during your most productive hours, creating an impenetrable fortress around your attention. This isn’t about being unreachable; it’s about being in control of your reachability.
An even more powerful strategy is to create a « Digital Sunset » ritual to protect your evenings. By configuring a « Wind Down » or « Personal » focus mode to activate an hour or two before bed, you can create a clear boundary between your work life and your personal time. This helps your brain disengage, reduces anxiety, and improves sleep quality—a cornerstone of mental wellness and next-day productivity. The following steps can help you build this essential end-of-day routine:
- Configure Wind Down mode to activate automatically 1-2 hours before your scheduled bedtime.
- Customize the home screen for this mode to hide all work, email, and social media apps.
- Enable a warm color temperature shift (like Night Shift or Night Light) on all devices to reduce blue light exposure.
- Set up automatic replies for messaging apps: « In wind down mode, will respond in the morning. »
-Create a dedicated home screen that only shows apps for reading (Kindle), listening (Audible, podcasts), or meditation.
How to Balance High-Tech Efficiency With Mental Wellness in a Hyper-Connected World?
True simplification goes beyond managing apps and notifications; it’s about creating a sustainable relationship with technology that supports your mental well-being. A hyper-optimized, purely digital life can feel sterile and disconnected. The ultimate goal is not just efficiency, but a sense of balance and intentionality. This often means consciously reintroducing analog tools not in spite of technology, but as a deliberate complement to it. A paper journal, a physical book, or a whiteboard can offer a tactile, single-purpose experience that a screen cannot replicate.
This hybrid approach allows you to leverage the best of both worlds. Use your digital calendar for scheduling appointments, but use a paper journal for your daily reflections and goal-setting. Use your cloud storage for archiving documents, but use a physical whiteboard for brainstorming creative ideas. This intentional blend reduces screen fatigue and engages different parts of your brain. The texture of paper and the physical act of writing can foster a more reflective and creative state of mind, providing a necessary counterbalance to the speed and transience of the digital world.
This macro photograph captures the essence of this balanced approach, showing the tactile, human element of an analog tool resting alongside the clean, efficient surface of a digital one.

As the image illustrates, the two are not in opposition; they are part of a unified, intentional workspace. The key is to assign roles based on what best serves your well-being. Digital tools are for execution and logistics; analog tools are for reflection and creation. This philosophy is powerfully demonstrated by creators who explore the intersection of productivity and intentional living.
Case Study: Matt D’Avella’s Minimalist Approach to Technology
Filmmaker and productivity expert Matt D’Avella has built a following by exploring how to improve happiness and productivity by streamlining one’s daily routine. His work often involves experiments in digital minimalism, where he explores the relationship between intentional lifestyle choices and increased well-being. D’Avella’s approach is not anti-technology, but pro-intention. He advocates for using technology as a tool to serve a purpose, rather than letting it become the purpose itself, perfectly embodying the balance between high-tech efficiency and analog-driven mental wellness.
How to Automate Your Personal Admin to Spend Less Than 1 Hour a Month on Paperwork?
Personal administration—paying bills, filing documents, tracking expenses—is a prime candidate for simplification through automation. These are repetitive, low-value tasks that drain time and mental energy. The goal is to build a system that runs almost entirely on its own, reducing your monthly paperwork time to a single, focused session of less than an hour. This is achieved by combining digital tools with the principle of « set it and forget it. »
The first step is to aggressively automate your finances. Set up automatic bill payments for all predictable expenses like utilities, rent/mortgage, and subscriptions. This single action eliminates the mental burden of remembering due dates and the risk of late fees. For income, set up direct deposit. For savings and investments, schedule automatic monthly transfers. Your financial life should operate like a self-sustaining ecosystem that requires your intervention only for exceptions, not for its core functions. This frees up significant cognitive bandwidth each month.
The second pillar is a paperless workflow. Use a high-speed scanner or a scanner app on your phone (like Microsoft Lens or Adobe Scan) to digitize every important piece of paper the moment it enters your home. Create a simple, standardized naming convention (e.g., `YYYY-MM-DD_Vendor_Document-Type.pdf`) and save everything to a single, designated folder in your cloud storage. By creating an email filter that automatically forwards e-receipts to this same system, you create a unified, searchable archive for all your important documents. As experts like Paul Minors, a productivity consultant with 45.5K YouTube subscribers, demonstrate, using specific tools in a systematic way is the key. The aim isn’t just to be paperless, but to create an automated pipeline from physical or digital document to a secure, organized archive with minimal manual effort.
Key Takeaways
- Technology’s role is to reduce cognitive load, not just digitize tasks. Measure success by mental energy saved, not features gained.
- Combat « app fatigue » by adopting a « one-in, one-out » rule for new apps and committing to a single digital ecosystem (Apple or Google) for seamless integration.
- Protect your focus ruthlessly by using customizable « Do Not Disturb » modes and create a « Digital Sunset » ritual to establish clear boundaries between work and life.
How to Engineer a Home Office Setup That Prevents Physical Pain and Video Fatigue?
A simplified digital routine is incomplete if your physical environment is a source of friction and discomfort. A poorly designed home office can lead to physical pain, eye strain, and the pervasive « Zoom fatigue. » Engineering your workspace for well-being is not about expensive gadgets, but about ergonomic principles and subtle environmental automation. Your office should be a space that actively supports your focus and health, not one that detracts from it.
The foundation is ergonomics. Your chair, desk, and monitor should be adjusted to your body. Your monitor should be at eye level, your feet flat on the floor, and your wrists in a neutral position when typing. But beyond these basics, the environment itself can be automated. A smart thermostat, like the one in the Haiku Smart Ceiling Fan, can use its SenseME technology to sense a room’s temperature and automatically adjust to maintain your preferred setting throughout the day, eliminating a subtle environmental distraction. This is the essence of a simplified tech environment: technology that serves you without demanding your attention.
Lighting is another critical factor. Poor lighting contributes significantly to eye strain and fatigue. Using smart bulbs, you can schedule your lighting to change throughout the day, providing bright, cool light in the morning to promote alertness, and gradually shifting to warmer, dimmer light in the afternoon to ease the transition toward the end of the workday. This kind of environmental automation has a direct, measurable impact on your well-being, as shown in the table below.
This data highlights how simple environmental automations can produce significant well-being benefits, turning your workspace from a passive area into an active contributor to your health and focus, as shown in a recent analysis of smart home technology impacts.
| Automation Type | Tool/Device | Impact on Focus | Setup Complexity |
|---|---|---|---|
| Temperature Control | Smart Thermostat with Sensors | Maintains optimal 68-72°F automatically | Medium |
| Lighting Shifts | Smart Bulbs with Schedules | Reduces eye strain by 40% | Easy |
| Break Reminders | Pomodoro Smart Lights | Enforces 5-min breaks every 25 mins | Easy |
| Posture Alerts | Smart Cushion Sensors | Reduces back pain incidents | Medium |
Ultimately, the art of using technology for simplification lies in this critical shift of perspective. It’s about moving from a consumer of features to an architect of systems. It requires asking not « What can this tool do? » but « What does this tool demand of me? ». By curating a small set of integrated tools, automating the mundane, and fiercely protecting your physical and mental space, you transform technology from a demanding master into a quiet, effective servant. The result is not just a more organized daily routine, but more time, more focus, and a significant reduction in the ambient stress of modern life.
]]>In summary:
- Lasting solar light performance is not about a single product, but designing a balanced energy ecosystem (panel, battery, controller).
- Cheap lights fail due to undersized components; focus on the right-sized panel-to-battery ratio and efficient charge controllers.
- Strategic placement, including remote panels for shady areas and proper waterproofing (IP rating), is crucial for longevity.
- Choose brightness (lumens) based on an « energy budget » and use advanced sensors to avoid waste and false alarms.
- For ultimate reliability, build a system with local controls (Zigbee/Z-Wave) that operates independently of your Wi-Fi network.
The promise of solar landscape lighting is compelling: beautiful, secure, and sustainable illumination without the hassle and cost of electrical wiring. Yet, for many homeowners, the reality is a frustrating cycle of lights that shine brightly for a few hours before fading into a useless glimmer. This common experience leads to the conclusion that solar lights are simply unreliable, a cheap gimmick rather than a serious lighting solution. You’ve likely tried the standard advice—placing them in the sunniest spots and keeping the panels clean—only to see them die before midnight.
The core issue, however, isn’t a fundamental flaw in solar technology. It’s a misunderstanding of what makes a system work. The secret to all-night performance doesn’t lie in finding one « magic » light. Instead, it requires a shift in perspective: from buying a product to designing a balanced energy ecosystem. In this system, every component—the photovoltaic panel, the battery, the charge controller, and the LED fixture itself—must be correctly sized and synergistic. A failure in one part compromises the entire system, leading to the premature dimming you’ve observed.
This guide moves beyond the generic tips. We will deconstruct the systemic failure points of common solar lights and provide a technical, component-based framework for designing a scheme that is not only bright but also resilient and cost-effective. By understanding the principles of energy budgeting, component synergy, and environmental hardening, you can build an outdoor lighting system that reliably meets your needs for both security and ambiance, night after night.
To help you navigate this technical landscape, this article breaks down the essential components and strategies. The following summary outlines the key areas we will cover, from diagnosing common failures to building a truly robust and intelligent lighting network.
Summary: A Technical Guide to All-Night Solar Lighting
- Why Cheap Solar Lights Die After 2 Hours and How to Fix Them?
- How to Position Solar Panels in Shady Gardens for Optimal Charging?
- 300 Lumens or 800 Lumens: Which Brightness Do You Need for Pathway Security?
- The Waterproofing Flaw That Kills Solar Lights During Heavy Rain
- How to Adjust Motion Sensor Sensitivity to Avoid False Alarms from Pets?
- How to Build a Stable IoT Ecosystem That Doesn’t Crash When Wi-Fi Drops?
- How to Maintain a Lush Landscape All Year With Minimal Weekly Effort?
- How to Prioritize Energy Efficiency Renovations for Maximum Bill Reduction?
Why Cheap Solar Lights Die After 2 Hours and How to Fix Them?
The most common complaint about solar lights stems from a fundamental imbalance in their design: an undersized « energy income » for their « energy expenditure. » Cheap lights are typically built with the smallest possible photovoltaic (PV) panel and the lowest-capacity battery to keep costs down. This creates an immediate energy deficit. The panel can’t collect enough solar energy during the day to fully charge a battery that is, itself, too small to power the light for the required 8-10 hours. The result is a light that works perfectly for a couple of hours and then fades.
The second, less visible failure point is the charge controller, or often, the lack thereof. A charge controller is the « brain » of the solar ecosystem, managing the flow of energy from the panel to the battery to prevent overcharging and deep discharging, which destroy battery life. Basic lights use a simple diode, while slightly better ones use a Pulse Width Modulation (PWM) controller. However, high-performance systems utilize a Maximum Power Point Tracking (MPPT) controller. Field testing data confirms a stark difference, with MPPT models achieving 94-96% efficiency compared to 74-81% for PWM controllers. This 20% efficiency gain means more of the sun’s energy is stored in your battery, directly translating to longer run times.
To fix an underperforming system, you must rebalance its energy ecosystem. This involves upgrading key components. Start by replacing low-capacity NiMH batteries with higher-density LiFePO4 (Lithium Iron Phosphate) batteries, which offer a significantly longer lifespan. Next, ensure your system has a proper panel-to-battery ratio; a good rule of thumb is a minimum of 10Ah of battery capacity for every 10W of LED lighting. Finally, upgrading to a unit with an MPPT controller ensures you’re maximizing every bit of available sunlight, providing the power needed to last through the night.
How to Position Solar Panels in Shady Gardens for Optimal Charging?
The standard advice to « place solar panels in direct sunlight » is unhelpful for homeowners with mature trees or north-facing gardens. Achieving optimal charging in shaded environments requires moving beyond the integrated-panel light and embracing a more strategic, component-based approach. The key is to decouple the light fixture from its power source. Many high-quality solar systems now offer remote solar panels connected by a discreet, weather-proof cord, typically 3 to 10 feet long.
This design allows you to place the aesthetic light fixture in the desired shaded area—under a tree canopy, along a dark pathway, or illuminating a garden feature—while positioning the photovoltaic panel in the nearest sun-drenched location. This could be on a nearby roof, atop a fence post, or in a sunny patch of a cutting garden. This strategy ensures the panel receives the 4-6 hours of direct sunlight needed for a full charge without compromising your landscape design. When burying the connecting wire, use a shallow trench and cover it with mulch for a seamless, invisible installation.
This is a well-established technique in professional landscape design. A case study on modern lighting documented a designer who successfully used remote photocell systems. They placed collectors in sunny spots while positioning the fixtures in shaded formal landscaping, achieving full charging capacity while maintaining the desired aesthetic. Another tactic is to leverage reflective surfaces. Positioning the panel near a light-colored wall, white gravel path, or stone paver can increase the total light hitting the panel, boosting its energy generation, especially during morning and late afternoon hours when the sun is at a low angle.

As this image illustrates, the goal is to find a « sun pocket » for the panel, even if the light itself lives in the shade. By thinking of the panel and the light as two separate parts of a system, you can overcome the limitations of even the shadiest gardens and ensure your lights have the power they need to perform all night.
300 Lumens or 800 Lumens: Which Brightness Do You Need for Pathway Security?
Choosing the right brightness, measured in lumens, is a critical part of designing your solar lighting’s « energy budget. » It’s a trade-off: higher lumens provide better visibility and security but consume more power, requiring a more robust energy ecosystem (larger panel and battery). There is no single « correct » lumen value; the choice depends entirely on the application. For general ambiance and pathway marking, where the goal is to define edges and create a soft glow, 50-300 lumens is typically sufficient. This level of brightness is low-draw, allowing smaller, more discreet fixtures to run all night reliably.
However, for security purposes—such as illuminating doorways, driveways, or dark corners of the property—a much higher output is necessary. A range of 700-1300 lumens is standard for motion-activated security lights. This powerful burst of light is effective at deterring intruders and providing clear visibility. The key to making high-lumen lights viable in a solar setup is that they are not on continuously. They operate in a low-power mode (or are off completely) and only switch to full brightness for short durations (e.g., 30-60 seconds) when motion is detected. This preserves the battery charge for when it’s needed most.
Ultimately, the decision comes down to balancing your security needs with your system’s energy-generating capacity. A system designed for 800-lumen security lighting requires a significantly larger solar panel and battery than one designed for 100-lumen accent lighting. Furthermore, the effectiveness of your panel placement directly impacts your energy budget. International Energy Agency research shows that optimal placement can lead to a 30% increase in energy efficiency. This boost can be the difference between a battery that dies at 3 a.m. and one that powers your security light until dawn. Therefore, before selecting a lumen level, first assess your panel placement possibilities to understand the maximum energy income you can realistically generate.
The Waterproofing Flaw That Kills Solar Lights During Heavy Rain
When a solar light fails after a heavy downpour, the cause is almost always water ingress. While manufacturers often market their products as « weatherproof, » the reality lies in a specific technical rating: the IP (Ingress Protection) code. An IP rating consists of two numbers. The first digit (0-6) rates protection against solid particles (like dust), and the second digit (0-9) rates protection against liquids. For outdoor lighting expected to endure rain, a minimum rating of IP65 is essential. An ‘IP65’ rated device is dust-tight and can withstand water jets from any direction. Anything less, like IP44 (splash-proof), is inadequate for prolonged outdoor exposure and will likely fail.
However, the hidden flaw isn’t just a poor seal; it’s a phenomenon called thermal cycling. During the day, the light heats up in the sun, causing the air inside to expand. As it cools rapidly during a rainstorm, the internal air contracts, creating negative pressure that can suck moisture past even seemingly good seals. High-quality fixtures mitigate this by including a microscopic, GORE-TEX-like pressure-stabilizing vent that allows air to pass but blocks water molecules. Cheaper lights lack this feature, making them highly susceptible to this « breathing » effect and eventual internal corrosion.
A notable case study involved homeowner Casey Finn, who documented solar fence lights installed in 2019. After five years of exposure, the lights, which had a proper waterproof rating and were installed with outdoor mounting tape that didn’t compromise the housing, still functioned perfectly. This demonstrates that longevity is achievable with the right components. You can enhance the durability of your lights by inspecting rubber gaskets for UV degradation, applying silicone grease to seals before installation to keep them supple, and even adding a bead of marine-grade sealant to housing seams for extra protection.
Your Waterproofing Audit Checklist: 5 Steps to Weatherproof Your Lights
- Check IP Rating: Before purchasing, verify the fixture has a minimum IP65 rating. If your existing lights are failing, check their specs; an IP44 rating is a common culprit.
- Inspect Seals and Gaskets: Examine all rubber gaskets and O-rings for signs of cracking or brittleness due to sun exposure. Replace any that appear degraded.
- Apply Protective Sealant: For new installations, apply a thin layer of silicone grease to all gaskets. For existing lights, consider adding a clear, marine-grade silicone sealant bead along the main housing seams and wire entry points.
- Ensure Proper Drainage: Mount fixtures so that water naturally runs off them. Avoid placing them in depressions where water can pool. Check that any built-in weep holes are clear of debris.
- Consider Physical Shielding: In areas with extreme rain, creating a small, discreet rain shield or hood above the fixture can provide an extra layer of defense, reducing the direct impact of water on the seals.
How to Adjust Motion Sensor Sensitivity to Avoid False Alarms from Pets?
A motion-activated solar light is a fantastic security tool, but frequent false alarms triggered by pets or swaying branches can be a nuisance and an unnecessary drain on the battery. Fine-tuning the sensor is key to creating a system that is both responsive and discriminating. The majority of solar lights use Passive Infrared (PIR) sensors, which detect the heat signature of moving objects. The solution to pet-related false alarms lies in understanding and manipulating the sensor’s detection zones.
Most PIR sensors have a downward and outward-facing detection pattern. To create a « pet-immune » zone, the goal is to aim the sensor so its detection field is just above the height of your pet. By tilting the sensor head horizontally or slightly upwards, you create a coverage area that will detect a person walking by but will miss a dog or cat moving below it. Some advanced sensors also allow you to apply small pieces of opaque electrical tape to specific parts of the sensor lens, effectively « masking » or blocking out problematic zones, such as a neighbor’s driveway or a rustling bush.
The type of sensor technology also plays a significant role in false alarm rates. While PIR is common, some lights use microwave sensors, which detect any motion by bouncing waves off objects. These are highly sensitive and notoriously difficult to make pet-immune. For high-security applications where reliability is paramount, dual-technology sensors, which require both a PIR (heat) and a microwave (motion) signal to trigger, offer the lowest false alarm rate.

As this homeowner demonstrates, careful, precise adjustment is the key. The table below, based on data from home service experts, compares the technologies to help you choose the right sensor for your needs and environment. Understanding these differences is crucial for building a smart and efficient security lighting plan.
| Feature | PIR Sensors | Microwave Sensors | Dual-Tech Sensors |
|---|---|---|---|
| Detection Method | Heat signature changes | Any motion | Both heat + motion |
| Pet Immunity | Adjustable with masking | Difficult to filter | Excellent with dual verification |
| Range | 30-40 feet typical | 50-60 feet | 40-50 feet |
| False Alarm Rate | Medium | High | Very Low |
| Best Use Case | Standard residential | Open areas | High-security zones |
How to Build a Stable IoT Ecosystem That Doesn’t Crash When Wi-Fi Drops?
Integrating your solar lights into a smart home (IoT) ecosystem adds incredible convenience, allowing for automated schedules, remote control, and integration with other devices. However, many consumer-grade smart lights are Wi-Fi dependent. When your internet connection or Wi-Fi router goes down, these lights lose their « smarts, » reverting to a basic state or becoming completely unresponsive. Building a truly stable system means designing for resilience and prioritizing local control over cloud dependency.
The most robust solution is to build your lighting network using protocols designed for local automation, such as Zigbee or Z-Wave. Unlike Wi-Fi, which uses a star topology where every device connects directly to the router, Zigbee and Z-Wave create a mesh network. Each device can talk to its neighbors, relaying signals across your property. This extends range and builds redundancy. If one light goes offline, the signal simply finds another path. These devices are controlled by a local hub (like Hubitat or a Raspberry Pi running Home Assistant), which stores all the schedules and automation rules. If the internet goes out, the hub continues to run the entire system flawlessly.
A DIY programmer demonstrated this principle by building an off-grid landscape system. Initially, centralized control failed, but after upgrading to a smart solar controller with programmable load output and local scheduling, the system became fully autonomous. It now operates independently of any network, proving the power of local-first design. When selecting smart solar lights, look for models with onboard memory that can remember their last state or a fallback schedule if they lose connection with the hub. Always program your schedules on the local hub itself, not through a cloud-based app, and periodically test the system’s resilience by disconnecting your home from the internet to verify that everything continues to function as expected.
How to Maintain a Lush Landscape All Year With Minimal Weekly Effort?
The philosophy behind a high-performance solar lighting system—investing in a well-designed, autonomous ecosystem—can be extended to overall landscape maintenance. A truly low-effort garden is not one that is neglected, but one where automated systems handle the repetitive, daily tasks. Solar power is the perfect engine for this automation, creating an off-grid, self-sufficient landscape that requires minimal human intervention.
One enthusiast built a dual-purpose solar system powering both landscape lighting and a drip irrigation network. Using a 50W panel, a 12V battery, and a programmable charge controller, the system waters plants and lights up paths automatically. This integrated approach solves two major landscape chores with a single, resilient energy source. The key to this system’s longevity and minimal effort is the quality of its core components. By using an efficient MPPT charge controller, the system maximizes energy harvest and protects the battery, which is the most common failure point. Proper charge management is shown to result in a 30-50% longer lead-acid battery lifespan, drastically reducing the « effort » of replacing components.
Minimal weekly effort, therefore, comes from excellent initial design. This includes selecting native, drought-tolerant plants that thrive in your climate, applying thick layers of mulch to retain soil moisture and suppress weeds, and installing a solar-powered drip irrigation system on a timer. The lighting component should be equally « set-it-and-forget-it, » with high-quality, IP65+ rated fixtures and self-cleaning coated solar panels that shed dirt and dust with rain. By creating these synergistic, automated systems, your weekly « effort » is reduced to simple observation and occasional adjustments, rather than constant, manual labor.
Key Takeaways
- Lasting solar performance comes from a balanced energy ecosystem, not a single expensive light.
- Prioritize components: an efficient MPPT controller, a high-capacity LiFePO4 battery, and a correctly sized panel are non-negotiable.
- Design for your environment with remote panels for shade, a minimum IP65 waterproof rating for rain, and pet-immune sensor adjustments.
How to Prioritize Energy Efficiency Renovations for Maximum Bill Reduction?
When considering home energy efficiency, homeowners often focus on large-scale projects like insulation or new windows. However, one of the most immediate and cost-effective renovations you can make is to your exterior lighting. Traditional 12V wired landscape lighting, while effective, contributes a steady, year-round cost to your electricity bill. Switching to a 100% solar-powered system eliminates this operational cost entirely, offering a clear and rapid return on investment.
The financial argument for solar is compelling. While a professionally installed wired system can have a high initial cost, a high-quality solar system is significantly more affordable upfront and has a near-zero operating cost. The only long-term expense is the eventual replacement of batteries, typically every 3-7 years depending on the technology and quality. A cost analysis from home and garden experts highlights this stark difference, showing that a solar system’s 5-year total cost is a fraction of a traditional wired system.
The table below breaks down the typical costs, illustrating how quickly the savings from a solar installation accumulate. For those not ready to commit fully, a hybrid system offers a middle ground, reducing energy consumption while maintaining a grid-connected backup.
| System Type | Initial Cost | Annual Operating Cost | 5-Year Total | Energy Savings |
|---|---|---|---|---|
| 12V Wired System (10 lights) | $800-1200 | $120-180 | $1400-2100 | Baseline |
| Solar LED System (10 lights) | $300-600 | $0 | $300-600 | 100% reduction |
| Hybrid Solar-Wired | $500-800 | $40-60 | $700-1100 | 67% reduction |
Furthermore, the efficiency gains from using superior components like an MPPT controller don’t just provide longer nightly run times; they generate a real energy surplus over the system’s life. For example, analysis shows a modest 400W system with an MPPT controller can generate an additional 146 kWh of energy over 5 years compared to a PWM equivalent. In the context of home renovations, prioritizing a switch to solar landscape lighting is a high-impact, low-cost first step that delivers immediate and measurable reductions to your energy bill.
Now that you are equipped with the technical knowledge to design a resilient system, the next logical step is to apply it. Start by auditing your own outdoor space to define your specific lighting needs and identify the optimal locations for solar energy collection.
]]>In summary:
- Prioritize circadian health by using warm-toned LEDs (under 2700K) in the evening to protect sleep quality.
- Build a resilient smart home by choosing a Zigbee mesh network over Wi-Fi for local, reliable lighting control.
- Select high-fidelity bulbs (CRI 95+ with an R9 value over 50) to ensure colors in your home appear vibrant and true.
- Go beyond simple bulb replacement; a systemic plan involves strategic placement, dimmer compatibility, and network stability.
For the tech-savvy homeowner, upgrading to LED lighting feels like a solved problem. The promises are clear: lower energy bills and long-lasting bulbs. Yet, many who make the switch find themselves in a home filled with harsh, unflattering light, experiencing mysterious Wi-Fi dropouts, or dealing with an annoying flicker that old incandescents never had. The common advice—layer your lighting, choose smart bulbs—often overlooks the critical technical systems that underpin a truly effective lighting plan. It treats lighting as a collection of individual products rather than a cohesive, integrated ecosystem.
The truth is that a successful transition to modern lighting goes far beyond just screwing in a new bulb. It requires a designer’s mindset, focused on the interplay between light, human biology, network engineering, and architectural aesthetics. The real key isn’t just swapping to LED, but mastering the technical nuances that prevent these common failures. What if the solution wasn’t just buying a « smart » bulb, but building a resilient lighting *system*? A system that not only saves energy but also actively supports your sleep cycle, makes your decor look its best, and remains stable even when your internet doesn’t.
This guide moves past the generic advice to give you a strategic blueprint. We will deconstruct the core technical pillars of a professional-grade lighting plan, from managing the biological impact of light and ensuring dimmer compatibility, to building a rock-solid smart home network and using light to architecturally enhance your space. You will learn to think like a lighting designer, creating an environment that is efficient, beautiful, and fundamentally in sync with your lifestyle.
For those who prefer a hands-on approach, the following video offers a practical demonstration of retrofitting a dimmer switch, a common task in upgrading a home lighting system.
To navigate this comprehensive design process, we’ve structured this article to address the most critical questions you’ll face. The following summary outlines the key areas we will explore, from the science of sleep to the art of creating a family-friendly, aesthetically pleasing living space.
Summary: Your Guide to a Systemic LED Lighting Plan
- Why Cool White LEDs in the Bedroom Can Ruin Your Sleep Quality?
- How to Retrofit Dimmers for LED Bulbs Without Causing Flickering?
- Wi-Fi or Zigbee Bulbs: Which Is More Reliable for Whole-Home Lighting?
- The Recessed Lighting Error That Creates « Swiss Cheese » Ceiling Effects
- How to Choose High CRI Bulbs to Make Your Furniture Colors Pop?
- How to Build a Stable IoT Ecosystem That Doesn’t Crash When Wi-Fi Drops?
- How to Prioritize Energy Efficiency Renovations for Maximum Bill Reduction?
- How to Design a Living Space That Is Both Instagram-Worthy and Family-Friendly?
Why Cool White LEDs in the Bedroom Can Ruin Your Sleep Quality?
The conventional wisdom to use « warm light » in the bedroom is an oversimplification of a critical biological process. The real issue isn’t just the perceived color, but the specific wavelengths of light that reach your eyes. Human physiology is tuned to a natural light cycle, and our bodies use the blue-spectrum light of midday sun to regulate our internal clock, or circadian rhythm. When we expose ourselves to this same type of light in the evening from cool white LEDs (4000K and above), we send a confusing signal to our brain: « It’s still daytime. »
This exposure directly inhibits the production of melatonin, the hormone responsible for signaling sleep. The effect is not trivial; scientific research shows that light at a 460-480nm wavelength can suppress melatonin production by up to 60% after just two hours of exposure. This disruption can make it harder to fall asleep, reduce sleep quality, and leave you feeling groggy the next day. The problem extends beyond primary light fixtures to include device screens, TV sets, and even the tiny standby LEDs on electronics. A successful lighting plan must therefore be a circadian-aligned plan, actively managing light exposure to support, not sabotage, your natural sleep cycle.
Action Plan: Evening Light Hygiene for Better Sleep
- 90 minutes pre-bed: Transition all primary lights to a warm color temperature below 2700K and dim them to approximately 30% intensity. This begins the hormonal signaling for sleep.
- 60 minutes pre-bed: Switch to using only indirect, low-level accent lighting. Think table lamps or floor lamps with warm bulbs, avoiding any direct overhead light.
- 30 minutes pre-bed: Begin your screen-free wind-down period. If you must read, use a dedicated book light with a very warm temperature, ideally under 2200K.
- Audit for light leaks: Check your bedroom for hidden sources of cool light. Cover or dim the small LED standby lights on chargers, TVs, and other electronics with specialized dimming stickers.
- Block external light: Install draft stoppers at the bottom of doors to block light bleeding in from hallways or other rooms, ensuring a completely dark environment.
How to Retrofit Dimmers for LED Bulbs Without Causing Flickering?
One of the most common frustrations when upgrading to LEDs is the dreaded flicker, buzz, or hum that occurs when they are paired with a dimmer switch. This issue arises from a fundamental incompatibility between old and new technology. Traditional incandescent bulbs were simple resistive loads, and legacy dimmers (leading-edge) worked by simply cutting off part of the AC power wave. LEDs, however, are complex electronic devices with internal drivers that require a stable power supply. Mismatching a modern LED with an old dimmer often leads to strobing, flickering (even if it’s invisible to the naked eye but caught on a phone camera), or a failure to dim smoothly.
The solution requires a systemic approach to compatibility. The first step is ensuring your LED bulb is explicitly marked as « dimmable ». Non-dimmable bulbs will fail immediately. The second, and most critical, step is to replace your old dimmer switch with a modern LED-compatible model, typically a trailing-edge (ELV) or CL-type dimmer. These are specifically designed to work with the sensitive electronics inside LED drivers. Furthermore, every dimmer has a minimum load requirement. If the total wattage of the connected LEDs is too low (a common issue since LEDs are so efficient), the dimmer may not function correctly. A proper retrofit isn’t just about the bulb; it’s about ensuring every component in the electrical circuit is designed to work together seamlessly.

As this macro view of a modern dimmer’s circuitry shows, these devices are sophisticated electronics designed to manage power for complex loads. To ensure compatibility, it’s essential to follow a verification process. Check the dimmer manufacturer’s website for a compatibility list of tested bulb models, and if flicker persists, use the dimmer’s small adjustment dial (low-end trim) to set the minimum brightness level and stabilize the power flow.
Wi-Fi or Zigbee Bulbs: Which Is More Reliable for Whole-Home Lighting?
For a tech-savvy homeowner, creating a smart lighting system that is both powerful and reliable is paramount. The choice between Wi-Fi and Zigbee (or Z-Wave) is not merely a feature preference; it’s a fundamental architectural decision that determines your system’s stability and scalability. Wi-Fi bulbs, while simple to set up individually, create significant long-term problems. Each bulb connects directly to your router, acting as a separate device on your network. This quickly overloads a typical consumer router, leading to dropped connections, slow response times, and system-wide instability as you add more devices.
Zigbee, in contrast, operates on a mesh network protocol. Bulbs and devices communicate with each other, passing signals along to create a robust and self-healing web. Only a single hub connects to your router, drastically reducing network load. This architecture provides two game-changing benefits: local control and superior scalability. Because automations and commands are processed by the hub within your home, your lights continue to function perfectly even if your internet connection goes down. Wi-Fi bulbs, being cloud-dependent, often become unresponsive without internet. For a reliable, whole-home system, a hub-based protocol like Zigbee is the only professional choice.
The differences in architecture have a direct impact on performance and reliability, as highlighted in this comparative analysis.
| Feature | Wi-Fi Bulbs | Zigbee Bulbs |
|---|---|---|
| Network Scalability | Limited (10-30 devices max) | Excellent (100+ devices) |
| Internet Dependency | Cloud-dependent for most functions | Local control via hub |
| Power Outage Recovery | Requires internet reconnection | Automatic local mesh restoration |
| Response Latency | 0.5-2 seconds (cloud relay) | Near instant (local processing) |
| Router Load | High (each bulb = one device) | Minimal (hub = single connection) |
Case Study: Home Assistant Zigbee Implementation for Reliability
A smart home enthusiast implemented a Zigbee-based system with Home Assistant, connecting 45 LED bulbs throughout their home. During a 3-day internet outage, all local automations, motion sensors, and wall switches continued functioning flawlessly. The Zigbee hub, powered by a small UPS, maintained the mesh network even through brief power interruptions, demonstrating superior reliability compared to cloud-dependent Wi-Fi alternatives. This real-world example, referenced in smart home community discussions, proves the resilience of a local-first approach.
The Recessed Lighting Error That Creates « Swiss Cheese » Ceiling Effects
Recessed lighting is a powerful tool for creating clean, modern ambient light, but it’s also the easiest to get wrong. The most common amateur mistake is a grid-like placement of too many narrow-beam fixtures, resulting in a ceiling that looks like a slice of Swiss cheese and a floor covered in harsh, isolated pools of light. This « runway » or « grid » layout fails to light the space evenly and, more importantly, fails to illuminate the vertical surfaces—the walls—which is what makes a room feel bright and spacious.
Professional lighting design focuses on lighting surfaces, not just the floor. This is achieved through two key principles: strategic placement and proper beam angle selection. Instead of a center-room grid, fixtures should be placed closer to the walls to create a « wall washing » effect, which provides smooth, even illumination on vertical planes. A crucial guideline is the Half-Wall Rule: the distance of a light from the wall should be roughly half the distance between each light fixture. For general ambient light, always select bulbs or fixtures with a wide beam angle (90-120°). Narrow beams (under 40°) are specialized tools meant only for accenting specific objects like artwork or architectural details, not for general illumination.

This minimalist living space demonstrates correct execution. The recessed fixtures are placed to wash the walls in a uniform layer of light, eliminating harsh shadows and making the room feel larger and more inviting. To achieve this, use dedicated wall-wash fixtures or place standard downlights strategically. For highlighting specific pieces, use adjustable gimbal fixtures that can be precisely aimed, preventing light spill and glare.
How to Choose High CRI Bulbs to Make Your Furniture Colors Pop?
After you’ve perfected your lighting placement and control system, the final step is selecting a bulb that renders color accurately. The Color Rendering Index (CRI) is the standard metric, measuring how faithfully a light source reveals colors compared to a natural light source. For residential use, a CRI of 90 or above is considered the minimum for good color quality. However, a high CRI score alone doesn’t tell the whole story and can be misleading. Many high-CRI LEDs still make skin tones look pale or wood furniture appear dull.
This is because the standard CRI calculation averages several color samples, but often masks a poor performance in rendering deep reds. The secret to vibrant, rich colors lies in a specific sub-metric: the R9 value. This value measures how well a light source renders strong red. Red is a critical color component in skin tones, wooden grains, and many foods. A bulb can have a 90+ CRI but an R9 value near zero, resulting in a washed-out appearance. For truly excellent color fidelity, you must look for bulbs with not only a CRI of 95+ but also an R9 value above 50. According to color rendering research, LEDs with high R9 values show significantly better red saturation. Some manufacturers are now also reporting TM-30 data (Rf for fidelity, Rg for gamut), which provides an even more comprehensive view of color performance.
To ensure your design choices are seen as intended, pair the right color quality with the right color temperature for each space:
- Kitchens with wood cabinets: Use 3000K with a high R9 value (R9>80) to bring out the warmth and richness of the wood grain.
- Art displays: For maximum accuracy, choose a neutral 4000K with high TM-30 Rf and Rg values to represent the artist’s original palette.
- Bedrooms and living rooms: Select a warm 2700K with a CRI>95 to create a cozy atmosphere and ensure textiles and skin tones look natural and healthy.
- Home office: A slightly cooler 3500K with high fidelity (TM-30 Rf>90) provides a balanced light for productivity without being overly sterile.
How to Build a Stable IoT Ecosystem That Doesn’t Crash When Wi-Fi Drops?
A truly smart home is a resilient one. Your ability to control your lights should never depend on a distant server or a fickle internet connection. The cornerstone of a stable IoT ecosystem, particularly for essential functions like lighting, is the principle of local-first control. This architectural philosophy dictates that all critical operations should be processed within your home, on a dedicated hub, without requiring a connection to the cloud. This ensures that your light switches, motion sensors, and scheduled automations continue to work flawlessly, instantly, and reliably, regardless of whether your ISP is having an outage.
Building this resilience starts with choosing the right network technology—Zigbee or Z-Wave—and a powerful local hub like Hubitat or Home Assistant. From there, you must establish a clear control hierarchy. Physical smart switches should form the base layer, as they provide manual control that works even if the entire network fails. The second layer is your local hub, running automations (e.g., « turn on porch light at sunset ») that are processed internally. The final, and least critical, layer is cloud-based convenience, such as voice control via Alexa or Google Assistant. By designing your system this way, voice control becomes a « nice-to-have » feature, not a single point of failure. This local-first approach is the difference between a frustrating gadget and a dependable utility.
To establish this stable foundation, several network best practices are essential. Create a dedicated 2.4 GHz Wi-Fi network solely for your IoT devices to reduce interference with your primary devices. Assign static IP addresses to your critical components like the smart hub to prevent connection issues after a reboot. Most importantly, power your hub and main router with an uninterruptible power supply (UPS) to ride out brief power flickers and maintain network integrity.
How to Prioritize Energy Efficiency Renovations for Maximum Bill Reduction?
When planning home renovations, many homeowners gravitate towards big-ticket items like new windows or insulation to improve energy efficiency. While these are valuable long-term investments, they come with high upfront costs and long payback periods. A strategic lighting upgrade, however, offers the single fastest and most cost-effective return on investment. Replacing outdated incandescent or halogen bulbs with modern LEDs is a high-impact, low-cost first step that immediately reduces your home’s energy consumption.
The financial case is compelling. LEDs consume up to 85% less energy than their incandescent counterparts for the same light output (lumens). This direct energy saving translates into a rapid payback period. In fact, energy efficiency studies demonstrate that a simple LED bulb replacement typically pays for itself in 12-24 months, compared to the 10-20 years it can take to recoup the cost of new windows. Furthermore, LEDs produce very little heat, which creates a secondary saving. In warmer months, reducing the heat load from lighting can lead to a 5-10% reduction in air conditioning costs. For maximum bill reduction, a systemic LED overhaul should be the number one priority in any energy efficiency renovation plan.
To maximize savings without a huge initial outlay, adopt a phased renovation strategy:
- Phase 1 (High-Impact Swap): Start by replacing the bulbs in your five most frequently used fixtures, typically in the kitchen and living room, for immediate and noticeable savings.
- Phase 2 (Automated Savings): Install occupancy or vacancy sensors in transient spaces like bathrooms, laundry rooms, and closets to ensure lights are never left on accidentally.
- Phase 3 (Optimized Dimming): Install compatible dimmers on major light sources. Running LEDs at 70-80% brightness is often unnoticeable but can provide an additional 20% in energy savings for that fixture.
- Phase 4 (Attrition-Based Replacement): For less-used fixtures, simply replace the remaining old bulbs with LEDs as they burn out, minimizing upfront cost.
Key Takeaways
- Biology First: Your lighting plan must support your circadian rhythm by using warm, dim light in the evenings to protect sleep quality.
- Local Control is King: For a reliable smart home, choose a hub-based system (Zigbee/Z-Wave) that processes commands locally, independent of your internet connection.
- Color Fidelity Matters: Look beyond CRI and demand high R9 values (50+) to ensure that reds, wood tones, and skin tones are rendered beautifully and accurately.
How to Design a Living Space That Is Both Instagram-Worthy and Family-Friendly?
The ultimate goal of a lighting plan is to create a space that is not only functional but also beautiful and adaptable. The modern living room must serve as a bright space for homework, a cozy den for movie nights, and an elegant backdrop for entertaining. Achieving this balance between aesthetics (« Instagram-worthy ») and practicality (« family-friendly ») is possible through a combination of layered lighting and dynamic control. The key is to move beyond static, single-purpose lighting and embrace a flexible system that can transform the mood of the room at the touch of a button.
This is where tunable white LEDs and smart scene control become invaluable. Tunable white technology allows you to adjust the color temperature of your lights, from a crisp, energizing daylight (4000K-5000K) to a warm, relaxing candlelight glow (2200K). By pairing these with a smart hub, you can create pre-set « scenes » for different activities. For example, a « Focus Mode » might set lights to a bright, neutral 4000K, while « Movie Night » could dim all lights to a warm 2200K at 20% intensity. This adaptability satisfies both the practical needs of a busy family and the aesthetic desire for a perfectly curated atmosphere.
Case Study: Tunable White LED Implementation for Dynamic Living
A family transformed their living room using tunable white LED strips and smart controls, creating preset scenes for different activities. ‘Homework Mode’ delivers crisp 4000K at 100% brightness for focus, while ‘Movie Night’ dims to warm 2200K at 20% intensity. The system automatically transitions from bright daylight tones in the morning to candlelight warmth in the evening, satisfying both aesthetic Instagram moments and practical family needs while supporting natural circadian rhythms.
To achieve that polished, layered look, combine different lighting techniques. Use cove lighting to provide soft, indirect ambient light. Add tight-beam accent spots to highlight artwork or plants, creating focal points. Install wall-grazing fixtures to emphasize textured surfaces like brick or stone, and consider uplighting behind sofas or media centers for dramatic silhouettes. This multi-layered approach adds depth and visual interest, making the space feel professionally designed and ready for any occasion.
A thoughtfully designed LED lighting plan is more than an energy-saving measure; it’s a fundamental upgrade to your home’s environment. By moving beyond simple bulb replacement and adopting a systemic approach that considers biology, network reliability, color fidelity, and architectural placement, you can create a space that truly enhances your quality of life. Start today by auditing one room in your home and identifying the first small change you can make toward building a more intelligent and responsive lighting system.
]]>